It is not unusual for water heaters to leak from the bottom but leaks from the top are not that common. This is because sediments settle at the bottom where they corrode the tank until cracks or holes develop. Drain valves also leak a lot.

Here are some of the reasons why your water heater is leaking from the top:
- Temperature and Pressure Relief Valve (TPR Valve) Leak: The TPR valve is designed to release excess pressure or temperature from the tank to prevent it from becoming overpressurized. If it’s leaking, it could indicate high pressure or overheating in the tank. A faulty TPR valve may need replacement.
- Loose or Faulty Connections: Loose or deteriorated plumbing connections, including inlet and outlet pipes, cold water supply, or hot water outlet connections, can lead to leaks from the top of the water heater. Tightening or replacing these connections may resolve the issue.
- Corroded Tank or Fittings: Corrosion inside the tank or on the tank’s fittings, such as the anode rod or nipples, can result in leaks from the top. In cases of severe corrosion, the tank may need to be replaced.
- Excessive Pressure in the Tank: High water pressure can cause water to leak from the TPR valve or other connections. Installing a pressure-reducing valve and a thermal expansion tank can help regulate pressure and prevent leaks.
- Faulty TPR Valve: A malfunctioning or damaged TPR valve may not operate correctly, leading to a leak from the top of the water heater. Replacing the TPR valve is typically necessary.
- Sediment Buildup: Accumulated sediment at the bottom of the tank can create hot spots and excessive pressure, causing the TPR valve to release water. Regular flushing of the tank to remove sediment can prevent this issue.
- Excessive Temperature Settings: Setting the water heater temperature too high can lead to overheating and TPR valve activation. Adjust the temperature to a safe and recommended level to prevent this.
- Internal Tank Damage: In rare cases, internal tank damage, such as a crack or a corroded tank lining, can cause leaks from the top. This typically requires a complete water heater replacement.
Finding the Leak
Unless water is leaking out of the water heater quite fast, spotting the source of the leak is not always easy. Before you even start finding the source of the leak, you should start by turning off the water heater.
If you have an electric water heater, turn off power at the circuit breaker. For a natural gas-powered water heater, you will need to turn off gas supply to the pilot.
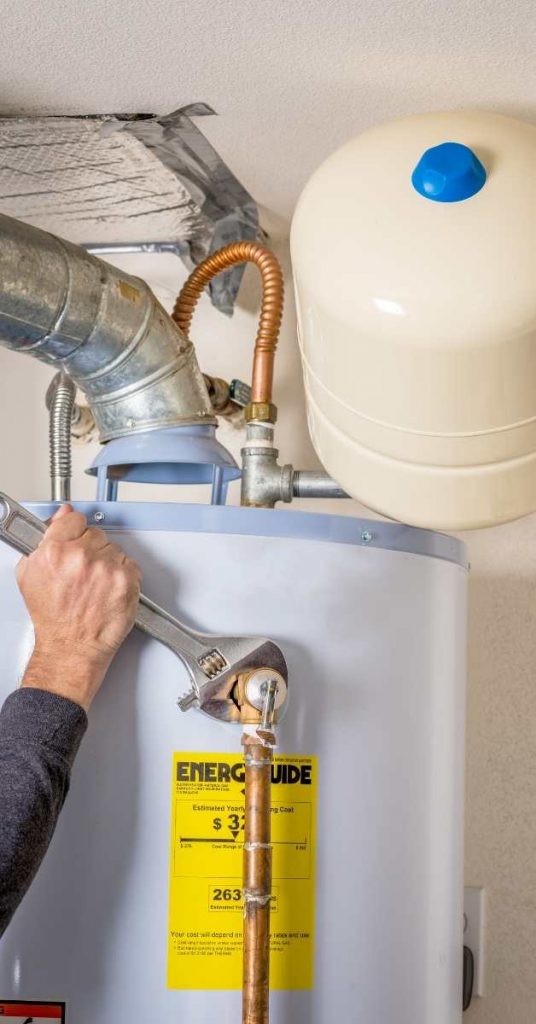
Grab a dry towel and wipe the top of your water heater completely. Pay attention to all the connections, not only those directly at the top of the water but those also above it, especially if the shut off valves and expansion tank are installed above the water heater.
Placing paper towels across the connections will help you spot the leaky one. Be careful while handling the water heater with your bare hand since it is usually hot.
The method to fix the water heater will depend on the location of the leak. In some cases you will not need to buy anything, but in some instances you will need to buy a replacement part or 2. If you are unlucky you will need to replace the entire water heater.
How to Fix the Leak

Before attempting to fix the water heater, you should drain out a gallon of water or 2 from the tank. Remember that the water inside the water heater is hot and at high pressure.
By draining out some water, you will have considerably reduced its pressure and temperature therefore making it safe to work on.
Place a bucket or connect a garden hose on the drain valve and open the valve using a flathead screwdriver. Some drain valves however have a lever to help in draining. Drain out 1 or 2 gallons of water and shut the drain valve.
Once that is done you can now start troubleshooting and fixing the water heater. The following are the different methods of fixing a water heater that is leaking from the top:
1. Water Heater Leaking from the Top Seam

A water heater has a top and bottom seal, which are both watertight. Before a water heater is sold, it is usually hydrostatically tested to a higher pressure than it is expected to be subjected to at home.
If you notice you water heater leaking from the top seam, internal corrosion has gotten the better of your tank and it has developed a hole. If left to continue leaking, the small hole will grow in size and develop a weakness along the entire seam and the water heater may burst.
Unfortunately, a water heater leaking from the top seam cannot be fixed. A replacement is the only way to deal with it. Due to the nature and regulations around water heaters, they are not supposed to be welded. As soon as the tank starts to leak it means that its integrity has been compromised and a replacement is the only option.
2. Leaking Water Supply Pipe Connections

A water heater has 2 pipes connected to it. One pipe brings cold water to the heater tank while the other carries hot water out of the tank to your house fixtures.
You may have solid copper pipes connected to your water heater, or you might have stainless steel flexible water hoses. Irrespective of what you have, these pipes have fittings threaded to your water heater at the top that could very well be the source of the leak.
Water heaters are made of steel which is subjected to hot and cold water at different times, which as a result causes expansion and contraction. The constant expansion and contraction will after some time cause the pipe fittings to loosen and hence the leaks.
If you have established that the source of the leak is water pipe connections. Grab a wrench and try to tighten them. Wait to see if the leak stops.
If the leak fails to stop, you will need to replace the fitting altogether. If the water pipes connections are badly corroded, it is also a good idea to replace them.
Replacing water heater fittings is a simple task and you won’t even need to call a plumber. Take you old fittings to a home improvement store and buy an exact match. SharkBite water heater fittings replacement kits are of good quality and easy to install.
In some instances, you will notice that after removing the connections the inside of the water heater is just so corroded and even replacing the fittings will not fix the problem. In that case, you will need to replace the water heater especially if it is older than 10 years or you live in area with very hard water.
If you need to check out the signs that shows that it is time to replace your water heater, check out this post.
3. Leaking Shut off Valve

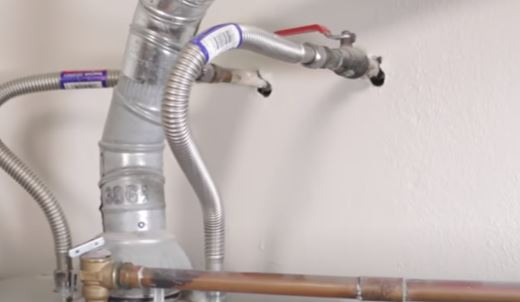
There is a water shut off valve on your water heater cold water supply pipe. This valve allows you to turn off water to your water heater when repairing the water heater instead of turning if turning off water to the entire house.
If the shut off valve is installed directly above the water heater, water will drip from it and land on top of the tank. Water shut off valves are operated using a lever (ball valve) or a knob (gate valve).
The valve handle is usually connected to the valve body using a nut. The first thing you should try and do to stop the valve from leaking is grab an adjustable wrench and tighten the nut. Check if the leak stops.
If the leak does not stop or the shut off valve is badly corroded, go ahead and replace it. You can buy a kit that allows you to replace the valve, water supply hose and fittings.
4. Faulty T&P Valve

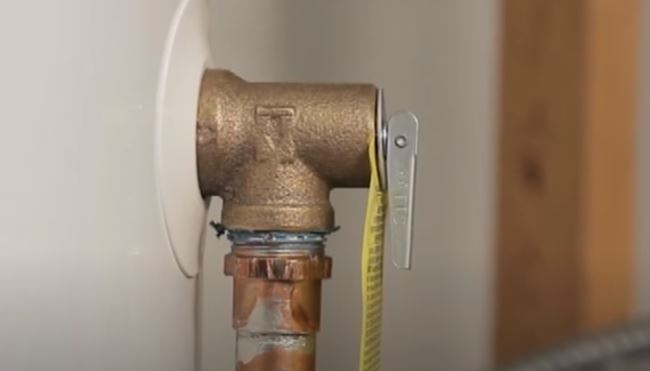
A water heater temperature and pressure relief valve is a small valve with lever handle installed directly at the top of the water heater or on the top side of the tank. It is a safety device that prevents the water heater from exploding.
As its name suggests, the T&P valve as it is commonly known discharges water out of the water heater when the conditions inside exceed its rating (150 psi and 2100 F).
A discharge tube is usually connected to the T&P valve so as water (steam) can safely flow out and down to a pan instead of blasting all over your face, which can badly scald you.
To check if the valve is working as it should, place a small bucket under the discharge tube and lift the lever up gently. If water flows out then it is good. If no water comes out then you need to have it replaced as soon as possible.
Just like the water supply pipe connections, the T&P valve can get loose where it is threaded to the water heater. When that happens, depending on whether the valve is installed at the top or side of the tank, water will start to leak and pool at the top of the tank or drip to the bottom.
Again, grab a wrench and try to tighten the valve. Check if the leak stops. If the leak persists or there are visible corrosions all over the valve connection, replace it.
This is how to replace a water heater temperature and pressure relief valve:
- Turn off the water heater shut off valve.
- If the valve is installed on the side of the tank, drain out water from the tank until the level falls below the location of the valve. Check that by lifting off the valve lever.
- Disconnect the discharge tube
- Remove the valve with a wrench.
- Use a toothbrush or a small wire brush to clean the water heater’s T&P valve connection threads.
- Wrap Teflon tape on the new valve around 6 times counterclockwise.
- Thread the valve on the water heater. Tighten with a wrench.
- open the shut off valve and monitor the new valve for leaks.
- Attach the discharge tube if happy.
5. Leaky Thermal Expansion Tank

A water heater thermal expansion tank is a small (about 2 gallons) steel tank installed on the cold water pipe, between the shut off valve and the water heater connection. A tee is installed on the cold water pipe and the expansion tank threaded on it.
The function of this tank is to prevent the water heater from bursting, especially in a house with a closed-loop system (due to a check valve or pressure reducing valve) The tank contains an air bladder which allows it to accommodate excess water pressure from the tank due to thermal expansion.
If the bladder raptures, the tank will be waterlogged. If you try to leak air from the air inlet valve at the top, water will flow out instead. Another sign of a waterlogged water heater expansion tank is a constantly leak T&P valve.
Just like the other water heater connections, the thermal expansion tank connection could be loose or corroded with time. While a wrench will help fix a loose connection, if the connection is badly corroded and leaking you should replace the expansion tank.
6. Leaking Anode Rode Plug
If you have been wondering what the plug at the top of your water heater is, that is the connection for the water heater anode rode. You are supposed to replace the anode rod after every 5 years.
An anode rod is a long strip of metal (usually magnesium) that runs from the top to the bottom of the water heater. It sacrifices its life for that of the water heater’s internal lining, thereby extending the life of the water heater.
Elements in the water react with the anode rode instead of eating away the internal lining of the water heater thereby extending its life. This is why you are supposed to replace the anode rod after every 5 years.
Again, the anode rod connection to the water heater can get loose, corroded or even both. If you have not replaced the anode rod in 5 years just replace it. A zinc anode rod is better than a magnesium one.
Others
If the size of the water heater is smaller compared to the water demand by your household, then condensation on the outside of the water heater can be expected.
I have written a detailed article on how to size a water heater. Read it here.
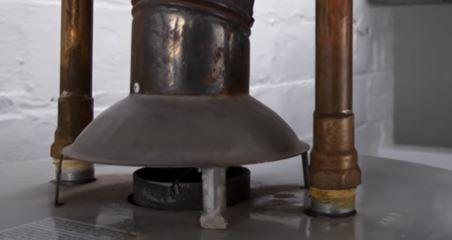
If you notice water leaking from the vent, the source of the water could be rain, especially if your area has been experiencing a storm and the vent cap is missing. Condensation in the vent could also cause water to leak from the water heater’s top vent.
