A water heater leaking from the bottom is often caused by a hole underneath it, as a result of corrosion by sediments. It could also be caused by high water pressure in the tank, loose pipe connections, a leaking drain valve, or a defective temperature and pressure relief valve.

A water heater leaking from a hole underneath it will need to be replaced. If there is no hole on the tank, all you need to do is tighten loose pipe connections, replace a leaking drain valve or replace a defective temperature and pressure relief valve.
You may also have to install a thermal expansion tank in a closed-loop system with high water pressure.
A leaking water heater does not pose immediate danger as long as the pressure and temperature relief valve is working properly and not capped. It can however lead to expensive repairs especially for people with wooden floors, carpets and other valuables on the floor.
It is ok to shower or run other fixtures even with a leaking water heater, provided the leak is manageable. If on the other hand water is leaking from the water heater fast, you should turn off the cold water pipe shut off valve, turn off the pilot light or circuit breaker and drain the tank.
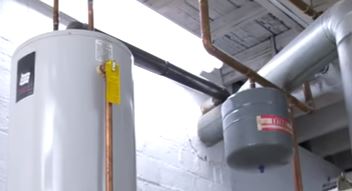
How to Fix a Water Heater Leaking from the Bottom
The first step in fixing a water heater leaking from the bottom is to troubleshoot the source of the leak. It is not every time you notice water pooling around the base of your water heater that you have a hole or cracked water heater.
Water can leak from any part of the water heater and pool around the base which makes it look like the source of the leak is the bottom of the water heater.
Let us now look at all the ways to troubleshoot and fix a water heater leaking from the bottom. I will start with a summary of the problem followed by the long answer.
- Turn off power and water: First, shut off the electricity or gas supply to the water heater and turn off the water supply valve to stop the flow of water.
- Assess the severity: Determine the extent of the leak. If it’s a minor drip, you may want to proceed with troubleshooting. However, if the leak is substantial, it’s safer to call a professional plumber.
- Drain the tank: Connect a garden hose to the drain valve at the bottom of the water heater and drain the tank into a suitable drain or bucket. This can help relieve pressure and reduce further leaking.
- Inspect the pressure relief valve: Check the temperature and pressure relief valve (TPR valve) located on the side or top of the tank. Sometimes, a faulty TPR valve can cause leaks. If it’s leaking, you may need to replace it.
- Check for rust or corrosion: Inspect the tank’s exterior for signs of rust or corrosion. If you see significant damage, the tank may need to be replaced.
- Assess the drain valve: The drain valve itself may be the source of the leak. If it’s damaged or loose, consider tightening or replacing it.
- Consult a professional: If you cannot identify the source of the leak or if the tank is significantly damaged, it’s best to contact a licensed plumber or technician for expert assessment and potential replacement of the water heater.
And now a longer explanation:
1. Tighten Loose Pipe Connections

The first place I would suggest you start looking is the cold and water pipes connections on the water heater. Just run your hand through the connections and check if there is any moisture.
In case of moisture, just know that you have loose connections that need to be tightened. The solution to this problem is an easy one. Grab a pipe wrench and tighten the connections a little bit. Corroded pipe connections might need a replacement.
Just to be on the safe side, I like to draw about a bucket of water from the tank to release the pressure in the tank. Place a bucket under the drain valve or attach a hose to it and drain some water off before tightening the connections.
Check if this fixes the problem.
2. Replace a Leaking Drain Valve
A drain valve is located at the bottom of the water heater. It provides a means of draining and flushing the tank. This valve can however fail, start leaking and as a result water will pool around the base of the water heater.
A water heater drain valve can have an external leak (where it is threaded to the water tank) or an internal leak (where water leaks from inside of the bib/spigot as result of valve failure).
A leaking drain valve will need to be replaced. Stick your finger inside the bib and check if the inside is moist. If that is the case, then you most likely have a leaking drain valve.
Before replacing a water heater drain valve, you will first need to drain the tank. Never forget that.
How to Replace a Water Heater Drain Valve
- The first thing you need is turn off the pilot light or circuit breaker to the water heater. Draining the tank with the power on can burn the element.
- Turn off the cold water pipe shut off valve to the water heater.
- Connect a hose to the drain valve bib and open the valve with flathead screwdriver.
- Let the water flow out completely. If the last bit of the water looked dirty, then now would be a good time to flush the tank. Turn on the cold water supply valve and let the water flush out all the sediments from the tank and then turn it off.
- Once the water heater is full drained, remove the hose.
- Grab the drain valve with a wrench or channel locks and turn it counterclockwise to loosen it. Since the water heater is empty, it can be tip to the side so you might need a second pair of hands to help you hold it down.
- Get a replacement drain valve. I suggest you get one made of brass instead of plastic. As you select your drain valve make sure that the shank length is the correct size, to prevent buying one which is too short or one which sticks out too much.
- Wrap Teflon tape on the drain valve’s thread and connect it to the water heater. If your drain valve has a handle, make sure you connect it in such a way that it is easy to operate the handle without it being impeded by the tank.
- Once tight, open the water heater’s cold water pipe shut off valve.
- To flush out air flow the lines, turn on the nearest hot water faucet. Close the faucet once it stops spitting out air.
- Turn on the pilot light or circuit breaker to the water heater.
If the cause of your leaking water heater was a leaking drain valve, then this repair will be enough to fix it.
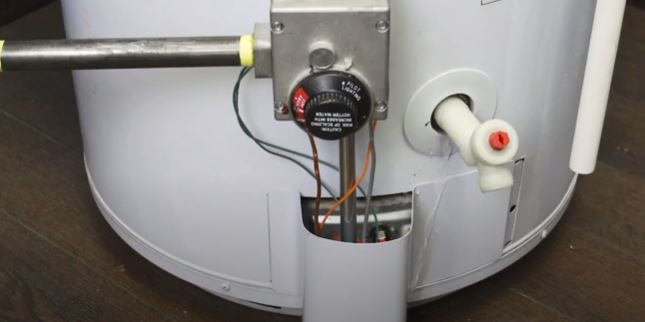
3. Replace a Defective Temperature and Pressure Relief Valve

A water tank’s temperature and pressure valve, commonly known as T&P valve is a safety device installed on the water heater to release excess pressure from water heater if the temperature and pressure of the hot water is too high.
This is the device that prevents your water heater from exploding. That is why it is dangerous to cap it, as some people do to prevent it from wetting the floor.
The ratings of temperature and pressure valves are different but most are rated at 150 pound per square inch (psi) and 210 degrees Fahrenheit. If the conditions inside the water heater exceeds the rating, the valve opens allowing pressure (in form of water) to leak out.
According to Physics, heated water expands. As the water expands, it exerts more pressure. When the pressure in the tank exceeds the rating of the P&T valve, the valve’s thermostatic elements expand as well lifting the valve’s disc off its seat to discharge water until pressure falls below the valves rating.
Often, a tube is connected to the valve which drains at the bottom of the water heater where there is sometimes a pan. If you are not conversant with how the T&P valve works, you will think that the water heater is leaking from the bottom while in actual sense you have a defective valve.
A defective T&P valve does not work as designed. It discharges water even before the hot water in the water heater exceeds its ratings. In that case the valve will need to be replaced.
Stick your finger inside the discharge tube and see if there is presence of moisture. Moisture presence is a sign of a defective/leaking T&P valve.
How to Replace a Water Heater T&P Valve
- Turn off the water heater’s cold water pipe shut off valve.
- Drain a few gallons of water from the water heater.
- Disconnect the tube from the T&P valve.
- Use a wrench to loosen the valve by turning it counterclockwise.
- Wrap Teflon Tape on the new valve and install it. Tighten it in place and connect the discharge tube.
- Turn on the cold water shut off valve and open the nearest hot water faucet.
- Once air has been flushed out of the system turn off the faucet.
And basically that is how to replace a leaking water heater temperature and pressure relief valve. If you are not comfortable doing it on your own, then feel flee to call in a licensed plumber.
4. Install a Water Heater Expansion Tank
A water heater expansion tank, also known as a thermal expansion tank is a small tank installed on your water heater’s cold water supply pipe if you have a closed-loop system and very high water pressure inside the tank.
Most if not all houses require water pressure of about 40 to 60 psi. If the water pressure exceeds 70 psi then that’s too high. It is especially a problem in a water heater since the water is being heated and expanding (thermal expansion) at the same time.
In some houses, that is usually not a problem since after expansion the water can flow back to the cold water line. If on the other hand you have a check valve such that water cannot flow back to the city pipe’s, the water will force its way through the T&P valve.
In that case you will always have water pooling around the base of your water heater. Replacing the T&P valve will not fix the problem in that instance.
The only solution for this problem is install a thermal expansion tank. This tank is usually installed on the cold water supply pipe to give the hot water from the water heater room for expansion and not leak from the T&P valve.
Basically, the thermal expansion has 2 sections divided by a watertight rubber seal. The top compartment contains air. Water from the heater flows into the bottom compartment and compress the air at the top compartment and is hence stored under pressure until there is demand for hot water in the house.
Not many people can install a thermal expansion tanks on their own though. You need to call in a licensed plumber who can do it safely.
Just before you call the plumber, test the pressure of water in your water heater to be sure that’s the problem. Grab a pressure gauge and connect it to the drain valve. Open the drain valve and check the water pressure in the tank.
If you get a pressure of 80 psi or more then you definitely need to have the thermal expansion tank installed.
5. Replace the Water Heater

Sometimes the reason your water heater is leaking from the bottom is because there is a hole underneath it. How does this happen though? And why does it happen underneath the water heater?
Water heaters comes with sacrificial anode rod. The anode rode prevents the inner lining of the tank from being corroded by compounds in the water. Instead of the compounds reacting with the tank, they react with the anode, depleting it with time.
If you don’t replace and the anode rode and flush your water heater frequently, sediments will settle at the bottom of the water heater where they will start corroding it. Continuous corrosion of the bottom of the tank will after sometime develop a hole and water will start leaking from it.
A water heater leaking from the bottom (or elsewhere on its body) cannot be fixed. The only solution is replacement. If you would like to know what size of water heater to buy for your household check out this post.
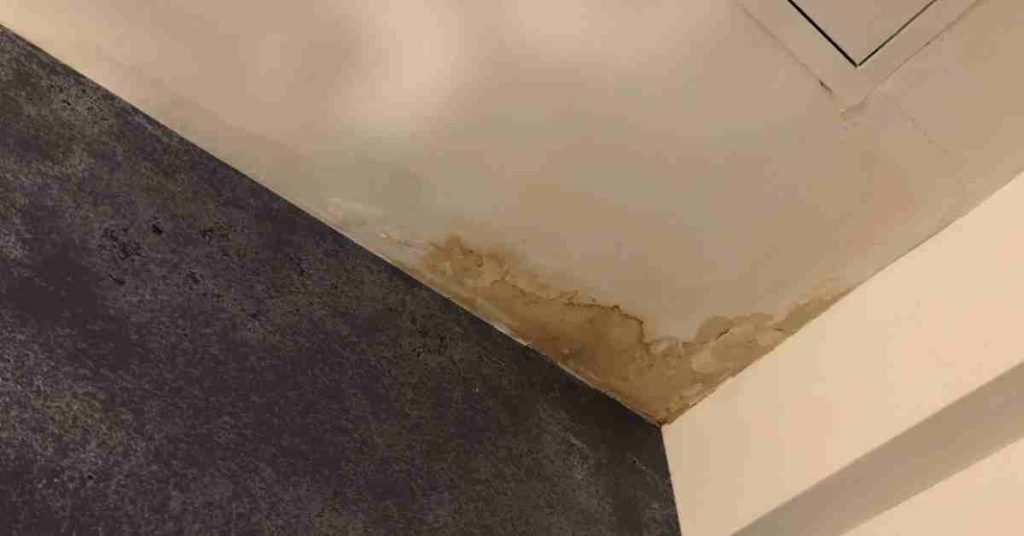
It is not safe to have water pooling on the ground around the water heater. The best thing to do therefore is turn off the pilot light or circuit breaker, turn off the cold water shut off valve and drain the water heater.
Related: water heater leaking from the top
Related: why your hot water is just lukewarm
Related Water Heater Guides
You may also find these water heater guides helpful: