
Replacing a water heater T&P (Temperature and Pressure) relief valve is a crucial maintenance task to ensure the safe operation of your water heater. Here’s a summary of the steps to replace a T&P relief valve:
Materials and Tools Needed
- New T&P relief valve compatible with your water heater.
- Pipe wrench or adjustable pliers.
- Pipe thread seal tape (Teflon tape).
- A bucket or container.
- Towels or rags.
- Safety glasses and gloves.
Step-by-Step Guide
- Turn Off the Power and Water Supply:
- For electric water heaters, switch off the power at the circuit breaker.
- For gas water heaters, turn the gas valve to the “pilot” position.
- Shut off the cold water supply to the water heater.
- Allow the Water Heater to Cool:
- Give the water heater ample time to cool down, as the water inside can be scalding hot.
- Locate the T&P Relief Valve:
- The T&P relief valve is typically located on the side or the top of the water heater tank. It’s a valve with a lever or handle and a discharge pipe that extends downward.
- Place a Bucket or Container Under the Discharge Pipe:
- Position a bucket or container under the discharge pipe to catch any water that may escape when you remove the T&P relief valve.
- Open a Hot Water Faucet:
- To help relieve pressure in the tank, open a hot water faucet in your home.
- Test the Old Valve:
- Lift the lever on the T&P relief valve briefly to check if it releases water and relieves pressure. If it doesn’t, it may be faulty and in need of replacement.
- Disconnect the Old Valve:
- Use a pipe wrench or adjustable pliers to loosen and remove the old T&P relief valve. Turn it counterclockwise to unscrew it from the water heater tank. Be prepared for some water to drain out when you remove it.
- Prepare the New T&P Relief Valve:
- Apply pipe thread seal tape (Teflon tape) to the threads of the new T&P relief valve to ensure a proper seal.
- Install the New Valve:
- Thread the new T&P relief valve clockwise into the opening on the water heater tank and tighten it securely with the wrench or pliers. Avoid over-tightening, which could damage the threads.
- Reconnect the Discharge Pipe:
- Reattach the discharge pipe to the outlet of the new T&P relief valve.
- Turn On the Water Supply:
- Turn on the cold water supply to the water heater and allow the tank to fill.
- Check for Leaks:
- Inspect the area around the new T&P relief valve and the discharge pipe for any signs of leaks.
- Restore Power or Gas Supply:
- If you have an electric water heater, restore power at the circuit breaker. For gas water heaters, turn the gas valve back to the “on” position.
- Close the Hot Water Faucet:
- Close the hot water faucet you opened earlier.
- Monitor for Proper Operation:
- Keep an eye on the water heater for the next few hours to ensure there are no leaks and that it operates normally.
How to Replace a Water Heater Temperature and Pressure Relief Valve

Follow the following steps to replace your water heater’s T&P relief valve:
1. Turn off Cold Water Shut off Valve
As you replace the valve, you cannot have water flowing into the tank otherwise you are going to flood your basement. That is why you should first turn off the supply of cold water to the tank.
There are 2 types of shut off valves. If you have a gate valve (looks like a wheel), turn it all the clockwise but if you have a ball valve, pull the handle so that it is at 90 degrees (perpendicular) to the water supply pipe.
Note: In the unlikely event that you do not have this valve, you will need to turn off water at the main house water shut off valve. To know where to locate the main shut off valve check out this post.
2. Turn off the Water Heater.
Water inside the water heater is always at a high temperature and therefore unsafe to work with. This is why you should turn off the gas supply or the heater’s circuit breaker so that the water can first cool off.
If you have an electric water heater, look for the breaker labelled “Water Heater” or “WH” and flip it to the off position.
Also, since you will be draining the tank, you cannot have the element on in an empty tank. It will burn resulting in expensive replacements and other inconveniences.
Note: You do not need to wait for the water to cool off but it is usually recommended. If time is not on your side, turn on one hot water faucet then turn on the water heater’s cold water supply valve for about 5 minutes then turn it back off.
3. Drain the Tank

Since the TPR valve is usually located near the top of the water heater, you do not need to drain the entire tank. Just drain out water until the water level is just below the valve.
Note: Some water heaters have the TPR valve on the side of the tank near the top while others have it at the top.
There are several ways to drain the water heater:
- You can turn on the nearest hot water faucet until you have drained out about 2 gallons of water.
- Connect a garden hose at the water heater drain valve and drain out the same amount of water.
- Drain out the water through the TPR valve itself. You will need a bucket for this.
Draining water out of the tank also helps to release the pressure inside the tank making it safe to work on.
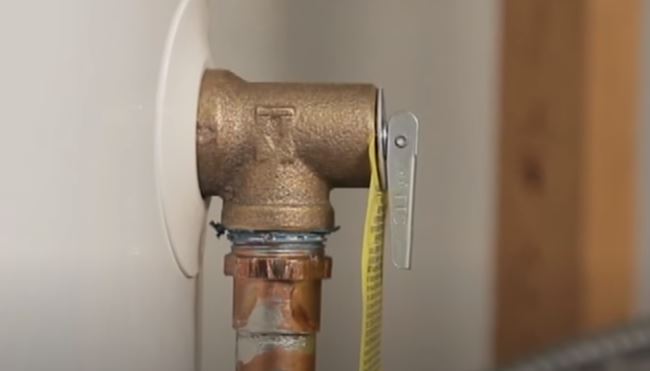
4. Remove the Old Valve
Water heater temperature and relief valves have a vertical discharge pipe connected to them. Do you know why you must always have the discharge pipe on and never capped?
The discharge pipe channels the water being discharged by the valve safely downwards instead of it gushing out straight into your face (if you are there). Discharge pipes also prevent flooding of the basement (or wherever you have the water heater).
That is the main reason why you always have a pan or bucket at the bottom of the discharge pipe. In some houses, the discharge pipe discharges outside the house.
Before removing the valve, start by unscrewing the discharge pipe by turning it counterclockwise. You will need a wrench here.
After removing the discharge pipe, grab the valve with the wrench and turn it counterclockwise to loosen it. Once loose, simply remove it with your hand slowly just in case you didn’t drain out enough water.
Sometimes the valve is just so corroded that it will simply not come off. What you can do in that case is to spray it with WD-40 or a penetrating fluid and after 15 minutes try to break the connection again.
5. Buy the Right Valve
All TPR valves are not the same. That is why you will notice that your old valve has a tag. That tag contains the specifications needed for your water heater.
Use those specifications to buy another valve. You can purchase a new valve online or you can take your old valve with you to a home improvement store and buy and exact replacement.
6. Install the New Valve
The first thing you will need to do is clean the threads in the water heater valve opening. Use a small wire brush to remove pipe corrosions and old Teflon tape from the threads.
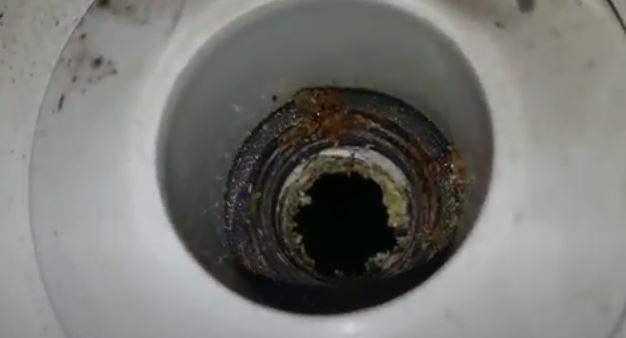
An old toothbrush also works very well here. Clean the threads until they are spotless. That will allow the new valve to seal properly with no potential damage to the threads and hence ensuring there are no leaks.
The next step is to wrap Teflon tape on the valve’s threads. Teflon tape is purely to prevent leaks since it is a thread sealant.
Apply about 4 wraps of Teflon tape nice overwrapped in a clockwise direction from back to the front of the threads. It is important to know how to apply Teflon tape lest you end up with leaks. Check out this post on how to properly apply Teflon tape.
Thread in the new valve slowly to prevent cross-threading until the valve is hand-tight. Use the wrench to tighten the valve. It is important to make sure that the valve is tight but in a vertical direction so that you can connect the discharge pipe.
Connect the discharge pipe to the valve and gently tighten it. Don’t forget to apply Teflon tape here as well.
7. Finish Up
Turn on the water heater’s cold water shut off valve and also turn on the nearest hot water faucet. The reason for turning on the hot water faucet is to bleed off the air in the water heater and thus prevent air lock inside the pipes.
At first, water will be spluttering out of the faucet as the air is released but when the air has been completely bled off a constant stream of water will be observed. At that point turn off the faucet.
Turn on the water heater as well. The process here will depend on whether you have a natural gas or an electric water heater.
Do You Need a Water Heater Expansion Tank?

A water heater expansion tank, also known as a thermal expansion tank is a small tank (about 2 gallons) that is installed between the water heater tank and the cold water shut off valve to prevent your TPR valve from constantly leaking.
If your house has a closed-loop water supply system, you definitely need a water heater expansion tank. A closed-loop simply means that water in your house can only flow in one direction.
That is made possible by the installation of a check valve. A check valve is installed to prevent contaminated water in your house from flowing back to the city’s water supply and contaminating it as well.
If you have a pressure reducing valve in your home then it also acts as a check valve. A hot water recirculation system also must have a check valve to prevent the cold and hot water from mixing.
Without a check valve, if the water in your water heater expands (due to high pressure and temperature), it will simply flow back to the water supply pipe hence making the system safe.
However, if you have a check valve there is no way water can flow back to the supply pipe. The excess water will be forced out through the TPR valve. That could be why your valve is always leaking.
A thermal expansion tank has a bladder filled with cold water and an air chamber with same pressure as that of the incoming water. If the temperature and pressure of the water heater increases, the excess water is forced to the thermal expansion tank.
The excess water compresses the air chamber at the top making the water heater safe again.
If you have a water heater expansion tank but still your water heater relief valve is always leaking, the expansion tank could be waterlogged. This happens when the bladder bursts meaning there is no more air chamber to compress.
A waterlogged thermal expansion tank will need to be replaced. That should be done by a licensed plumber though.
Wrap Up
And basically that is how to replace a water heater temperature and pressure relief valve. I hope this guide was helpful.