Discharging an AC capacitor is a critical safety step before attempting any maintenance or replacement of the capacitor in an air conditioning system. Capacitors store electrical energy and can pose a danger if not discharged properly. Here’s a summary of how to safely discharge an AC capacitor:
- Safety First: Always prioritize safety. Turn off the power supply to the AC unit at the circuit breaker or disconnect switch. Ensure you have the necessary safety gear, such as insulated gloves and safety goggles.
- Identify the Capacitor: Locate the capacitor within the AC unit. It is typically a cylindrical or oval-shaped component with wires connected to it.
- Discharge the Stored Energy: To discharge the capacitor, you will need a properly insulated screwdriver with an insulated handle. Make sure it’s rated for electrical work.
- Ground the Screwdriver: Ensure that you are properly grounded by holding the metal shaft of the screwdriver’s handle. This is a crucial safety precaution to prevent electrical shock.
- Short-Circuit the Capacitor: Carefully touch the metal shaft of the screwdriver to both terminals on the capacitor at the same time. This creates a short circuit and allows the stored electrical energy to discharge safely.
- Observe the Spark: When you make contact between the terminals with the screwdriver, you may see a small spark or hear a popping sound. This is normal and indicates the discharge process is working.
- Wait for Complete Discharge: Keep the screwdriver in place for a few seconds to ensure the capacitor is fully discharged. This minimizes the risk of residual electrical energy.
- Test for Voltage: If you have a voltage tester, you can use it to confirm that the capacitor is no longer holding a charge. Ensure the voltage reads zero.
- Proceed with Caution: Once you are certain the capacitor is discharged, you can proceed with your maintenance or replacement task.
Discharging a Start vs Run Capacitor

The rule of thumb when dealing with capacitors is to always assume they are charged. And that is why discharging them is important because capacitors have a higher charge than your home supply (which is usually 240 volts) meaning they can badly shock you.
Air conditioners have start and run capacitors. However, not all AC systems have start capacitors but they all have a run capacitor.
Nonetheless, start capacitors work differently from start capacitor and the amount of charge they store is also different. As a matter of fact, handling start capacitors is more dangerous than handling run capacitors.
Start capacitors store a high amount of charge and are only active for a second or two. They provide the motor with the initial powerful jolt of electrical charge needed to start and when the motor kicks in they disconnect from the circuit.
On the other hand, run capacitor maintains a consistent supply of current to the motor during the cooling cycle. Run capacitors therefore remain connected to the motor circuit throughout the cooling cycle.
Since start capacitors are only used for a few seconds, they still retain a lot of their charge and are therefore dangerous to handle as opposed to run capacitors which remains connected to the motor and are thus drained out.
That is however not to say that you should treat run capacitors carelessly. They may still hold a high enough charge to shock you when you touch the contacts.
For ease of identification, start capacitors will have a black plastic exterior while run capacitors have a shiny metallic exterior. Also, run capacitors have a low capacitance (3-70 microfarads) while start capacitors have capacitance of over 70 microfarads, usually given in a range.
How to Discharge an Air Conditioner Capacitor
Let us now look at the different ways to safely discharge an AC capacitor. We will look at this process step by step.
1. Step 1: Turn Off Power to the AC
You cannot discharge the capacitor with 240 volts of power still flowing to the air conditioner. That is why the first thing you should do is to turn off power to the unit.
There will be a breaker box on the wall next to the AC outside unit and that is where you will flip the switch to the off position. In some units you will need to pull out a plug. You can also turn off the AC at the main breaker panel inside the house.
Even with the power to the unit turned off, once the thermostat calls for cooling 24 volts will be sent to the unit. For that reason, I also recommend turning off the thermostat.
Step 2: Locate the Capacitor

The capacitor is located in the AC outside unit concealed by the side/cover panel. You will need to remove the panel to access the capacitor.
The cover panel is held in place using screws. Use a screwdriver to remove the cover panel and place it away and take care of the screws so that you don’t lose them.
Step 3: Check What Type of Capacitor It Is
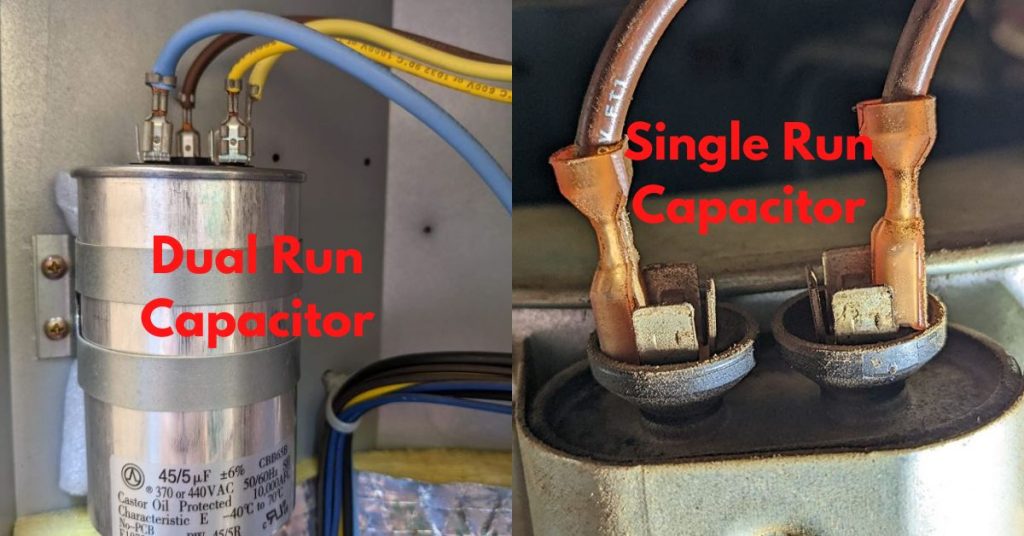
There are 2 types of capacitors. You could have a single capacitor or a dual capacitor. How can you tell what type of capacitor you have?
If there are 3 terminals at the top of the capacitor, you have a dual run capacitor. 2 terminals on the capacitor means you have a single capacitor.
An air conditioner will need 2 single run capacitors, one for the compressor motor and the other for the fan motor. On the other hand, a dual run capacitor serves both the fan and compressor motor.
The terminals on a dual run capacitor will be clearly labeled as:
- C – common
- HERM – hermetically-sealed compressor
- FAN – Condenser fan

Also, single run capacitors will have a one capacitance rating, something like 40 microfarads while dual run capacitors will have something like 45/5 microfarads. The high rating is for the compressor motor and the lower rating is for the fan motor.
Note: You can tell if you capacitor is bad just by looking at it. If the top has bulged/mushroomed or if it is leaking out the dielectric fluid, it is clearly bad and will need to be replaced. However, the capacitor can look all good but still be bad and hence the need to test it with a multimeter.
Step 4: How to Discharge AC Capacitor with Multimeter
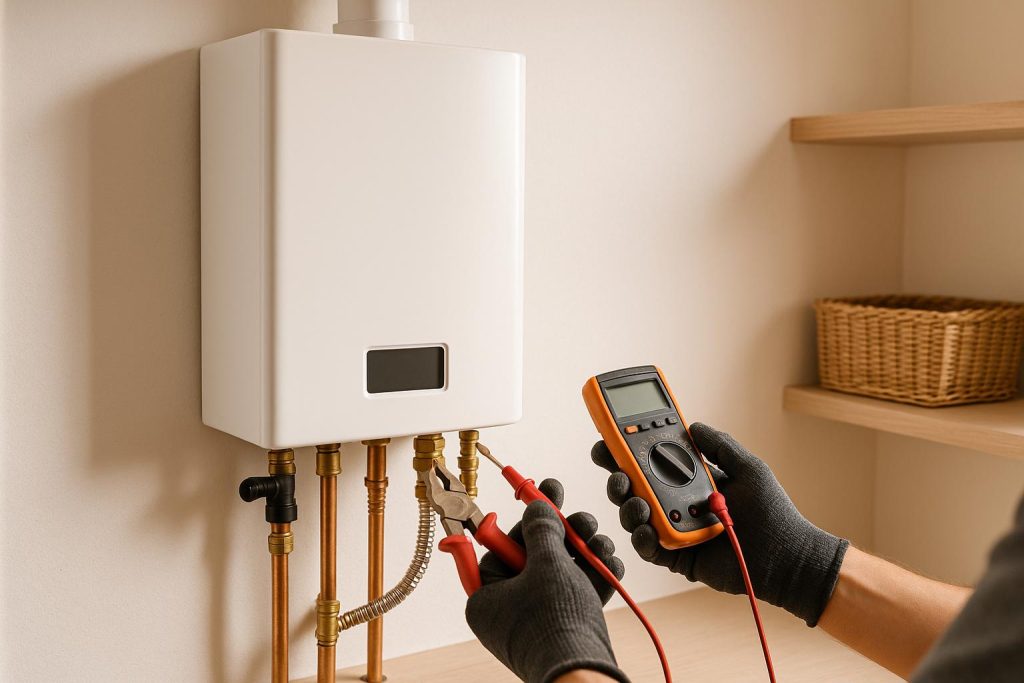
Ideally, a multimeter is used to check if there is a charge in the capacitor but not to discharge it. That is however not to say that a multimeter can’t discharge a capacitor.
A multimeter can successfully discharge a capacitor, only that it takes a long time, especially if the capacitor is fully charged. In most cases though, run capacitors are usually discharged or have a low charge and will therefore takes less time to discharge them with a multimeter.
Tip: If you really want to discharge a capacitor with a multimeter, make sure that your digital multimeter has the Low Impedance Mode (LoZ) setting in it. In that case the capacitor will discharge very quick.
This is how to discharge a capacitor using a multimeter:
- Set your multimeter to the low impedance mode
- Connect your multimeter probes to the capacitor terminals (common and HERM followed by common and FAN in dual run capacitors)
- Watch you capacitor discharge to zero.
If you have the ordinary multimeter, I would suggest that you first check the charge in your capacitor prior to discharging it. If it has no charge or has a low charge, discharge it with a screwdriver. If the charge is high (over a 100 volts, use a capacitor discharge tool to discharge it.
Step 5: How to Discharge a Capacitor Using a Screwdriver

To do this job safely, you need to use a screwdriver with an insulated handle. The insulated handle prevents the electric charge from travelling from the metal part of the screwdriver to your hand.
If the handle has cracks don’t use it. To add another layer of protection, you should also use insulated gloves.
This is how to discharge a capacitor using a screwdriver:
- If you have a single run capacitor, use the tip of the capacitor to make contact with the 2 capacitor terminals. That will short them and discharge the capacitor. Repeat the process one more time just to be sure that the capacitor has been discharged.
- If you have dual run capacitor, use the metal part of the screwdriver to short the common and HERM terminals. Once you have discharged that side of the capacitor, use the screwdriver to short the common and FAN terminals. Repeat both steps just to be sure that you have successfully discharged the capacitor.
Note: If you don’t have a screwdriver, you can also use a needle-nose pliers, again with insulated handles. Just open the pliers prongs wide enough to make contact with the 2 terminals and you will successful discharge the capacitor.
Step 6: How to Discharge a Capacitor Using a Discharge Tool

If you want to discharge a capacitor through one of the safest way then I suggest that you buy a capacitor discharge tool.
Capacitor discharge tools, also known known as discharge pens are easy to use and are inexpensive as well (costs between 10 and 20 dollars). I prefer these ready-to-use tools instead of making one myself.
They are properly insulated and have 2 leads allowing you to safely discharge the capacitor without the risk of shock. They are rated up to 440 volts, which is also the maximum rating of most AC capacitors.
You old need to make contact between the 2 leads and the capacitors terminals (common-HERM and then common-FAN) and the capacitor will be successfully discharged.
Step 7: How to Discharge a Capacitor Using a Resistor
If you want to build your own capacitor discharge tool, you will need the following:
- A properly insulated electric cable (around 15 inches)
- 20k-ohm resistor
- 2 insulated alligator clips
- Soldering iron
- Electrical tape
This is how to make your capacitor discharge tool:
- Cut the cable into 2 equal parts
- Clip off the insulation from both ends of the 2 cables. About an inch of exposed wire on each end of the cables is sufficient.
- Use the soldering iron to sold one end of each cable to the resistor probes. To do that correctly, wrap the wire on the probes first and then solder them together. At the end, the resistor should be in between the 2 cables.
- To keep the connection solid and for insulation purposes as well, wrap electrical tape all around the solder.
- Connect the loose ends of the cables to the alligator clips and weld them together as well. Again, use electrical tape to properly insulate the solder.
- To discharge a single run a capacitor, connect the alligator clips to the 2 terminals. The capacitor will discharge in a few seconds.
- To discharge a dual run capacitor, connect the clips to the common and HERM terminals, and after a few seconds connect them to the common and FAN terminals.
And basically that is how to discharge a capacitor using a resistor.
Do You Need to Discharge a Capacitor Before Installing?
No. New capacitors do not hold any charge and therefore do not need to be discharged before being installed. However, it is a good idea to discharge it to be on the safe side.
And there is a good reason behind assuming that the new capacitor is charged. What if the capacitor had earlier been bought in an ecommerce site like Amazon but the buyer returned it after a day of usage without discharge it?
That is why you should discharge the capacitor even if it is new. You can never be too safe with capacitors.


