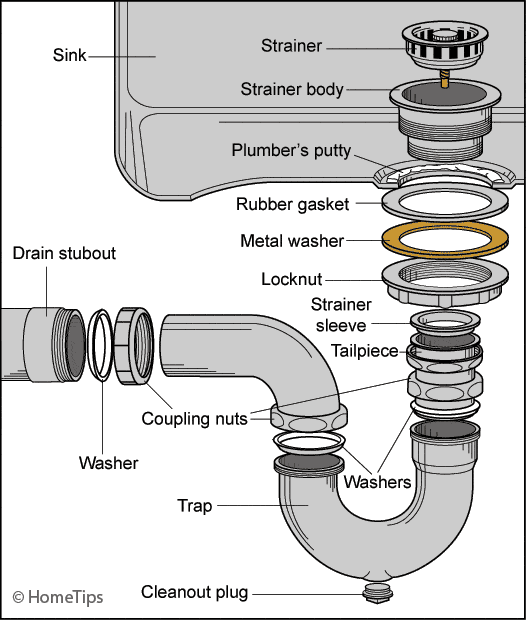
A bathroom sink drain consists of several components that work together to facilitate proper drainage and prevent water from backing up. Here’s a brief summary of the different parts of a bathroom sink drain:
- Sink Drain Opening: This is the visible opening in the bottom of the sink where water flows into the drainpipe. It’s typically round or oval in shape and is where water and waste enter the drain system.
- Sink Stopper: The sink stopper is a movable plug that opens and closes to control the flow of water down the drain. It can be operated by a lever or a push-pull mechanism located on the faucet or behind the sink.
- Tailpiece: The tailpiece is a straight section of pipe that connects the sink drain opening to the P-trap. It carries water and waste from the sink to the P-trap.
- P-Trap: The P-trap is a U-shaped pipe that traps a small amount of water, creating a seal. This seal prevents sewer gases from entering the bathroom and also helps to prevent clogs by trapping debris.
- Trap Arm: The trap arm is a horizontal pipe that extends from the P-trap to the drain stack or the main sewer line. It carries wastewater from the P-trap to the larger drain system.
- Drain Pipe: The drain pipe is the portion of the plumbing system that carries wastewater away from the bathroom sink and ultimately into the sewer or septic system. It connects to the trap arm.
- Cleanout Plug: A cleanout plug is a removable cap or plug found on the P-trap or other parts of the drain system. It provides access for cleaning and removing clogs.
- Gaskets and Washers: Rubber gaskets and washers are used to create watertight seals between various drain components, preventing leaks.
- Slip Nut and Washer: These are used to secure connections between different parts of the drain system. They are tightened to create a snug fit.
Parts Diagram
With that brief introduction, let us now look at all the parts of a bathroom sink drain and how they work.
Parts of a Bathroom Sink Drain
In no particular order, the following are the parts of a bathroom sink drains:
1. Faucet
Without a faucet, a sink is useless. A faucet receives water from your cold and hot water supply pipes and all you have to do is turn the faucet handle on to have water flowing out.
Depending on your preference, a bathroom sink can have 1 or 2 faucet handles, one for the cold water and the other for the hot water. A single-handle bathroom sink faucet will discharge cold or hot water depending on which direction you turn the handle.
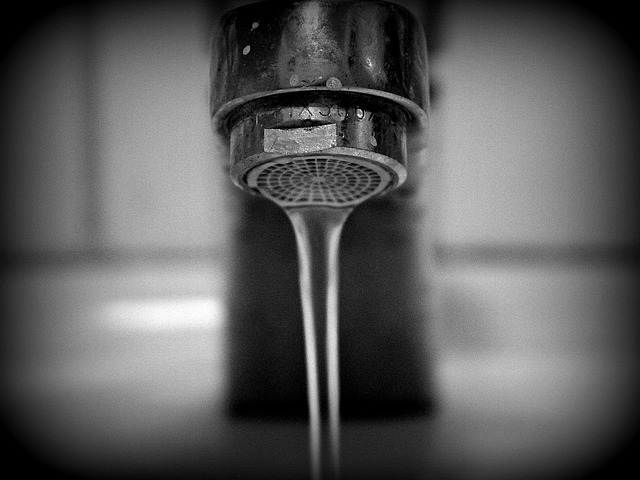
If you carefully look at the tip of the faucet spout, you will see a little attachment with fine mesh-like nozzles. That is called a faucet aerator. Your kitchen sink faucet has one too.
Faucet aerators are designed that way to mix the water stream with air, reducing the flow. Due to the small size of the nozzles, faucet aerators get clogged a lot especially if you live in an area with hard water or house with old corroded steel pipes.
Anytime you have low water pressure in your bathroom sink, check out the faucet aerator. Disconnect it with a wrench, soak in in vinegar, poke each hole with a pin then connect it back.
2. Water Supply Hoses
The are 2 water supply under your bathroom sink which supply your faucet with water. One hose carries hot water to the faucet while the other carries cold water.
Another thing that can cause your bathroom sink to have low water pressure is if these hoses are kinked. Sometimes they are also clogged by debris and mineral deposits.
Just like is the case with your other fixtures that have a cold and hot water line, it takes sometime to get hot water flowing out of the faucet when you turn on the hot water faucet handle.
The time will depend on how far the fixture is from the water heater. To solve this problem in your house, you can install a hot water recirculation system.
A hot water recirculation system creates a loop between all the fixtures and the water heater, guaranteeing you instant hot water when you turn on the faucet. For more information on that read this post.
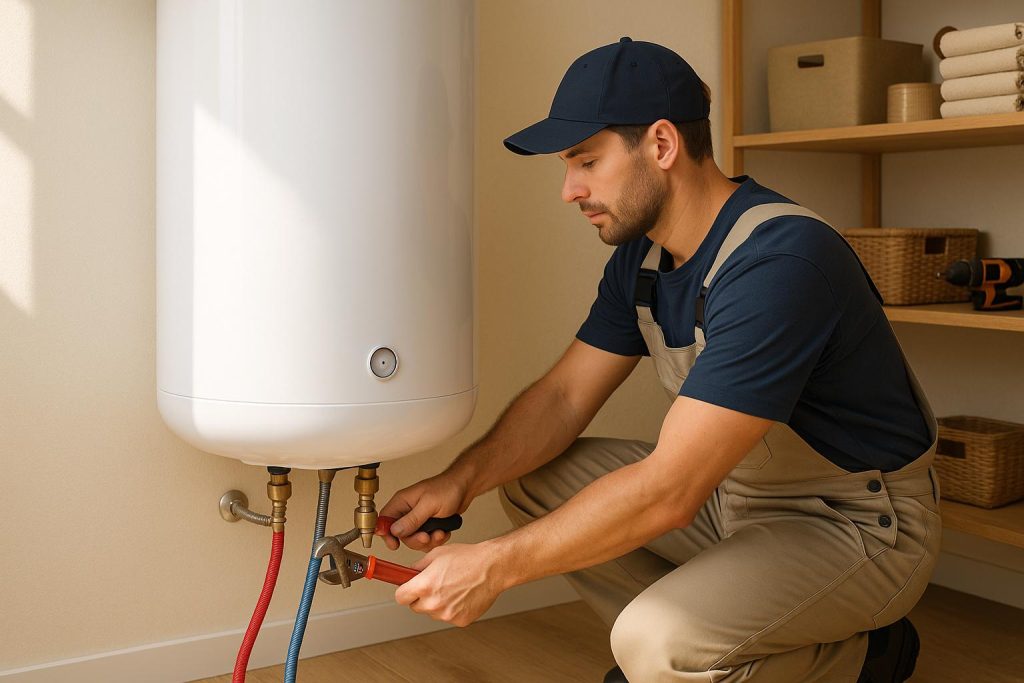
3. Shut Off Valves
Your bathroom sink water supply hoses are connected to 2 shut off valves in the under the sink. Shut off valves allows you to turn off water to the faucet if you when you need to fix or replace the faucet or water hoses with turning off water to the entire house.
Again, if you have low water pressure in your bathroom sink, make sure that the shut off valves are opened fully. A fully opened shut off valve should be turned all the way in the counterclockwise direction.
4. Bathroom Sink Drain Flange

A bathroom sink drain flange is the finished part at the bottom of the sink drain opening. It helps to create a watertight connection between the sink and the drainpipe. The drain flange is held in place using a locknut from underneath the sink.
To help the drain flange create a seal between it and the sink body, a sealant (usually plumber’s putty or silicone caulk) is applied underneath its rim. After years of usage, the sealant erodes and you will notice that the bathroom sink will be leaking from the bottom.
Another cause for a leaky bathroom sink is a loose locknut or a worn-out washer/gasket. Failure to install the gasket properly will also result in leaks.
I have written a detailed post on how to seal a sink drain. Read it here.
5. Bathroom Sink Stopper
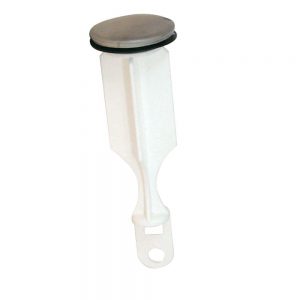
A bathroom stopper is installed in between the drain flange. It allows you to plug off the drain pipe to hold water in the sink as well as drain it as you wish. Most bathroom sinks use a pop-up stopper.
A pop-up bathroom stopper has a mechanism for lowering and raising the stopper without touching it, which is especially useful when draining it. While all you can see from the top of the sink is the lift rod, the big part of the mechanism is usually under the sink. Let us look at how it works.
The Lift Rod
The lift rod is the visible from the top of the sink as it is just next to the faucet. Whey you pull the lift rod up, the whole mechanism pulls the stopper down plugging off the sink drain.
If you want to drain the sink, you just push the lift rod downwards. The mechanism will lift the stopper off the sink drain allowing the sink to drain.

The Clevis Rod
The clevis rod, which is also known as a clevis strip is the metal strip or rod under the bathroom sink which connects both the lift rod and the pivot rod. It helps creates an elbow, allowing the stopper to move up and down with respect to the lift rod movements.
You will notice that there are several holes on the clevis rod. Those holes are where the pivot rod is connected to and secured by a clamp.
The reason there are several holes on the clevis rod is to allow the pop-up stopper be installed in sinks of different sizes. When installing the pop-up stopper you need to adjust yours accordingly to make sure that the stopper is plugging off and opening precisely.
The Pivot Rod
The Pivot rod is the rod that connects the actually pop-up stopper to the clevis rod. The rod enters the drainpipe part called the tailpiece from the side and goes through a hole/hook at the bottom of the stopper.
To make sure that the connection between the pivot rod and tailpiece does not leak, it has a seal, gasket and a ball which creates a watertight connection when tightened together. It is the hooking of the pivot rod on the stopper that allows the stopper to be manipulated when you pull or push the lift rod.
6. Bathroom Sink Drain P-Trap

A bathroom sink drain trap commonly known as a P-trap is the U-shaped bend under the sink. It you look at it carefully, you will notice that it looks like an inverted P and hence its name.
Every fixture in your hose with a drain (tubs, showers, toilets, washing machines) has a P-trap only that you cannot see it in some of them. A drain trap has 2 main functions:
- Due to its shape relative to the rest of the drainpipe, it allows some water to be held there. The water creates a barrier which prevents sewer gases/smells from coming up through the drain.
- It prevents the main drainpipe from being clogged by trapping/holding potential drain clogs. Unclogging the P-trap is of course easier than the main drainpipe.
If you have travelled for sometime or you have not used the bathroom sink for some time, the water in the drain trap will dry up. This means sewer gases can easily come out through the sink drain.
Anytime you experience a sewer gas smell in your house, there is a big chance one of the drain traps are empty. As a result, it is always advisable to run water through all your fixtures and flush all toilets whenever you come back from vacation.
Sewer gases in the main house drainpipe should exit through the vent stack. The vent is the vertical pipe which is connected to the main drainpipe and runs through the roof of the house.
If the vent is clogged, you will notice that most of your fixtures will be draining slowly due to negative air pressure in the drainpipe. You can also notice the toilet bubbling when flushed or the bathroom sink gurgling when the toilet is flushed.
A clogged (fully/partially) drainpipe can also cause the above scenario. When the bathroom sink is draining slowly yet all the other fixtures are draining properly, most of the time the P-trap is usually partially clogged (hair is the number one culprit) restricting the flow of water.
While you can snake the drain, disconnecting, cleaning and installing back the the P-trap is usually a fast and sure way to fix the problem.
If your bathroom sink drain trap is made of PVC, the connections are usually hand tight in most of the time you do not need to use a wrench or slip-joint pliers to loosen them. You may need the tools however if you have a metallic drainpipe.
If your bathroom sink drain trap is leaking, I have written an article to help you fix it. Read it here.
7. Bathroom Sink Drain Tailpiece
The bathroom sink tailpiece is the vertical pipe that connects the P-trap to the drain flange using a locknut backed up by a rubber gasket. If you have a pop-up stopper, the pivot rod enters the sink drain through a hole on the side of the tailpiece.
Just like is the case with the P-trap connections, the tailpiece locknut is usually hand tight. Most people however prefer to gently tighten it a little using a pair of slip-joint pliers, to squeeze the gasket against the sink body therefore creating a tight seal.
Some of the gaskets are usually threaded and you therefore needed to make sure that you thread them as well until they are in contact with the body of the sink. If there is a small gap between the gasket and the sink you will have a leak no matter how much you tighten the locknut.
It is important to always remember that the P-trap’s long arm should be the one connected to the drain tailpiece while the short arm is the one to be connected to the drainpipe elbow. Reversing the connections will give you problems with the drainage.
8.Bathroom Sink Drainpipe
Wastewater from the bathroom sink flows through the drain opening and down via the tailpiece, loops through the P-trap and enter the drainpipe through the short leg/arm of the trap.
The bathroom sink drainpipe is connected the main house drainpipe which carries the waste out into the city sewer lines or the septic tank. If you have to choose a bathroom sink drain material I would suggest you choose PVC or ABS instead of steel.