If your kitchen/bathroom sink is leaking from below, you will need to remove it, apply a new sealant and then install it again. You could also be installing a new sink and wondering which sealant to use to create a watertight and long-lasting seal.
Plumber’s putty and silicone caulk are 2 of the best sealants for sink drains. While both will create a good seal, plumber’s putty is the most preferred for sink drain flanges while silicone caulk provides the best seal between the edges of the sink and the countertop.

Both silicone caulk and plumber’s putty have their advantages and disadvantages. Of the two, plumber’s putty is the most widely used and preferred by most people. While the silicone caulk is just as good if not better, it is a little tricky to use.
Silicone caulk is a modern solution to sealing sink drains (among other applications), mostly preferred for its waterproof qualities. If properly done, a sink drain installed using silicone caulk can last for a long time.
Both silicone caulk and plumber’s putty however don’t last forever. The seal will after a few years (depending on how well it was installed) break and the sink will start to leak from the bottom/underside.
If you decide to seal you sink drain with caulk, make sure you use 100% silicone caulk, preferably white or clear. Unlike other varieties of caulk, this type of caulk is waterproof and will not erode easily despite the constant contact with water.
In this blog post, I will show you how to seal a bathroom and kitchen sink drain using plumber’s putty as well as silicone caulk. Let’s get down to it.
How to Seal a Kitchen Sink Drain

- Clear the space under the kitchen sink. If you use the space under your kitchen sink to store stuff remove them to allow yourself enough space to work with.
- Disconnect the P-trap.
The P-trap is the U-shaped part of your sink drain which looks like an inverted P. It holds a little amount of water at all times, preventing sewer gases from coming up to your house.
The P-trap also traps potential drain clogs. This prevents them from clogging up the drainpipe farther away where unclogging it would be harder.
The reason you need to disconnect the P-trap is that it is always a good time to clean it as well. This is especially important if your sink is draining slowly as well. You can as well omit this step.
If your P-trap is made of PVC, the connections will be hand tight hence no need to use a wrench. A metallic drainpipe with a metallic will need an adjustable wrench to loose.

Note: The P-trap will contain some water. Put a small bucket or pan underneath it to drain the water to prevent it from spilling on the floor.
- Disconnect the tailpiece. The tailpiece is the small vertical pipe connecting the trap to the sink drain. Note that your set up will be different if you have a garbage disposal under the sink. For such a connection check out this post.
- Loosen the locknut. The locknut is the nut underneath the sink drain that holds the flange (strainer body) in place. Use a slip-joint pliers or adjustable wrench to loosen and remove it out completely. Sometimes the locknut is tight and the only way to remove is cutting it off with a hacksaw blade.
- With the lock nut out, take off the housing and the washers. A kitchen sink drain has 2 washers, a rubber washer and a friction washer (usually a cardboard washer). The rubber washer is the one which should be in contact with the drain opening.
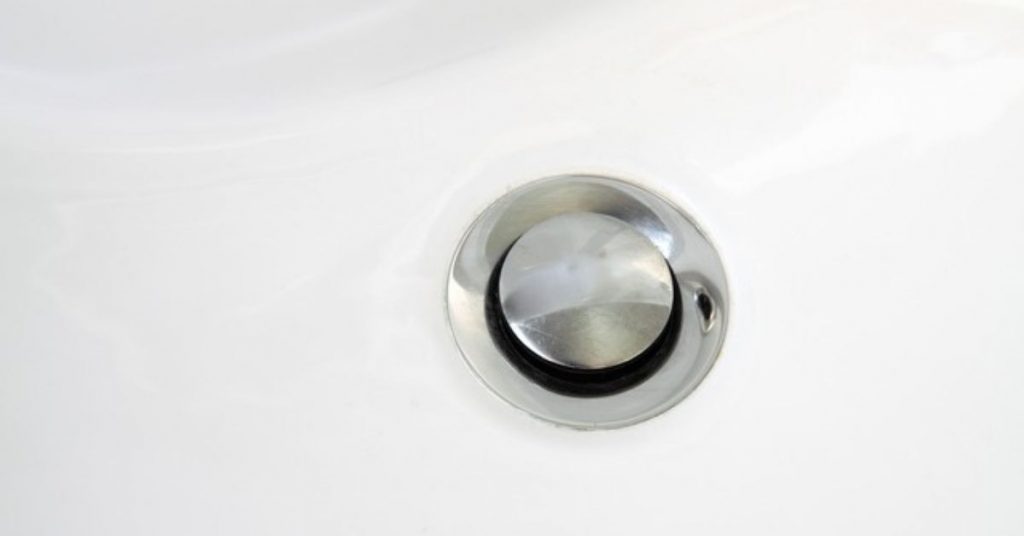
- Remove the sink flange from the top of the sink.
- Scrape off old plumber’s putty or caulk from the top of the drain opening as well as under the rim of the flange.
- If you clean the drain with water, make sure that your dry it completely. You can as well wipe it with a bit of rubbing alcohol.
Applying Plumber’s Putty on the Sink Drain Flange
- Scoop a generous amount of plumber’s putty and roll it between the palm of your hands into a long-pencil sized bead.
- Apply the bead of plumber’s putty under the rip of the sink flange to form a perfect circle underneath it. Cut off the excess putty.
- Push the flange inside the drain opening.
- Duck under the kitchen sink and nicely place the 2 washers on the basket and push them through the flange. It is very important that you make sure that the rubber washer is pushed all the way up against the body of the sink. Failure to do that will result in leak no matter how much you tighten the locknut.
- Hold the washers and basket with one hand as you screw in the locknut with the other until it is hand tight. Tighten the locknut in place using the wrench/Channellock’s. As a sign that you have a good seal, plumber’s putty will squeeze from all around the flange. Scrape off the excess putty with a knife.

- Connect the tailpiece and P-trap. Tighten the connections.
Applying Silicone Caulk on the Sink Drain Flange
If you decide to use silicone caulk, apply a bead of the same under the rim of the sink flange as well as around the sink drain opening. Carefully insert the flange through the drain opening and push it down strongly to get a strong seal.
That is the only difference between the silicone caulk and plumber’s putty installation. Just like with the plumber’s putty, excess caulk will squeeze from around the flange. Wipe if off before it hardens.
Testing the Seal
With plumber’s putty you can test the seal immediately. It however takes about 3 hours for silicone caulk to dry and up to 24 hours to cure. To test whether the sink drain flange is sealing properly, follow the following steps:
- Plug off the sink drain using a stopper.
- Turn on the water and fill the sink to just under the overflow drain opening.
- Look for leaks. Wait for about 10 minutes looking for leaks from underneath the sink The level of water in the sink should not go down.
- Remove the stopper and look for leaks in the drain connections. Check especially the P-trap connections to make sure there are no leaks. If any, tighten the connections with a wrench. Make sure that the tailpiece and other connections are properly centered/aligned to prevent leaks.
How to Seal a Bathroom Sink Drain
If you have a pop-up bathroom sink stopper (which is the case with most bathroom sinks), you will first need to remove the stopper before you can remove the flange. This is actually a really simple task so let is get down to it.
- Clear the area under your bathroom sink.
- Disconnect the P-trap. Don’t forget to have a pan/bucket to drain the water in the trap.
- Remove the sink stopper.
A pop-up sink stopper has 3 rods which help it to work as it does. The one connected to the drainpipe (and hooked to the actual stopper body) is called a pivot rod. The rod/strip with holes on it where the pivot rod is connected is called a clevis rod.
Start by disconnecting the pivot rod from the clevis rod. Seeing as the clevis rod has several holes, mark the hole in which the pivot rod is connected to prevent having to do adjustments later.

Disconnect the pivot rod from the drainpipe. If the connection is not hand tight you can use a wrench. Pull it out to free the stopper.
With the pivot rod out of the way, you will only need to lift off the stopper from the top of the sink.
- Use a wrench/Channellock to disconnect the locknut holding the flange in place and remove it together with the washer
- Clean the top of the sink as well as underneath the drain flange.
- Just like with the kitchen sink flange, apply a good size of plumber’s putty or silicone caulk bead under the rim of the flange.
- Push the flange through the sink drain opening.
- Place a heavy object on top of the flange to prevent it from shifting when tightening the locknut.
- Slide the washer and locknut and tighten them together. Please check if the washer is threaded. If it is, you need to thread it all the way so that it is firmly squeezing against the sink body. That is the only way to prevent a leak afterwards.
- Again, excess plumber’s putty or caulk will squeeze out from around the flange as a sign that you have a good seal. Scrap it off with a putty knife.
- Drop the stopper inside the sink drain opening and insert the pivot rod through the drainpipe opening. To check if the pivot rod has engaged the stopper, move it up and down. The stopper should move the same way as the rod. Thread the pivot rod coupling on the drainpipe.

- Connect the pivot rod to the clevis rod and secure it with a clip.
- Finally connect the P-trap.
- Test the new seal for leaks. Tighten loose connections if any.
And that is simply how to seal a sink drain using either plumber’s putty or silicone caulk.