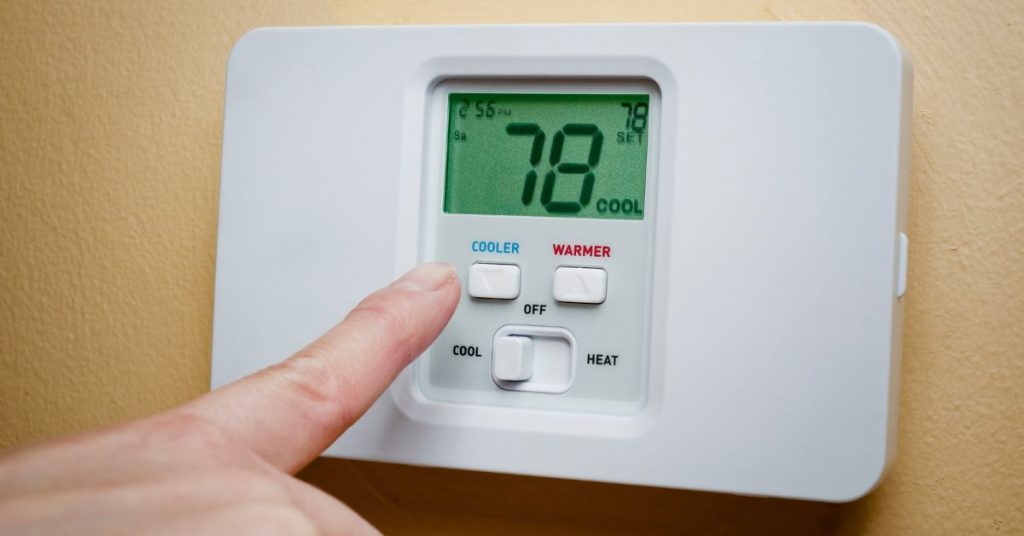
The reasons for an AC not turning on are problems with the thermostat, tripped breaker, blown fuses, failed capacitors, frozen evaporator coil, clogged condensate drain line or damaged/dead motors.
Common Causes
- Thermostat Issues: Incorrect thermostat settings, a dead battery, or a faulty thermostat can prevent the AC from turning on.
- Tripped Circuit Breaker: A tripped circuit breaker in your electrical panel can cut power to the AC unit.
- Disconnected Power: Loose or disconnected electrical connections at the AC unit or the electrical panel can disrupt power supply.
- Faulty Capacitors: Capacitors that have failed or weakened can prevent the AC compressor and fan from starting.
- Safety Switches: Safety switches, such as the float switch in the condensate drain, can shut off the AC if there’s a drainage issue.
- Refrigerant Leak: A significant refrigerant leak may trigger safety mechanisms that prevent the AC from running.
- Compressor Problems: A malfunctioning compressor can prevent the entire AC system from starting.
- Blown Fuses: Blown fuses in the AC unit or the electrical panel can disrupt power flow.
What to Do
- Check Thermostat: Verify that the thermostat is set to “cool,” the desired temperature is lower than the current room temperature, and the batteries (if applicable) are functional.
- Inspect Circuit Breaker: Check the circuit breaker in your electrical panel to see if it has tripped. If it has, reset it and attempt to turn on the AC again.
- Examine Electrical Connections: Inspect the electrical connections at the AC unit and the electrical panel to ensure they are secure and not loose or disconnected.
- Test Capacitors: If you are comfortable with electrical work, test the capacitors with a multimeter or have a technician assess and replace faulty capacitors.
- Check Safety Switches: Ensure that safety switches, such as the float switch, are not triggered due to drainage issues. Address any drainage problems.
- Refrigerant Leak Inspection: If you suspect a refrigerant leak, contact a professional HVAC technician to diagnose and repair the leak and recharge the system.
- Compressor Evaluation: Have a technician assess the compressor’s condition and replace it if necessary.
- Inspect and Replace Fuses: Check for blown fuses in the AC unit and electrical panel and replace them if needed.
AC Not Turning on In House? Reasons and the Solutions
Let us now look at the reasons why your air conditioner is not turning on and what you can do to fix it in more details.
As I mentioned, the first thing you should do is isolate the problem. Do you have a problem with your indoor or outside AC system?
To do that, test if the outside AC unit (also called a condenser unit) is receiving 240 volts of power. You will need a multimeter for that test. Since will also be working with the unit still powered up, you need to be careful not to touch any naked wire.
It is best to put on some insulated gloves. This is how to test if your AC is not turning because of the outside or indoor unit:
- Dash to where your outside unit is located.
- Use a screwdriver to remove the side/cover panel.
- With the panel out, you should see the AC’s contactor. This is a simple component next to the capacitor with wires connected to it.

Note: A contactor is a magnetically powered switch. It has a plunger in the middle (operated by a coil) which pulls in and out to make contact with the system’s circuit. When the thermostat calls for cooling, 24 volts are sent to the coil which is then magnetized, pulling the plunger in, and the cooling starts. After the house is properly cooled, the coil is demagnetized and the plunger pulls out thereby breaking contact, and the unit turns off.
- Look for 2 screws on the side (or bottom) of the contactor where the power cord is connected to the unit.
- Place the 2 micrometer leads on the screws and measure the voltage across them.
If you get 240 volts of power, it means that the problem with your AC is not turning on is due to problems with the condenser unit, usually a failed capacitor or bad compressor/fan motor.
On the other hand, if you do not get voltage across the screws, the outside unit is not receiving power and the problem is mostly due to issues within the house. It could be a tripped breaker, frozen coil, blown fuse, clogged AC drain line or even a malfunctioned thermostat.
You can also check the plunger in the middle of the contactor. If it is pulled in, the capacitor is most likely bad. However, if the plunger is out, the thermostat could be the problem.
Just to be sure, use a screwdriver with an insulated handle to push in the plunger (that will bypass the thermostat). If the unit turns on, the thermostat has malfunctioned.
Let us look at these problems one at a time in more details.
1. Tripped Circuit Breaker

Your AC system is designed to trip the circuit breaker (turning off power to the unit) in case of an overload. Perhaps the reason why your AC won’t turn on is because the circuit breaker has tripped.
The first thing you should therefore do is to locate your main breaker panel in the house and check out if that is the case. The breaker panel will be located somewhere in the in the basement, utility room or garage.
Look for 2 bars or 1 big one labeled “AC” and check if it is the middle instead of the “ON position”. If so, the breaker has tripped. Flip the breaker back to the “ON” position. If you have a double-bar breaker make sure that you flip both bars.
Check if the problem is fixed, or whether the breaker trips back immediately. Sometimes that may be all you need to do.
You should however find out why the breaker tripped in the first place. Usually, breakers trip when the system is forced to work harder than it should. By tripping, it prevents the AC components like motors from overheating and burning out.
An AC will worker harder for some of the following reasons:
- Low refrigerant levels
- Dirty AC coils
- Clogged air filter
- Blocked,collapsed or leaking ductwork
You should therefore investigate further why the breaker tripped in the first place
2. Thermostat Problems
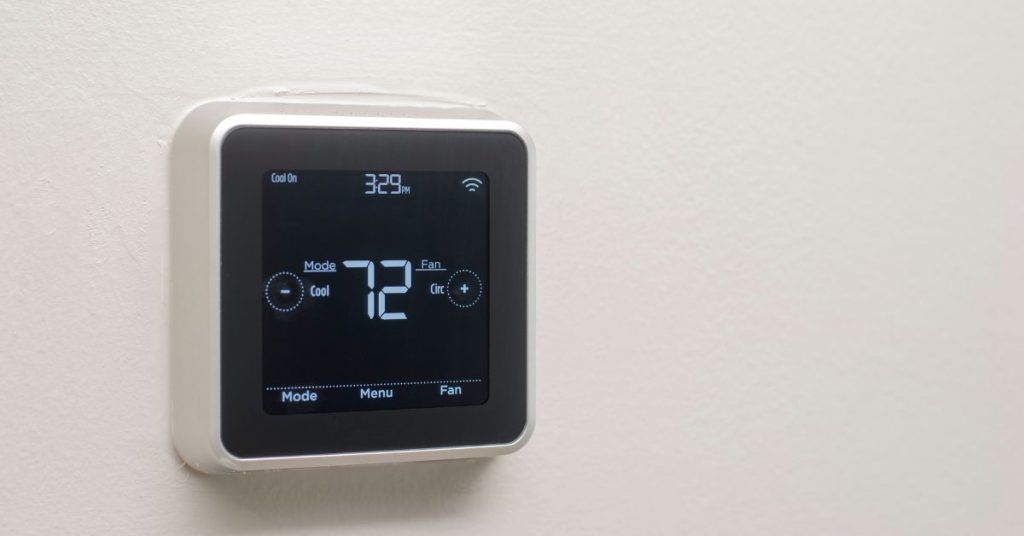
The thermostat is the link between power supply and the AC components. It tells the AC when to turn on and off.
The first thing you should check on your thermostat is whether the display is on or off. If the display is off, you most likely need to replace your thermostat batteries. Please note that not all thermostats have batteries.
The other thing you should do is make sure that your thermostat is set to “cool”. There are many settings on a thermostat and by setting it to “cool” you are telling it exactly what to do.
After that, set the thermostat to 5 degrees lower than the room temperature. Give it a few minutes and see if cold air will starting being blown in the house.
If you have a programmable thermostat, press on “hold” after selecting the temperature you want. You should also see name “HOLD” next to the set temperature on the thermostat. That command overrides other settings and tells the thermostat to only cool the house to that temperature.
To further troubleshoot the thermostat, set the fan from “AUTO” to “ON”. With that setting, the fan will run throughout even when the AC is not in a cooling cycle. Check if there is air being blown in the house or better still dash to the furnace and listen in if you can hear the fan running.
If the fan is running, the thermostat is hardly the problem.
Another thing you can do with your thermostat is manually reset the AC. However, if your AC has a rest button, you don’t need to use the thermostat. Locate the reset button, push it and then try to turn on the AC.
To manually reset the AC, turn off the thermostat for 5 to 10 minutes. Check if that fixes the problem.
3. Blown Fuse

Other than tripping the circuit breaker, a fault in the AC circuit can also cause the fuse to blow. A fuse is basically a low resistance wire whose life is “sacrificed” to protect that of a more expensive component, like a compressor motor
There will be 2 fuses on your AC outside unit on the wall near the unit. The only thing you will need to do is turn off power to the AC unit and remove the fuses.
Next use a multimeter to test for continuity in both of the fuses. If any of the fuses fails the continuity test (the multimeter does not beep), it is faulty and will need to be replaced.
Luckily, AC fuses are cheap and easy to replace. Just take a picture of the fuses and use it at your nearest hardware store to buy 2 exact same fuses. Install the fuses and check if the AC can now start.
Testing the fuses of the inside unit is however not as easy as that of the inside unit.
4. AC Switch is Turned Off
Air conditioners have a switch inside the house which turns the whole system on and off (including the thermostat). It is usually located close to the furnace or in the attic, crawlspace or in a utility closet.
It is very easy for someone to mistake the switch for a light switch and flip it to the off position. Locate your indoor switch and find out if that is the situation. If so flip it back to the on position.
Apart from the indoor switch, most air conditioners have an outside switch next to the breaker box on the wall where the condenser unit is located. Someone might have turned off that switch as well.
Dash outside and check if the switch if off and turn it on. Also, make sure that the AC units are properly plugged in the power outlet. Sometimes the solution is usually that easy but most people almost never think about it.
5. Frozen AC Coil
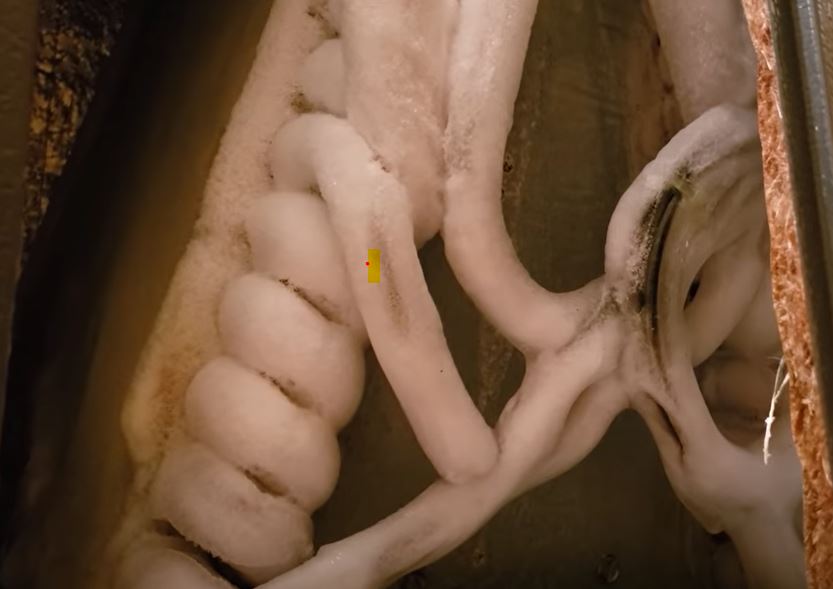
An evaporator coil is the AC unit located inside the house. It is a heat exchanger. A cold refrigerant/Freon enters the coil while the return air duct brings in warm indoor air.
The refrigerant absorbs heat from the air and evaporates, heading out to the compressor. The now cooled air is then supplied back to the house through the supply air ducts.
Apart from cooling the air, the coil also removes moisture from the air (reduces humidity). The moisture drains out through the AC drain line.
If there is a problem with the supply of air to the evaporator coil, the temperature of the refrigerant will fall below freezing point. Instead of the moisture draining out, it will form a block of ice, covering the entire coil.
As you can imagine, heat exchange will stop taking place. The refrigerant will remain liquid and no hot air will be supplied to the house. As the system struggles to cool the house, it will overheat and the AC will turn off.
So, what causes an air conditioner to freeze? The following are some of the causes of a frozen AC evaporator coil:
Dirty Air Filter
An AC is equipped with a filter which removes dust, pollen, lint, viruses and other impurities from the air. It is located in the return air duct so that the impurities cannot be recirculated in the house.
Ideally, an AC filter should be replaced after 3 months or even sooner. If you fail to change the filter, airflow to the evaporator coil will be restricted.
As you can imagine, the refrigerant will have less air to cool which will cause it to keep lowering the temperature and hence freezing of the coil.
A dirty AC filter also causes the whole AC system to overwork, which apart from increasing your energy bills causes the capacitor to fail or the circuit breaker to trip.
If you don’t know how to change an AC filter, check out this guide.
Faulty Blower/Fan
The evaporator coil’s blower is responsible for pulling warm air from the house through the return air ducts. If the blower is faulty, it will barely send enough warm air to the evaporator.
As a result, the evaporator coil will just be too cold with hardly any air to cool. And that is how freezing of the coil starts.
Troubleshooting and repair of an AC blower is not something most homeowners can do on their own. It is best to call in a professional technician to fix it.
Blocked/Leaking Ducts
In central air systems, air moves through a network of ducts. If the return air ducts are leaking or even clogged, less air (if any at all) will get to the evaporator coil.
Again, the coil will be so cold but without sufficient warm air to cool. Ice will start building up on the surface of the coil and become one big block of ice until the problem is fixed.
You should call in a technician to inspect and fix leaks or clogs in the ductwork. This job cannot be DIYed.
Low refrigerant Level
An AC system is a sealed/closed-loop system. Unlike the gas in your car, you don’t need to keep topping it up with the refrigerant. If your refrigerant levels are low, it means that you have a leak somewhere in your system.
When the refrigerant leaks, the remaining one keeps on expanding (lowering its pressure). When the pressure of the refrigerant is reduced, its temperature reduces as well, until it falls below freezing point and the evaporator coils starts to freeze.
Since you need gauges to test and top up the system, you will hardly be able to do this job on your own. It is a job best left to professionals.
Dirty Evaporator Coil
Despite having a filter, some dust will still pass through and settle on your evaporator coil. Continued deposits makes it hard for air to get to the coil resulting in freezing.
To conclude this point, if you have a frozen AC coil, hire a technician to get to the root of the problem and fix it. Trying to thaw the ice without getting to the root of the problem is hopeless.
Also, attempting to run an AC despite its freezing problems will just overwork the system and you may end up replacing the compressor.
6. Clogged Condensate Drain Line

As I have mentioned above, the other function of an AC apart from cooling is dehumidification. When the warm indoor comes into contact with the evaporator coil, moisture in the air condenses and drains into a drain pan located under the coil.
The condensate drain pan is also connected to the drain line, which drains the condensate outside the house. As such, the drain pan should never be full of water since it is continually being drained out.
Due to the humid nature of the system, algae tend to grow and multiply easily inside the AC drain line. With a clogged drain, the water in the condensate drain pan cannot drain out.
To make sure that the water does not fill and overflow, the drip pan is fitted with a float switch. The float switch is an electric switch connected to the thermostat.
If the level of water in the drip pan rises to a certain level, the float switch automatically turns off the thermostat. With the thermostat off, the AC will not produce anymore condensate.
Dash to your basement or wherever the indoor unit is located. Check if the condensate drip pan is full of water. If it is, the drain line is clogged.
This is how to unclog an AC condensate drain line:
- Locate the AC drain line outside and connect a shop vac’s hose to it. Use a rag or duct tape to seal around the hose and run the vacuum for a minute. It will suck out all the gunk from the drain line.
- Alternative, remove the cap on the tee (near the drip pan) and use a thin snake to pull out the clog. Usually, the clog will be too far from the tee.
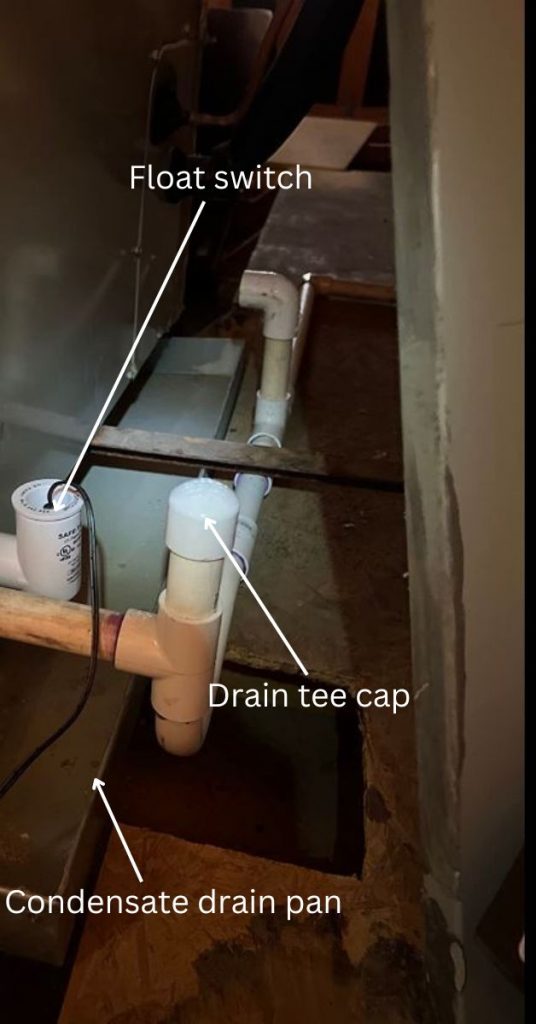
- Use vinegar. Pouring vinegar down the drain line via the tee will break down and clear the clog. Sometimes you can even pull the clog out with your hand.
To prevent your AC drain line from clogging, clean it regularly. Learn how to clean an AC drain line in this post.
7. Bad AC Capacitor
Most of the time when an AC won’t turn on, a bad capacitor is usually to blame. The function of an AC capacitor is to supply the AC motors with the powerful jolt of electricity needed to start and run the motor.
There are start and run AC capacitors. The start capacitor only comes on for a few seconds to give the motors the startup torque required and then disconnects from the circuit when the motor picks up.
Run capacitors on the other hand maintain a constant supply of current to the motor circuit throughout the cooling cycle. Most AC systems however do not have a start capacitor but will always have a run capacitor.
Even if you have start capacitor, it will hardly fail. The run capacitor is the one which fails a lot. Start capacitors are black in color while run capacitors have a shiny metallic exterior.
So, how can you tell if you have a bad capacitor? The best way is to test the capacitance (ability to store charge) of the capacitor. When capacitors fail, they cannot store a charge and hence they cannot start the AC motors.
If you don’t already know, the capacitors are located inside the outside AC unit.

How to Test and Replace an AC Capacitor
- Turn off power to the AC unit.
- Turn the thermostat off as well.
- Remove the outside AC’s unit cover/side panel. It will be the panel on the side where power is connected to the unit.
- Inspect the capacitor. The capacitor will be the cylindrical or oval component with terminals at the top. If there are 3 terminals, you have a dual capacitor. 2 terminals means you have a single run capacitor and there should be 2 of them (one for the compressor and the other for the fan motor).
- Is the capacitor swollen at the top? Or is a fluid leaking out from it. If you answer “YES” to any of these questions, the capacitor is bad and should be replaced. You don’t even need to test it. Bad capacitors can however still look and hence the reason to test them.
- Discharge the capacitor. Capacitors store a high charge and can badly shock or burn you if you touch the terminals without discharging them. The good thing is that run capacitors will have been drained by the motor, but you still need to discharge them.
- To discharge a single run capacitor, use a screwdriver with an insulated handle to short the 2 terminals. When discharging a dual run capacitor, use the screwdriver to short the common “C” and HERM (compressor) terminals then common and FAN terminals. More on discharging capacitors here.
- Test capacitance. For a single run capacitor, just set the multimeter to capacitance (MFD) and place the leads on the 2 terminals. Note down the reading. Test the other capacitor as well.
- To test a dual capacitor, place the leads on the common and HERM terminals and take down the readings, then test common and FAN terminals. Note down the readings as well.
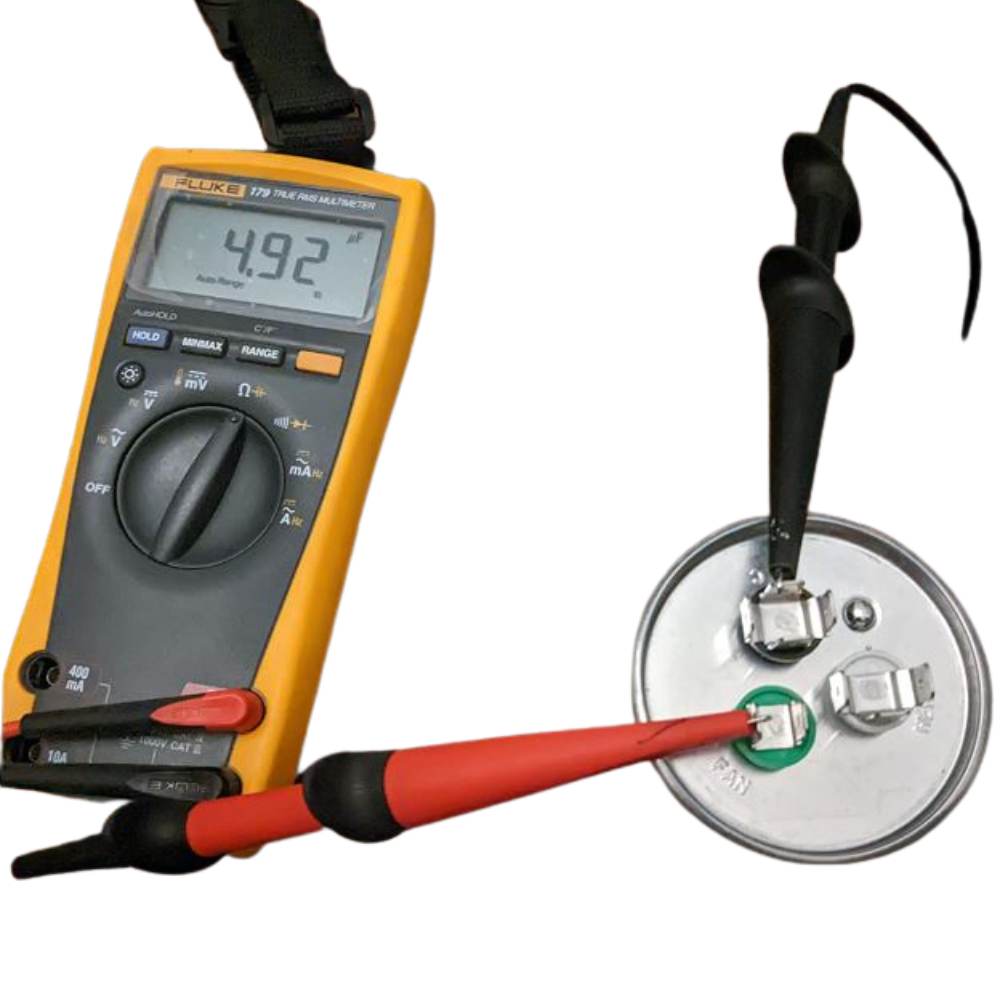
Compare the readings with what is written on the capacitor. The capacitance usually has a margin of plus or minus 6%. Therefore, you expect the reading of a good capacitor to be between 94% and 106% of the required microfarads.
In dual run capacitors, one side of the capacitor can be good while the other could be bad. Replace the capacitor regardless. With single run capacitors, replace both of them or replace them with a dual run capacitor.
When buying a replacement capacitor, make sure you buy one with similar ratings (capacitance and voltage) as the old one. It is also good to buy a quality capacitor. Cheap capacitors can even last for 1 year before needing a replacement.
- To replace an AC capacitor, start by taking a picture of the old capacitor and connections so that you don’t forget how to connect them back.
- Disconnect the wires from the capacitor. You may need a needle-nose pliers here.
- Undo the strap connecting the capacitor to the unit.
- Connect the wires to the new capacitor and strap it in position.
- Put back the cover panel.
- Turn on power to the AC and also turn on the capacitor.
- Check if the AC starts promptly.
8. Failed Motor
If your outside unit is receiving 240 volts of power and the capacitor is good, you are most likely dealing with a failed motor. The best way to find out though is by testing the resistance to both fan and compressor motors.
usually, if the fan motor is bad, the fan will not spin even when the AC is buzzing or humming. With a bad compressor motor is bad, grinding, screeching or clattering noises can be heard before the motor fails completely.
To troubleshoot or even replace a bad AC motor is a job best left to professionals. Sometimes it makes more sense to replace the entire unit when dealing with a bad compressor motor. That is usually a very expensive repair.
And basically those are the reasons why your air conditioner is not turning on and the different ways to fix the problem.
