Picture this: you walk into your kitchen or bathroom, filled with pride at the beautiful tiles adorning the floor or walls, only to have your gaze fall upon the grout lines, marred by stains, mold, and unsightly discoloration. It’s a common sight in many households, but fear not – with the wealth of knowledge and expertise contained within these pages, you’ll soon be wielding your grout brush with the confidence and skill of a seasoned professional.
Grout, often overlooked in favor of its more glamorous tile counterparts, plays a crucial role in not only enhancing the aesthetic appeal of your tiled surfaces but also in maintaining their structural integrity and longevity. It serves as the unsung hero, providing stability, support, and protection against moisture infiltration, ensuring that your tiles remain firmly in place for years to come. However, like any hero, grout is not immune to the ravages of time and neglect. From daily wear and tear to spills, dirt, and the insidious growth of mold and mildew, grout faces a constant battle against the forces of grime.
Understanding Grout
Grout is the material used to fill the gaps between tiles, providing stability and preventing moisture from seeping underneath. There are several types of grout available, each with its own unique properties:
- Sanded grout: Contains sand particles and is suitable for wider grout lines. It’s more durable but can scratch delicate tiles.
- Unsanded grout: Smooth in texture and ideal for narrow grout lines. It’s less prone to scratching tiles but may crack in wider gaps.
- Epoxy grout: Resistant to stains and moisture, making it perfect for high-traffic areas and wet environments. It’s the most durable option but can be challenging to work with due to its fast-drying nature.
Preparing for Grout Cleaning
Before diving into the grout cleaning process, it’s essential to gather the necessary supplies and prepare your workspace:
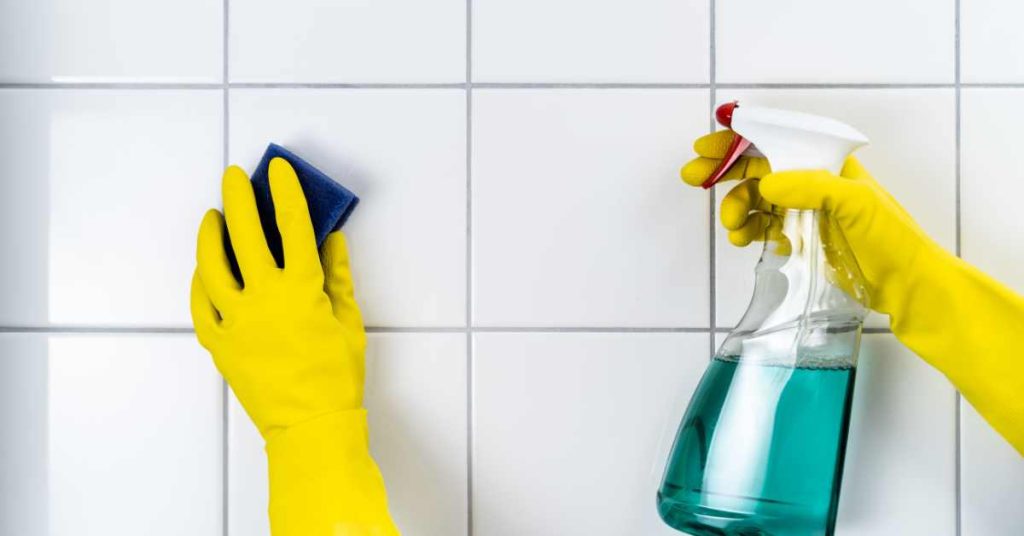
- Supplies: Grout cleaner (commercial or homemade), scrub brush or grout brush, old toothbrush for detail work, sponge or cloth, protective gloves, and goggles.
- Workspace preparation: Ventilate the area to avoid inhaling fumes from cleaning products. Lay down protective coverings to prevent damage to surrounding surfaces.
Inspecting the Grout

Take a close look at the grout lines to assess their condition and identify any specific issues that need attention:
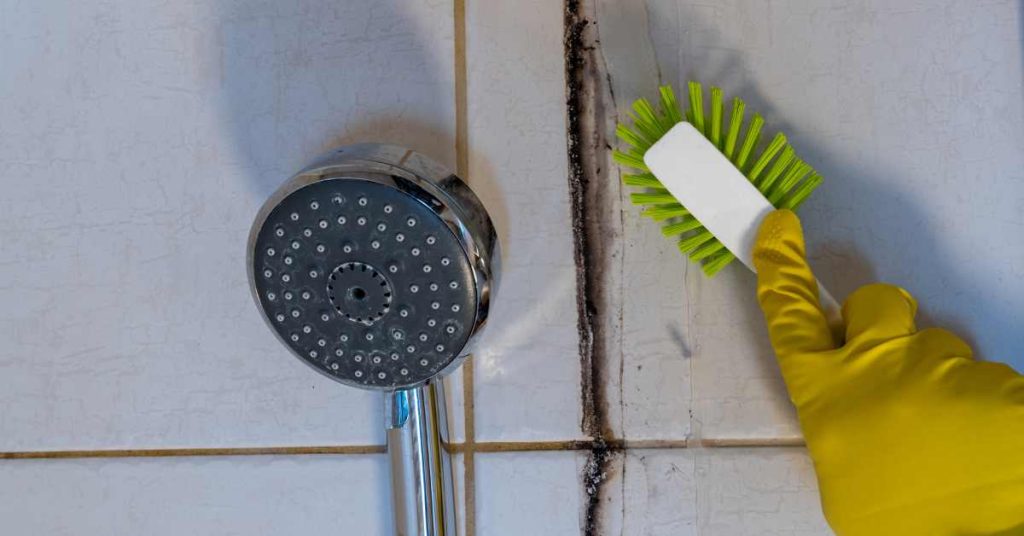
- Check for mold and mildew: Look for black or greenish spots indicating mold growth, especially in damp or poorly ventilated areas like bathrooms and kitchens.
- Examine for stains: Notice any discoloration or staining caused by spills, dirt, or grime buildup over time.
- Assess overall cleanliness: Determine the general level of dirtiness and decide on the appropriate cleaning method based on the severity of the grout’s condition.
Basic Grout Cleaning Techniques
When dealing with lightly soiled grout, simple household cleaners and scrubbing methods can often do the trick:
- Use a mild cleaner: Mix equal parts water and vinegar or water and baking soda to create a natural cleaning solution. Apply it to the grout lines and let it sit for a few minutes before scrubbing with a brush.
- Scrub gently: Use a scrub brush or grout brush to gently scrub the grout lines in a circular motion. Avoid using abrasive cleaners or brushes that could damage the grout or tiles.
- Rinse thoroughly: Once the grout is clean, rinse the area with clean water and wipe away any remaining residue with a damp cloth or sponge.
Deep Cleaning Grout
For tougher stains and mold growth, you may need to employ more intensive cleaning methods:
- Use a commercial grout cleaner: Choose a cleaner specifically formulated for grout and follow the manufacturer’s instructions for best results. Some cleaners may require dilution or mixing before use.
- Apply the cleaner: Use a brush or sponge to apply the cleaner to the grout lines, making sure to cover the entire surface evenly.
- Let it sit: Allow the cleaner to penetrate the grout for the recommended amount of time. This will help loosen stubborn stains and kill mold and mildew.
- Scrub and rinse: After the cleaner has had time to work, scrub the grout lines with a brush or scrubbing pad to remove stains and dirt. Rinse the area thoroughly with clean water to remove any residue.
Grout Sealing
Once the grout is clean, it’s essential to seal it to protect it from future stains and moisture damage:
- Choose the right sealer: Select a grout sealer that is suitable for your type of grout and tiles. Epoxy grout may not require sealing, but sanded and unsanded grouts will benefit from a protective sealant.
- Apply the sealer: Use a brush or applicator to apply the sealer to the grout lines, working in small sections at a time. Be sure to follow the manufacturer’s instructions for proper application and drying times.
- Buff and polish: Once the sealer has dried, buff the tiles with a clean, dry cloth to remove any excess sealer and restore shine to the tiles.
DIY Grout Cleaning Solutions

If you prefer to use natural or homemade cleaners, there are several options available:
- Vinegar and baking soda: Mix equal parts white vinegar and water or create a paste with baking soda and water. Apply the solution to the grout lines and scrub with a brush before rinsing with water.
- Hydrogen peroxide and baking soda: Make a paste with hydrogen peroxide and baking soda and apply it to the grout lines. Let it sit for a few minutes before scrubbing and rinsing.
Tools for Effective Grout Cleaning
Having the right tools can make all the difference when it comes to grout cleaning:
- Grout brush: A stiff-bristled grout brush is essential for scrubbing dirt and stains from grout lines effectively.
- Steam cleaner: Steam cleaners use high-pressure steam to loosen dirt and grime from grout lines, making them an excellent option for deep cleaning.
- Old toothbrush: An old toothbrush is perfect for cleaning hard-to-reach areas and detail work.
Tips and Tricks from the Pros
Here are some insider tips for achieving professional-quality results when cleaning grout:
- Pre-treat stains: For stubborn stains, pre-treat the grout with a paste made from baking soda and water or hydrogen peroxide before cleaning.
- Use protective gear: Wear gloves and goggles to protect your skin and eyes from harsh cleaning chemicals.
- Work in small sections: Focus on cleaning one small area at a time to ensure thorough cleaning and avoid missing spots.
Maintenance and Prevention
To keep your grout looking its best, it’s essential to maintain a regular cleaning and maintenance routine:
- Clean regularly: Wipe down grout lines with a damp cloth or sponge after showering or cooking to prevent dirt and grime buildup.
- Reapply sealer: Periodically check the condition of your grout sealer and reapply as needed to maintain protection against stains and moisture.
Conclusion
Congratulations! You’ve now mastered the art of grout cleaning and are equipped with all the tips and tricks you need to keep your grout looking pristine. By understanding the different types of grout, preparing your workspace, and using the right tools and techniques, you can achieve professional-quality results right at home. So roll up your sleeves, put on your gloves, and get ready to enjoy sparkling clean grout for years to come!