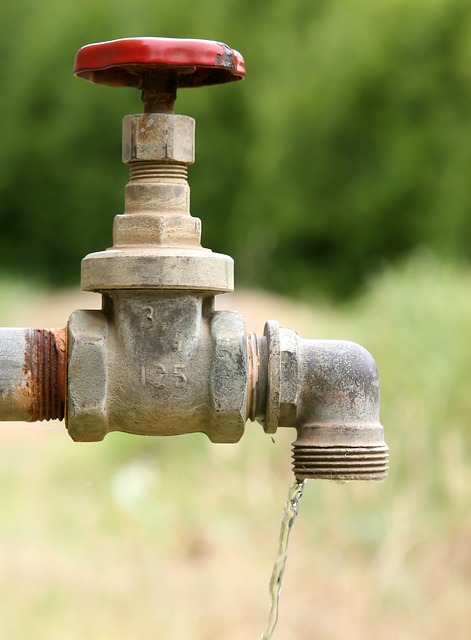
A leaking outdoor spigot, also known as a hose bib or hose faucet, can lead to water wastage and potential damage. Here’s a brief guide on common causes and solutions for a leaking outdoor spigot:
- Worn Washer:
- Cause: The washer inside the spigot can wear out over time, causing water to leak from the spout.
- Solution: Turn off the water supply to the spigot, remove the handle, and replace the worn washer with a new one.
- Loose Packing Nut:
- Cause: The packing nut located just below the handle can become loose, allowing water to seep out.
- Solution: Tighten the packing nut with a wrench to create a proper seal.
- Damaged Valve Seat:
- Cause: A damaged or corroded valve seat can prevent the spigot from sealing properly.
- Solution: If the valve seat is removable, consider using a valve seat wrench to smooth or replace the seat. If it’s not removable, you may need to replace the entire spigot.
- Freezing Temperatures:
- Cause: In regions with cold winters, frozen water inside the spigot can cause cracks and leaks.
- Solution: Install a frost-proof spigot designed for cold climates to prevent freezing-related leaks.
- Leaky Stem or Cartridge:
- Cause: A worn or damaged stem or cartridge can allow water to leak from the spigot.
- Solution: Replace the faulty stem or cartridge with the appropriate replacement part.
- Damaged or Cracked Spigot:
- Cause: Physical damage or cracks in the spigot housing can lead to leaks.
- Solution: If the spigot is severely damaged or cracked, it may need to be replaced entirely.
How to Fix a Leaky Spigot
The method to use when fixing a leaky spigot will depend on where exactly the leak is coming from. It can actually be very easy where you will be over and done within a minute.
Sometimes it can take longer especially when you have to go to the home improvement store to buy a replacement kit. All the same I recommend attempting this repair on your own before reaching out to a plumber.
1. Spigot Leaking from the Handle
When your outside spigot is leaking from the handle, the packing nut which is straight below the handle is either loose or the packing washer is worn out. The solution for this is tightening the loose nut or replacing the worn out washer.

The packing nut and washer prevents the spigot from leaking when the water to the spigot is turned on. This means the spigot will not leak unless there is water running out of the spigot.
To fix this problem, grab an adjustable wrench and turn the packing nut clockwise ¼ or ½ turn to tighten it. Sometimes depending on how loose the packing nut is you might need to give it a complete turn.
If that does not fix the problem, the problem is not with the packing nut but with the packing washer. In this case you will need to remove and replace the packing washer.
Here is how to replace a spigot packing washer:
- Turn off water to the spigot. If there a shut off valve close to the spigot then you are lucky otherwise you will need to turn off water to the whole house.
- Drain the pipe. Turn on the spigot to drain the water already in the pipes.
- Loosen the packing nut with a wrench or pair of pliers and then remove it out all the way.
- Inspect the packing washer. The packing washer is the rubber seal under the packing nut. Check if it is worn out or even warped. Most of the time that is usually the case.

- Remove the packing nut. In order to remove the packing nut, you will first need to remove the spigot handle. The handle is usually connected to the spigot stem using a screw. Remove it with a screwdriver and slide out the packing nut and washer.
- Replace the packing washer. You can take the whole assembly with you to the home improvement store and buy a matching packing washer, but I suggest you just buy a compete spigot replacement kit just in case you have such or other problems in the future.
- Slide in the packing washer followed by the packing nut and then attach the spigot handle.
- Connect the assembly on the spigot valve and tighten it, but not crazy tight.
- Turn on the water shut off valve as well as the spigot handle and check if the leak has been fixed.
If you are desperate to fix the leak urgently but don’t have a replacement packing washer, there is another trick you can use to stop the leak.
- Remove the faucet handle, packing nut and washer. Be sure to shut off the water to the spigot prior.
- Instead of a new packing washer, wrap a thick layer of Teflon tape round the spigot bonnet. Make sure that the layer of Teflon tape is as thick as a new washer.
- Slide in the packing nut and attach the handle to the stem.
- Connect the assembly back and turn the water back on.
- Check if the leak has stopped.
2. Spigot Leaking all the Time
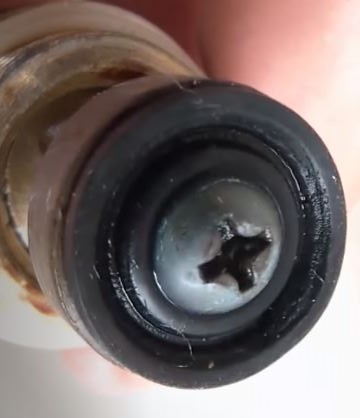
If you spigot is leaking all the time (through the spigot spout), it is a sign that the valve seat washer is worn out. This washer is usually located at the front of the spigot stem, connected to it using a Philips screw.
The way a spigot works is that the handle is attached to the stem, and at the front of the stem is the valve seat washer. When you want to turn on the water to the spigot, you turn the spigot handle counterclockwise, a move which pulls the stem back and in process unseat the washer allowing water to flow out.
To turn off water to the spigot, you turn the spigot handle clockwise and as a result the stem is pushed forward, compressing the washer against the valve seat, shutting off water to the spigot.
Continuous pushing and pulling the washer against the valve seat causes it to wear out due to friction and in the process the spigot starts leaking. Replacing the valve seat washer is a sure way to fix this problem.
Here is how to replace a spigot valve seat washer:
- Turn off water to the spigot and drain out the water trapped in the pipe.
- Using an adjustable wrench or a pair of pliers, loosen the packing nut and pull out the spigot stem.
- Hold the spigot stem firmly in your hand and remove the worn out washer with a Philips screwdriver. Be careful not to lose the screw.
- Replace the washer with a brand new one and screw it in place. Again you can take the stem with you to the home improvement store and buy the correct size of washer if you do not already have one at home.
- Connect the stem back. To do this correctly pull the stem all the way back such that the washer is a close to the bonnet as possible. To do that you just need to turn the spigot handle counterclockwise. Tighten the packing nut with a wrench or pliers but be careful not to strip the threads.
- Turn on the water and check if the leak has been stopped.
The above are the 2 ways of fixing a leaking spigot. If on the other hand the spigot is just too old, the best thing would be to replace it altogether.
3. Replace the Spigot
An outside spigot replacement job is quite easy and fast. I would recommend that you buy a Shark Bite spigot for the sole reason that you do not need to solder in on the pipe. It just snaps tight on the pipe when you push it in.
Here is how to replace an outside spigot.
- Turn off water to the spigot and drain the pipe.
- Using a pipe cutter, cut the pipe as closest to the spigot as possible.
- Push the Shark Bite spigot in the pipe to connect it.
- If you want to secure it further, it comes with 2 screws holes.
If you would like to buy the Shark Bite spigot online get it here on Amazon.
You can also replace your old outside spigot with a modern frost free also known as a frost proof spigot. The Shark Bite frost free is a really good one as it does not need lots of tools to install and also needs no soldering. Check it out here on Amazon.
Related post: How to fix a leaking shut off valve