
To replace a shower faucet handle (lever/knob), follow these steps:
- Gather Tools and Materials:
- Replacement faucet handle.
- Screwdriver (Phillips or flathead).
- Allen wrench (if applicable).
- Plumber’s tape (Teflon tape).
- Replacement screws (if needed).
- Turn Off the Water Supply:
- Locate and turn off the main water supply to the shower to ensure no water flows during the replacement.
- Remove the Old Handle:
- Depending on the handle type, you may need to remove a screw or set screw securing it.
- For a lever handle: Look for a set screw near the base of the handle. Use an Allen wrench to loosen and remove it.
- For a knob handle: Look for a screw or screws usually on the underside or behind the decorative cap. Use a screwdriver to remove them.
- Detach the Old Handle:
- Once the screw or set screw is removed, gently pull or wiggle the old handle until it comes off.
- Clean the Stem:
- Inspect the stem for any debris, mineral deposits, or old plumber’s tape. Clean the stem thoroughly to ensure a proper seal with the new handle.
- Prepare the New Handle:
- If necessary, apply plumber’s tape (Teflon tape) to the threads of the stem to create a watertight seal.
- Attach the New Handle:
- Carefully slide the new handle onto the stem, aligning it with the screw hole or set screw location.
- Secure the New Handle:
- For a lever handle: Tighten the set screw with an Allen wrench to secure the handle in place.
- For a knob handle: Insert and tighten the screws you removed earlier.
- Turn On the Water Supply:
- Gradually turn on the main water supply to the shower.
- Test for Leaks and Functionality:
- Turn on the shower to check for any leaks around the handle. Make sure the new handle operates smoothly and controls the water flow correctly.
- Final Checks and Adjustments:
- Make any necessary adjustments to the handle’s position or tightness to ensure proper function and a secure fit.
- Cleanup:
- Clean up your work area and dispose of any debris.
You are likely to have the following types of shower faucets in your bathroom:
- Lever-type shower faucet
- Knob-type shower faucet
- Single-handle shower faucet
- Double-handle shower faucet
- 3-handle shower faucet
Lever type shower faucets are also single-handle shower faucets. You use the same handle/lever to turn on the water and also choose the temperature depending on which side you turn it. If you have a tub-shower combo, the shower diverter will be on the tub spout.
With a two/three-handle shower faucet, you will have knobs. Each knob will turn on the cold and the hot water. The middle knob in a 3-handle shower faucet is the shower diverter valve.
I will start by showing you how to replace a single-handle/lever shower faucet handle then we will look at how to replace a shower faucet knob/handle later.
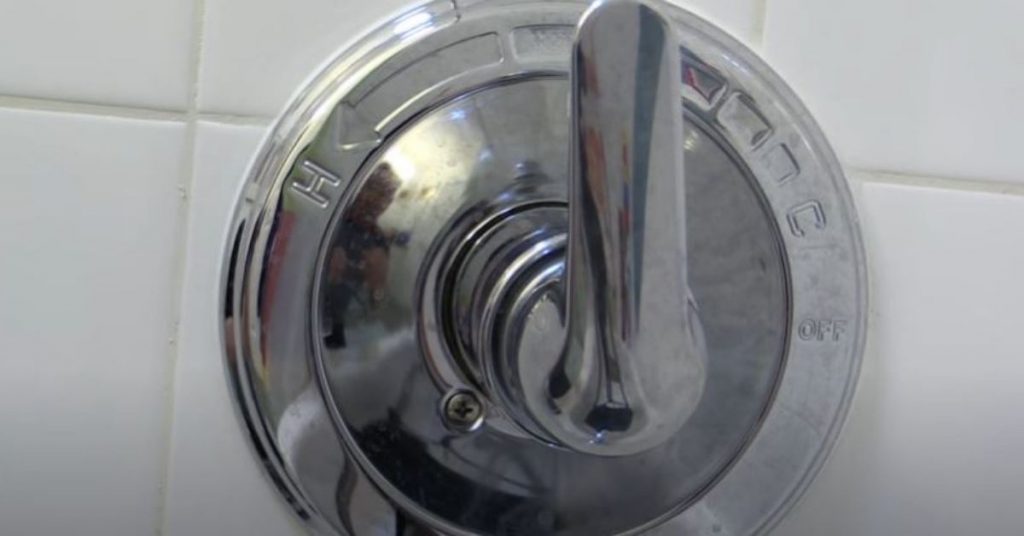
How to Replace a Single-Handle/Lever Shower Faucet Handle

If you have a modern Moen or Delta single-handle shower faucet (some other brands as well), this is the handle you have. The good thing is that you replace a 3-handle shower faucet with this type of faucet. More information on that here.
If you have a broken single-handle shower faucet handle, this is how to replace it:
1. Turn off Water to the Shower
Replacing this handle will require you to first turn it upside down to access the screw. There is no way to do that without water running out of the shower head or tub spout. For that reason, you will first need to turn off water to the shower.
If you are lucky, there will be an access panel on the wall behind the shower. There are shut off valves behind the access panel for the hot and cold water.
If you have no shower access panel in your house, you will need to turn off water to your entire house. The shut off valve will be in the basement very close to the water heater where the main water line enters the house.
Turn on the faucet to drain the water already in the pipes. Do not forget to plug off the shower/bathtub drain to prevent losing screws down to the drain.
2. Remove the Faucet Handle
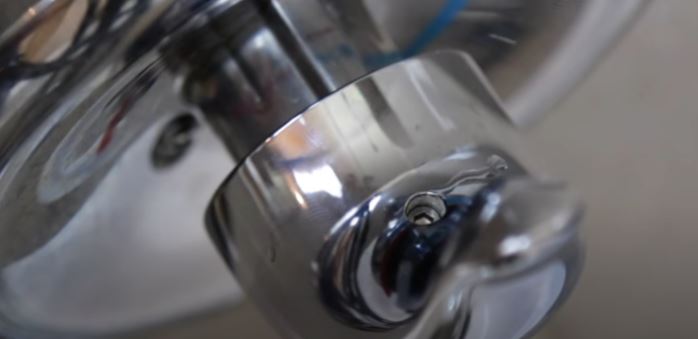
- Turn the faucet handle upside down to reveal a hex screw that connects it to the rest of the faucet.
- Use an Allen wrench to loosen and remove the screw.
- Pull out the handle as you wiggle it at the same time.
2. Remove the Escutcheon
An escutcheon is the decorative trim plate which is used to cover the unsightly hole on the bathroom wall where the faucet is installed. It is installed purely for cosmetic purposes.
All faucets don’t look the same. You will notice that after removing the faucet handle, there may be an anti-scald device or other attachments at the tip of the shower cartridge. The good thing is you can remove the escutcheon without removing these parts.

The escutcheon will be attached to the wall using 2 screws. Loosen the screws with a screwdriver and remove the escutcheon.
Note: The escutcheon may be caulked to the wall. If that is the case, cut through the caulk with a knife. You may also need to tap the escutcheon gently to completely free it up.
3. Install the New Faucet Handle
- Slide in the new escutcheon and align the screw holes as they were before. Put in the screws and tighten it against the wall.
- Push the new faucet handle on the shower cartridge. Before putting in the screw, turn the handle left and right to be sure that is properly engaged and that it is moving freely.
- Insert the screw and tighten it with the Allen wrench.
- Turn the water to the shower back on and check the handle is shutting off and turning on precisely.
And basically that is how to replace a shower faucet handle in a single-handle shower faucet.
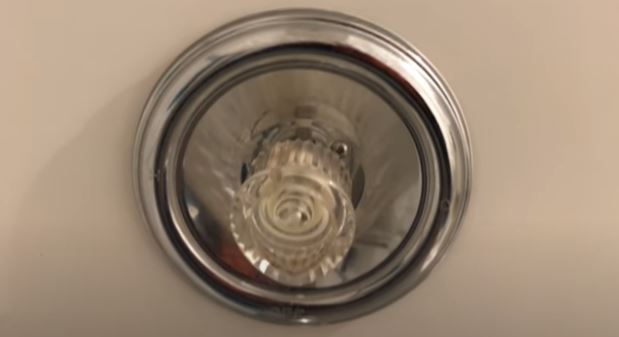
How to Replace a Knob Shower Faucet Handle
Replacing the handle in a two/three-handle shower faucet will take longer if you are replacing all the 3 handles (recommended) but it is absolutely easy. I don’t even turn off the water to the shower during the replacement.
The shower faucet/knob is usually attached to the shower cartridge/stem by a long Philips screw. This screw is however hidden by a small index cap at the front/face of the knob.
Keenly look at the front of your shower faucet knob. You will see a small index cap either with the faucet brand logo or with initials ‘C’ or ‘H’ to denote cold or hot water.
Here is how to replace a two/three shower faucet handle:
- Remove the index cap. For this you will need a flat and sharp surface like a small flathead screw driver or even a knife. Pry off the off the cap being careful not to injure your fingers. Don’t worry if it breaks.
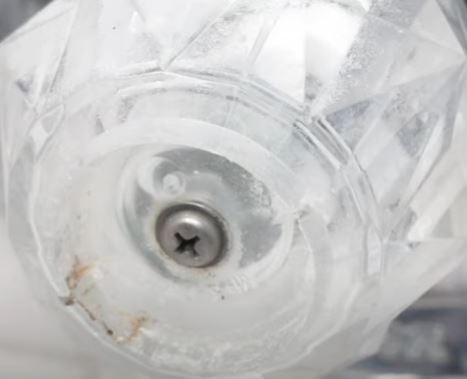
- Use a Philips screwdriver to remove the screw. As you hold the screwdriver with one hand, use your other handle to grab the knob and counter the force of the screwdriver. This will prevent you from turning the faucet on.
- Once the screw is out, pull out the knob. Depending on how long the handle has been there, it might be very sticky so you will need to wiggle and pull it out forcefully.
- Remove the escutcheon. Again, this step is optional. With these types of faucet handles, the escutcheon could be threaded on the faucet stem. All you will need is to do is loosen it with a wrench.
- Install the new escutcheon. Slide in the new escutcheon and secure it against the wall.
- If you don’t want to replace the escutcheon, clean the old escutcheon/stop tube especially if there are mineral deposits on it to allow the new handle to slide in freely.
- Slide in the new knob and secure it with a screw.
- Pop in the new index cover to conceal the screw.
- Test the new handle.
And that is how to replace a shower faucet handle. I hope this guide was helpful.
See also: Signs, Effects and Solutions for for more details.
See also: 5 Reasons To Replace Your for more details.