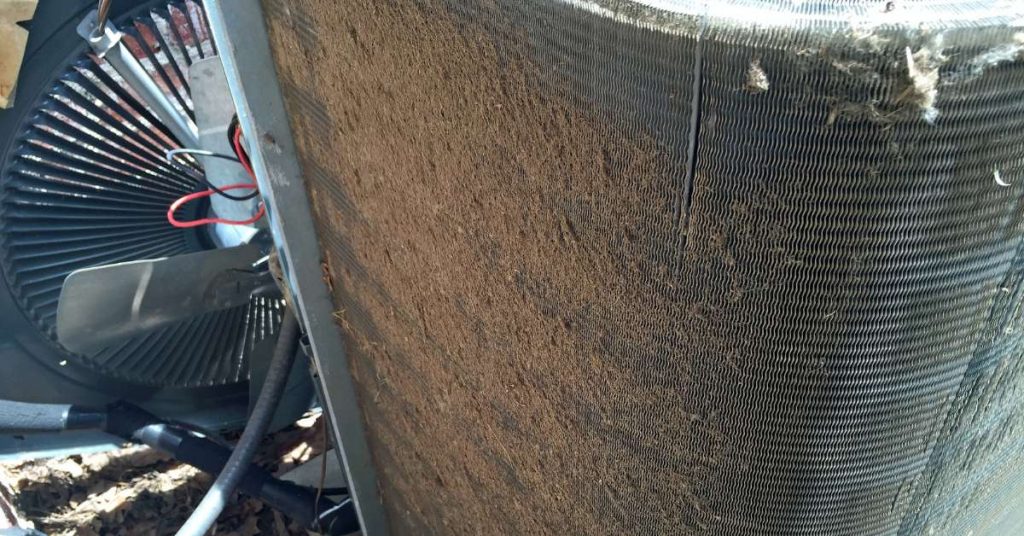
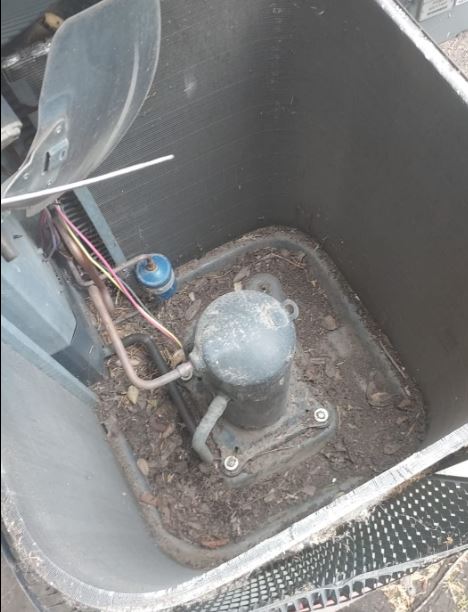
Cleaning your AC condenser (also known as outside unit/coil) can help the unit cool your house better and efficiently. Actually, one of the main reasons for an AC that is not cooling is a dirty condenser coil.

Here’s a summary of the steps for effective condenser cleaning:
- Safety First: Before starting any maintenance, ensure the power to the AC unit is turned off at the circuit breaker to prevent electrical hazards.
- Gather Necessary Tools: You’ll need basic tools such as a screwdriver, a hose with a spray nozzle, a fin comb or brush, and a coil cleaner solution.
- Remove Debris: Clear the area around the condenser to ensure unrestricted airflow. Remove leaves, branches, or any debris that might have accumulated on or around the unit.
- Clean the Fins: Gently clean the fins, which are the thin, metallic blades on the condenser’s exterior. Use a fin comb or brush to straighten any bent fins, as bent fins can impede airflow. Be careful not to damage the fins further.
- Hose Down the Unit: Use a hose with a spray nozzle to rinse the condenser coils from the top down. Ensure the water pressure is not too high to avoid damaging the fins or pushing debris further into the unit.
- Apply Coil Cleaner: If the coils are still dirty, apply a commercially available coil cleaner according to the manufacturer’s instructions. This solution helps break down and remove stubborn dirt and grime.
- Rinse Thoroughly: After applying the coil cleaner, thoroughly rinse the coils with clean water. Be sure to rinse from top to bottom to ensure all cleaning residue is washed away.
- Allow Drying Time: Allow the condenser to dry completely before restoring power to the unit. This prevents electrical issues and mold growth.
- Trim Vegetation: Regularly trim and maintain any vegetation around the condenser to prevent it from obstructing airflow.
- Turn Power Back On: Finally, return to the circuit breaker and switch the power back on to the AC unit.
Symptoms of Dirty Condenser Coils

After cooling (by absorbing heat) the indoor air, the refrigerant is compressed and enters the condenser coil as a hot gas. As it goes through the many loops in the condenser coil, the fan pulls air from the surrounding through the fins and blasts it across the coil.
The air absorbs heat from the refrigerant until it cools down and turns to its liquid form. That way it can go back inside the house for another round of cooling.
- When the condenser coil is dirty, it means that the fins on the coil (looks like a car’s radiator) are clogged and air cannot flow through them (or less air than needed will flow). As you can expect, the AC will not blow cold air in the house, or the airflow will reduce significantly.
- Apart from a reduction in the airflow in your house, the AC’s efficiency will be impacted. Since the thermostat will still be calling for cooling, the AC will be forced to work harder and hence an increase in energy bills.
- Continuous running of the fan and condenser motor causes them to overheat. To prevent them from burning out, the AC trips the breaker. If your AC breaker keeps tripping and you have low airflow in the house, a dirty condenser coil may be the culprit.
- A clogged up condenser coil causes air to be trapped inside the unit. If the outside temperature is high as well, the AC capacitor can overheat and fail. With a bad capacitor, your AC may not even start.
- Continued use of a dirty capacitor can cause the AC motors to fail prematurely.
How to Clean an Air Conditioner Condenser Coil
You can easily clean a condenser coil by simply spraying water on it from top to bottom. While that helps a little, it does not remove everything. The best way to clean the condenser is from inside-out.
You will need the following tools:
- Cordless drill or screwdriver
- Brush with soft bristles
- Water hose
- Coil cleaner
After putting together your tools, follow the following steps:
1. Turn off Power to the AC
In many condenser coils setups, there will be a breaker box on the wall next to the unit. To cut off power, just pull out the plug from the breaker.
Alternatively, turn off power at the main circuit breaker panel inside the house. There will be 2 bars (120 volts each) or 1 big bar (240 volts).
2. Remove the Fan Assembly
As I have mentioned, the best method to clean the condenser coil is from the inside-out. To access the inside of the coil, you will first need to get the fan assembly (grille, fan and motor) out of the way.
The grill is held in place using a few screws. Remove them and carefully pull the entire fan assembly on the side of the unit. Since the fan motor has a power cord connected to it, you don’t want to pull it too hard.
3. Remove the Condenser Panels

There are 2 types of air condenser units. There is a type where the fins are covered using slotted panels all round it, and there are those whose fins are exposed. If you have the first type, you will need to remove the panels.
Tip: If there are overgrown bushes too close to the condenser coil, they could be restricting the intake of air by the coil. Ideally, there should be more than 1 foot of free space all around the condenser unit so if the bushes are too close cut them down.
4. Clean the Condenser coil with a Brush
Start by inspecting inside the condenser coil (where the compressor is located). Can see you large debris inside which you can pick up with your hand. Go ahead and pick them and suck out the little once using a shop vac.
After that, use the soft-bristled brush to clean the coil by brushing the fins from the top, working your way all the way to the bottom. Don’t leave the gunk near the unit since it will be sucked in as soon as you start the AC and clog the fins again.
The AC coils are very delicate and can easily bend and that is why you should brush them gently and not with a wire brush. Bent fins have the same effect on the AC as gunk since they also restrict the free flow of air.
5. Spray the Cleaner on the Coil’s Fins
If you are using a commercial no-rinse or self-rinsing coil cleaner, spray it on the fins from the inside of the coil. Again, start spraying from the top all the way to the bottom.
The cleaner will penetrate through the fins, break down the gunk and emerge on the outer side of the coil. If you are using a homemade cleaner (dish soap and water in spray bottle works just fine), follow the same technique.
Let the cleaner sit in the fins for 5 to 10 minutes before finishing up by rinsing.
6. Rinse the Coil with Water

Coil cleaners are self-rinsing but rinsing the coil with water allows you to see if the coil is properly cleaner or whether there are areas you need to clean again.
When using water, the pressure needs not to be very high since high pressure can also bend the fins. Also, don’t strike the fins with the water directly. Spray the water at an angle, starting from the top and let the dirty water and gunk flow down via gravity.
When rinsing the coil, start from the inside and then rinse the outside. A sign of clean condenser coils is when you use a flashlight on the inside of the coil and see the light from the outside.
7. Put Back the Panels and Fan Assembly
Now that the condenser coil is clean, you can put back the panels and the fan assembly. Make sure that all the screws have been put in and tightened.
The only thing left to do now would be to turn on the unit. I personally like to give the condenser coil a few minutes to dry before turning it back on.
To prevent your condenser coil from being clogged by debris to the point that it is affecting the AC’s efficiency, clean it at least once a year. Also a cover helps to keep debris away when the AC is not being used.
And simply that is how you clean an air conditioner condenser coil. If you clean your AC coils yourself, you can save between $200 and $500 which is charged by HVAC technicians.
