Cleaning a P‑trap is one of the most effective ways to keep your sink draining smoothly, prevent foul odors, and avoid costly plumbing repairs.
In this comprehensive guide, you’ll learn exactly how to clean a P‑trap, whether you’re tackling grease buildup in the kitchen or hair clogs in the bathroom, using three proven methods. You’ll also discover essential tools, safety precautions, troubleshooting tips, and answers to frequently asked questions.
Why Regular P‑Trap Cleaning Matters
A P‑trap is the U‑shaped section of pipe beneath every sink, tub, or shower. It holds a small amount of water at all times, creating a seal that prevents sewer gases from entering your home. However, every time you run water down your drain, tiny bits of debris, oil, grease, food particles, hair, and soap scum get caught in that curve. Over time, this buildup can:
- Slow drainage: As debris accumulates, water flow diminishes. Slow-draining sinks quickly turn into standing-water nuisances.
- Emit foul odors: Decaying organic matter trapped in the P‑trap breeds bacteria, leading to unpleasant sewer-like smells that waft up through the drain.
- Harbor pests: Cockroaches and drain fly larvae thrive in dark, moist environments. A clogged trap can become a breeding ground for bacteria.
- Invite costly repairs: Ignoring minor clogs forces pressure deeper into your plumbing system. Eventually, you’ll need a professional to snake or replace pipes, which can be a significant expense.
By cleaning your P‑trap regularly (ideally every 3–6 months for kitchen sinks and every 1–2 months for bathrooms), you’ll maintain optimal drainage, eliminate odors before they start, and extend the lifespan of your plumbing system. In the long run, this simple maintenance saves both time and money.
Must Read “S-traps vs P-traps – Differences and Code Requirements“
Essential Tools & Safety Precautions
Before attempting any P‑trap cleaning method, gather the following supplies:
- Bucket or pan: To catch water and debris when you disconnect the trap.
- Adjustable pliers or pipe wrench: For loosening slip nuts.
- Flexible pipe brush or drain snake: To scrub the inside of the trap and pipes.
- Rubber gloves: Protect your hands from grime, bacteria, and cleaning agents.
- Flashlight: Helps you inspect dark corners inside the trap.
- Old towels or rags: For wiping up spills and drips.
- Baking soda and white vinegar (for Method 1).
- Zip‑tool hair remover (for Method 3).
Safety First:
- Turn off the water supply to the fixture, or be prepared to catch all drips.
- Work slowly, and forcibly twisting or yanking pipes can cause damage or leaks.
- Ventilate the area if you use chemical cleaners (although we recommend natural methods here).
- Wear eye protection if you anticipate splashes from cleaning solutions.

Method 1: Baking Soda, Vinegar & Hot Water
This chemical‑free approach is perfect for routine maintenance and light clogs, especially grease in kitchen sinks and soap scum in bathroom basins.
Why It Works
- Baking soda (a mild base) and vinegar (a weak acid) react to produce carbon dioxide bubbles that agitate and break up grime.
- Hot water melts grease and flushes out loosened debris.
Step‑by‑Step Instructions
- Clear standing water. Run your faucet until the sink is nearly empty so the mixture reaches the trap, not just the sink.
- Measure baking soda. Pour 1 cup of baking soda straight into the drain.
- Add vinegar. Slowly pour 1 cup of white vinegar on top, stand back for fizzing.
- Seal the drain. Use a stopper or rag to keep the reaction concentrated in the trap.
- Wait 15–20 minutes. Let the fizz loosen the buildup.
- Boil or heat water. Boil at least 1 gallon of water (or use the hottest tap water if dealing with porcelain).
- Flush the drain. Carefully pour the hot water into the drain in stages, allowing it to work its way down.
- Rinse thoroughly. Run the tap for another minute to ensure complete clearance.
Pro Tip: For stubborn grease, repeat once more or follow up with Method 2 if necessary.

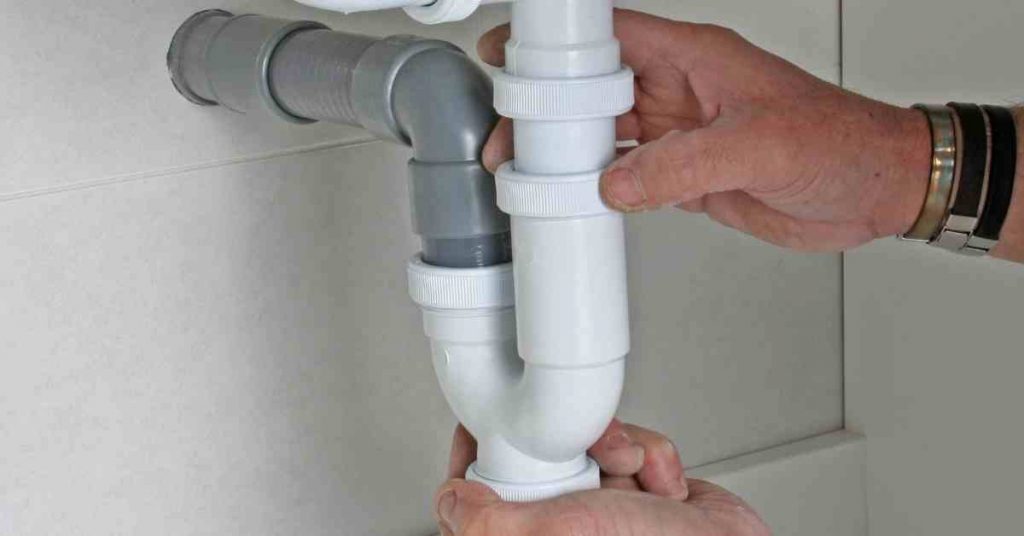
Method 2: Remove & Scrub the P‑Trap
For more persistent clogs, physically removing the P‑trap allows you to clear out every bit of debris.
Why Choose This Method
- Complete cleaning, no hidden residue left behind.
- Inspection opportunity, identify pipe damage or leaks early.
- Ideal for hair, chunky debris, and pipe scaling.
Detailed Steps
- Prepare the area. Clear items under the sink and lay down towels to protect the cabinet floor.
- Position your bucket. Place it directly under the P‑trap U‑bend.
- Loosen slip nuts. Use your hands first; if they’re tight, gently apply pliers or a wrench. Turn nuts counterclockwise.
- Detach the trap. Carefully pull the curved trap section downward, and water and debris will drain into the bucket.
- Empty the trap. Tip it over a trash receptacle; use a disposable scraper or paper towels for sticky residue.
- Scrub inside. Insert a flexible pipe brush and rotate vigorously to dislodge buildup. For narrow areas, a hand‑held drain snake works well.
- Clean side arms. Don’t forget the horizontal arms connecting to the wall and sink tailpiece; use a long brush or snake.
- Inspect washers/gaskets. Replace any worn or cracked seals to prevent future leaks.
- Reassemble the trap. Realign the U‑bend and tighten slip nuts by hand, then snug with pliers, avoiding overtightening plastic fittings.
- Test for leaks. Run hot and cold water for several minutes, checking for drips at each connection.
Micro‑FAQ
Q: What if the trap won’t come loose?
A: Apply a few drops of penetrating oil around the nuts, let sit 10 minutes, then tap lightly with a rubber mallet before retrying.

Method 3: Hair‑Removal Zip‑Tool
When hair is the culprit, particularly in bathroom sinks, showers, and tubs, a flexible zip tool can pull out clogs without removing pipes.
How It Works
- The plastic strip with tiny barbs captures hair as you rotate and pull.
- It’s gentle on pipes and easy to use.
Steps to Follow
- Remove the drain cover or stopper. Unscrew or pop off to access the drain opening.
- Insert the zip tool. Push it about 6–8 inches down until you feel resistance.
- Twist and pull. Rotate the tool 360°, then tug gently upward, and most of the hair will come out.
- Repeat. Continue until the tool emerges clean.
- Flush the drain. Run hot water and use a small amount of baking soda, vinegar mix to clear residual grime.
Best For: Quick hair clogs between deeper cleanings; it’s a preventive tool as well as a fix.

Troubleshooting & Pro Tips
- Still draining slowly? Combine Methods 1 and 2 for a two‑pronged attack.
- Persistent odor without visible clogs? Refill a dry trap by running water for 30 seconds; check vent stacks on the roof if accessible.
- Chemical alternatives: Enzyme‑based drain cleaners (biological formulations) can safely break down organic matter over several hours, avoid caustic lye or sulfuric acid products that damage pipes.
- Preventative maintenance:
- Install strainers or mesh guards in sinks and showers.
- Schedule quick flushes with hot water weekly.
- Use baking soda and vinegar monthly for proactive cleaning.
- Install strainers or mesh guards in sinks and showers.
Pro Insight: “In hard‑water areas, mineral scaling can adhere to trap walls; consider a periodic vinegar soak (remove trap, submerge in 1:1 white vinegar: water for 30 minutes).“
Frequently Asked Questions
Q1: How often should I clean my P‑trap?
A: Kitchen sinks every 3–6 months; bathroom fixtures every 1–2 months. Heavy‑use or large families may need more frequent checks.
Q2: Can I clean a P‑trap without removing it?
A: Yes, Method 1 (baking soda/vinegar) or Method 3 (zip tool) handles light clogs, but deep blockages require removal.
Q3: Is boiling water safe for all sinks?
A: No, avoid freshly boiled water in porcelain or cast‑iron basins to prevent cracking. Use the hottest tap water instead.
Q4: What if my P‑trap still smells after cleaning?
A: Ensure the trap has water in it (dry traps let sewer gas escape). Check nearby vent pipes and consider a short flush of enzyme cleaner.
Q5: Can I replace a P‑trap myself?
A: With basic plumbing skills and proper tools, yes. Always turn off the water, measure pipe diameters, and stock replacement parts (traps, washers).
Conclusion
Keeping your P‑trap clean is a small task with big benefits: improved drainage, odor control, and longer pipe life. Whether you choose the baking soda and vinegar flush, the hands‑on removal and scrubbing, or the quick zip‑tool hair removal, you now have the knowledge and confidence to maintain your home’s plumbing like a pro.