If your water pressure is low that 30 psi, it is considered low. But why would be the kitchen faucet pressure be low while elsewhere in the house it is just fine?

Low water pressure in a kitchen faucet is mostly caused by a clogged aerator or/and cartridge. This is as a result of accumulation of dirt from pipes/wells, corrosions from steel pipes and mineral deposits therefore restricting water flow.
It can also be caused by leaking pipes, partially opened shut off valves, kinked water supply lines or problems with the municipal water supply. Fixing low water pressure in a kitchen faucet is usually an easy DIY. Rarely will you need to hire a plumber.
Unclogging the aerator or cartridge or sometimes both will most of the times fix low water pressure in a kitchen faucet. Also, make sure that all the valves are fully opened. If this doesn’t fix it, you might need the services of a professional plumber.
Isolating the Problem
After noticing low water pressure in your kitchen, the first thing you should do is to first determine if the problem is only affecting the kitchen faucets or more fixtures in the houses. Head straight to the bathroom and check the water pressure in the bathroom sink or shower faucet.
If other faucets in the house are running optimally then you can conclude that your kitchen faucet is the only affected one. However, if the problem is affecting all the house fixtures then you might have a bigger problem than you had thought.
The next course of action is to talk to your neighbors and see if they are having the same problem as yourself. If that is the case then the problem is your municipal water supply so go ahead and give them a call.
In the unfortunate event that the problem is restricted to your house then definitely you need to fix it as soon as possible. The first thing is to head to the main house shut off valve to make sure that it is fully opened.
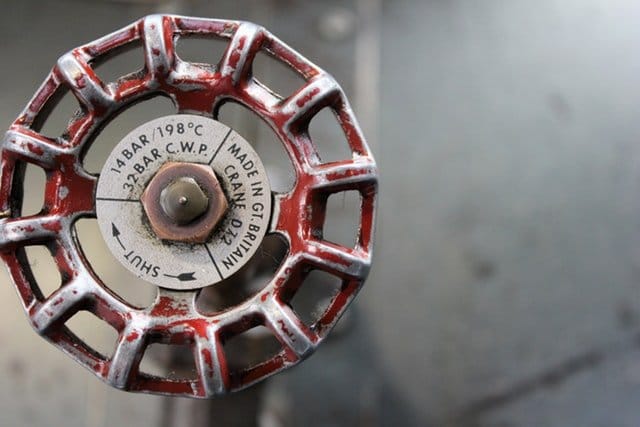
The main house shut off valve is usually located in the basement or on an outside wall nearer to the meter. It will be either a gate valve or a ball valve. The gate valve is round like a wheel. Make sure that you fully turn it counterclockwise. The ball valve use a lever. Make sure that the lever is fully aligned with the pipe.

If the main house water valve is fully open and the water pressure is still low, you most likely have a leaking pipe. A leaking pipe is not something you can easily fix on your own. Try to locate the leak and contact a plumber as soon as possible.
How to Fix Low Water Pressure in a Kitchen Faucet
Now that you have determined that the low water pressure is only affecting your kitchen faucet, fixing it is a quick and easy job. That will however also depend on the affected part.
You should always start with the easiest of tasks and upgrade gradually. A clogged cartridge is usually the hardest to remove and clean and it should therefore be the last thing you try.
1. Check the Shut Off Valve and Supply Lines
There are 2 water shut off valves and supply lines under the kitchen sink, one for the hot water and the other for the cold water. If you don’t have sufficient light to work under the kitchen grab a flashlight first.

The kitchen sink water shut off valves gives you the option to shut off water supply to the kitchen faucet in case you want to fix or replace it without necessarily having to shut off the main house water supply.
Check the shut off valves to make sure that they are fully opened. A partially opened shut off valve will without a doubt lower the water pressure to the faucet.
A fully opened shut off valve should be completely turned in the counterclockwise direction. After doing that, make sure that the water supply lines (mostly braided stainless steel) are not kinked.
A kinked water supply line will definitely reduce the pressure of water to the faucet. If that is the case straighten them up.
If however the shut off valves and water supply lines are all in good condition, it is time to check the aerator.
2. Unclog the Aerator

A kitchen faucet aerator is the small attachment at the tip of the spout with a mesh-like opening. Due to the fine holes of the aerator, it is very easy for debris, corrosions and mineral deposits to embed there restricting water flow and hence the low pressure.
Before removing and unclogging the aerator you will need to first gather some materials. They include:
- Vinegar
- A bowl
- Toothbrush
- Adjustable wrench/pliers
- Duct table/emery cloth
After gathering together all your supplies it’s time to get down to business.
Here is how to clean/unclog a kitchen faucet aerator:
- Start by plugging off the kitchen sink drain. This will prevent anything from falling and being washed down the drain.
- Remove the aerator from the faucet head. Usually, the aerator is usually hand tight and all you have to do is grab it and turn it to the left/counterclockwise.
- ‘If it is however too tight, you need to loosen it with a pair of pliers or adjustable wrench. The problem with that is that you risk peeling off its finish. To avoid that, wrap a duct tape or emery cloth around the aerator or just put it on the pliers/wrench and gently turn it to the left. Some aerator are however designed with a grip hence no need for all the trouble.
- Once you have removed it, check its condition. You will most likely see dirt trapped inside it. Drop it inside the bowl.
- The aerator has 3 pieces. There is the actual main piece, a seal and the sleeve or ring. Put the 3 pieces inside the bowl and add equal volumes of water and vinegar. Leave it for 30 minutes.
- Turn on the faucet and check if the water pressure is as it should. If it is then you are almost there.
- As you wait for the time to lapse, try to as much as possible clean the inside of faucet head. There will always be some debris also trapped there. Blast the water at full pressure to push out any embedded debris.
- After the 30 minutes, take the toothbrush and start cleaning the aerator to make sure that all the holes are fully opened.
- Once that is done put the 3 pieces together and put the aerator back on the faucet head. Do not use the pliers to tighten, unless there is a leak.
- Once again check the faucet pressure just to be sure it is as it should be.
And that is basically how to clean/unclog the kitchen faucet aerator if the faucet’s water pressure is low. If the aerator was never the problem, the next thing will be the cartridge.
3. Clean/Unclog the Kitchen Faucet Cartridge
The kitchen faucet cartridge is located below the faucet handle. It regulates the volume/ flow rate of water (not the pressure) depending on whether it is fully or partially opened. Kitchen faucet cartridges are connected to the water supply lines.
Just like the aerator, the cartridge can also be clogged by debris (especially if you are using water from a well) and pipe corrosions. Fixing a faucet cartridge is however a little harder than fixing an aerator.
Before beginning please gather the following materials:
- Screwdriver
- Towel
- Adjustable wrench
- Bowl vinegar
- Small bucket
As soon as you have the following items ready proceed as follows:
- Turn off both the hot and cold water kitchen faucet shut off valves. This are located under the kitchen sink.
- Open both the hot and cold water faucet handles and let the water already in the lines drain into the sink.
- Now plug off the kitchen sink drain so that smaller pieces don’t fall down the drain.
- Remove the faucet handles. There is usually a protective cap on top of the handle. Pry it off to reveal a screw that holds the handle in place. Use the screwdriver to remove the screw and lift off the handles.
- You will now see a nut that holds the cartridge in place. Use the wrench to loosen the nut and lift off the cartridge.
- Drop the cartridge in the bowl and add vinegar until it is completely submerged. Leave it there for 30 minutes.
- Flush the lines. This is to remove any debris inside the faucet and the supply lines. Hold the bucket in an inverted position (to avoid splashing) just above where you remove the cold water cartridge. Have someone open the cold water shut off valve and let the water blast out for 30 seconds. Turn off the cold water valve and do the same for the hot water line as well. Turn off the valve.
- Clean the cartridges thoroughly and put it back and tighten with the wrench. Do not however tighten too much lest you strip the threads.
- Screw the handles back and put the caps back on.
- Turn on the water shut off valves.
- Check for changes in the faucet water pressure.
And basically that is how to unclog a kitchen faucet cartridge. Unclogging a kitchen faucet aerator and cartridge will most of the time be enough to fix low water pressure in any kitchen faucet.
Note: Your kitchen faucet may not look like the one above. Either ways, the process of removing it is more or less the same. Some faucet handles are however usually connected using an Allen screw so check that out.
Do You a New Kitchen Faucet?
It is not unusual to find out that after installing a new kitchen faucet, the water pressure is way low that you would want it to be. So why is this the case?
Low water pressure in a new kitchen faucet as a result of debris/dirt getting into the lines during installation. The dirt ends up clogging the aerator or/and cartridge restricting the water flow. It could also be that you installed a low-flow kitchen faucet.
A low-flow kitchen faucet is designed in such a way that the cartridge only lets out a little amount of water. They are nice if you want to save on your water bills.
If a low-flow kitchen faucet is not what you intended you should replace it with an ordinary faucet. If the kitchen faucet is not a low flow one you should then go ahead and unclog both the aerator and the cartridge.
Is It a Pull-Out Kitchen Faucet

A pull out kitchen faucet is a little different from the other kitchen faucets. Their faucet heads are usually not threaded on the faucet and as their name suggests you just need to pull them out.
They usually have a hose inside which delivers the water to the head from the supply lines. They work just like other faucets the only difference is when you want to clean the aerator.
If you have a pull out kitchen faucet with low water pressure this is how to proceed:
- Hold the faucet head and pull it down gently.
- Insert a pen/pencil inside the faucet to hold the hose in place. Failure to do this will have hose drawn back in the faucet after disconnecting it from the head. You would then need to fish it out.
- Disconnect the faucet head from the hose. It is usually screwed on the head.
- Clean the head by removing all the debris from the aerator and connect it back to the water hose.
- Remove the pencil and push the faucet head back into the faucet.
Could It Be Just the Hot Water?
Sometimes you find that the kitchen faucet low pressure is only affecting the hot water, or sometimes the cold water. So, why is this and how can you fix it?
If your kitchen hot water line has low water pressure, there is big likelihood that the hot water shut off valve, water supply line, cartridge or aerator is clogged. The same is also true for the cold water line.
Start with the shut off valve and proceed as follows:
- Turn off the shut off valve.
- Drain the hot water line in the sink.
- Use an adjustable wrench to loosen the water supply line from the valve. Have a small bucket to drain any water still left inside the line.
- Check out for any visible debris and remove it.
- Next flush the water supply line by turning on the cold water faucet handle. Make sure the the supply line end is inside the bucket. All the debris in the supply line will fall inside the bucket.
- Connect the supply line to the shut off valve. Make sure that as you tighten the nut the supply line is not rotating as well.
- Open the hot water and check for changes in water pressure.
- If the pressure has significantly improved then you are home and dry. If not you will need to clean the cartridge or aerator or even both. If you might also have to replace the valve.
Related post: Low water pressure in bathroom sink
Summary
Experiencing low water pressure in your kitchen faucet can be frustrating when you’re trying to cook or clean. Here’s a brief guide on how to diagnose and fix this issue:
1. Check Other Faucets: Start by determining if the low water pressure is specific to the kitchen faucet or affects other fixtures in your home as well. If it’s isolated to the kitchen faucet, the issue is likely within the faucet itself.
2. Remove and Clean the Aerator: The most common cause of low water pressure in kitchen faucets is a clogged aerator. An aerator is a small device screwed onto the faucet’s tip. Remove it carefully with pliers or a wrench, then clean and rinse any debris or mineral buildup. Once cleaned, reattach the aerator to the faucet.
3. Check for Valve Issues: If cleaning the aerator doesn’t improve water pressure, the problem might be with the faucet’s valves. Shut off the water supply to the faucet, usually located under the sink, and remove the faucet handle. Inspect the valves for debris or corrosion, and clean or replace them as necessary.
4. Inspect Supply Lines: Ensure that the supply lines leading to the faucet are not kinked, damaged, or blocked. Replace any damaged lines and ensure they are properly connected.
5. Test the Shut-Off Valves: Sometimes, the shut-off valves under the sink may not be fully open. Turn them clockwise to fully open them and maximize water flow to the faucet.
6. Check for Hidden Blockages: If the problem persists, there could be blockages or corrosion in the plumbing lines leading to the kitchen faucet. This may require professional assistance to identify and resolve.
7. Consult a Plumber: If none of the above steps resolve the issue, it’s advisable to consult a licensed plumber. They can diagnose more complex problems, such as pipe obstructions or valve issues deeper in the plumbing system.


