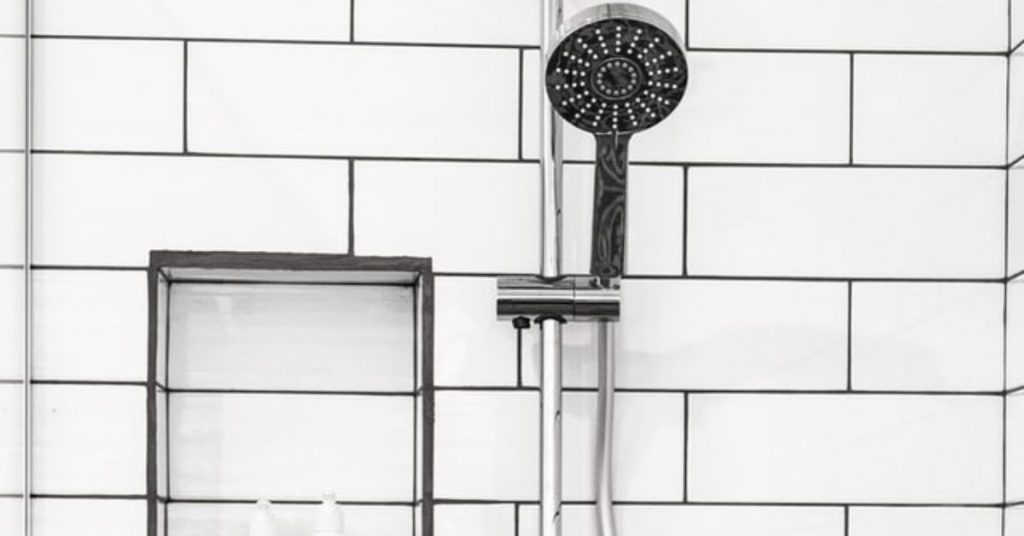
If the water pressure in the rest of your house is good (40 to 60 psi) apart from the shower, you have a problem affecting just the shower head and perhaps its faucet as well.

So, what causes low water pressure in the shower?
Low water pressure in the shower is caused by a clogged shower head, a water pressure restrictor in the shower head, a dirty/blocked shower cartridge or partially opened shut off valves. In old houses it could be as a result of undersize water supply pipes, mineral deposits or even leaks.
To increase the water pressure in your shower you can do one of the following:
- Check Other Faucets: Ensure that low water pressure is specific to your shower and not a general issue in your home. If it’s only the shower, proceed with the following steps.
- Clean the Showerhead: Remove the showerhead and soak it in a mixture of equal parts white vinegar and water to dissolve mineral deposits and debris. Scrub it gently with an old toothbrush to remove any remaining buildup. Rinse thoroughly and reattach.
- Check for a Flow Restrictor: Some showerheads have flow restrictors to conserve water. You can remove or adjust these according to the manufacturer’s instructions to increase water flow.
- Inspect for Blockages: Ensure there are no obstructions in the showerhead or the pipe leading to it. Remove any debris or blockages that may be restricting water flow.
- Upgrade the Showerhead: Consider installing a high-pressure showerhead designed to increase water pressure. These showerheads are designed to provide a more powerful flow.
- Check the Shower Valve: The shower valve may be the source of the low pressure. Inspect it for any blockages, sediment buildup, or damage. If necessary, consult a plumber to repair or replace the valve.
- Examine Plumbing Pipes: Low water pressure can sometimes result from aging or corroded pipes. Consult a professional plumber to inspect and replace any deteriorating pipes if needed.
- Adjust Water Pressure Regulator: If your home has a water pressure regulator, you can adjust it to increase water pressure. Be cautious not to set it too high, as excessive pressure can damage plumbing fixtures.
- Consult a Plumber: If none of the above steps work or if you’re uncomfortable making adjustments yourself, consider hiring a professional plumber. They can identify and address underlying issues that may be affecting water pressure in your shower.
As you can see, the solution can either be a very easy and fast one or a pricey one that will take time too. The good thing is that all this are simple tasks that you really don’t need to pay a plumber to do for you.
Is It Just the Shower?
Before you go ahead and try to fix the low water pressure in the shower, you should first determine if the low water pressure is only affecting the shower or other fixtures as well. Sometimes someone can mess up with the main house supply valve causing all the fixtures to experience a low water pressure.
Open your bathroom or kitchen faucet to full pressure and check if their pressure is good or low as well. If their pressure is good then the problem is restricted to your shower and you should therefore go ahead and fix it.
On the other hand if the other fixtures are also experiencing a low water pressure the shower is not the problem. Start by checking the condition of your main house shut off valve.
The main house shut off valve is usually located at the basement nearer to the water heater or on an outside wall where you also have the water meter. You will have either a gate valve (one with a wheel) or a ball valve, which has a lever.

For the case of a gate valve make sure that the valve is completely turned counterclockwise. If you have a ball valve make sure that the level is nicely aligned with the supply pipe.
Check if the pressure increases after that. More on that in this post.
Is It Just the Hot Water?
Sometimes you find that the low water pressure is only affecting the shower’s hot water supply but the cold water has decent pressure. This is usually a problem with your heater’s shut off valve.
Depending on the type of shower plumbing you have, you can adjust the hot water pressure to the shower head from the heater room or using a screwdriver at the hot water/cold water junction. To do this you will first need to remove the shower faucet’s handle.
Rush to the basement and make sure that the heater’s shut off valve is fully opened. If this does not increase the water pressure you will need to remove the faucet handle and turn the screw with a screwdriver. More on this later.
How to Increase the Water Pressure in Your Shower
If you have indeed concluded that the low water pressure is only affecting the shower, it is time to go ahead and fix it. As with every other repair, you should start with the most likely problem and eliminate them out as you progress.
1. Unclog the Shower Head.
The Shower contains fines holes through which water comes out at high pressure and is able to reach different parts of our bodies instead of using an ordinary faucet. While this is a great invention, it is not without its problems.
Mineral deposits, pipe corrosions and debris/dirt (especially for folks using water from a well) embed on these fine holes restricting the flow of water. With this comes low water pressure in the shower.
You can unclog a shower head using different methods depending on the time you have at hand and to some extent severity of the problem.
If you in a hurry, grab a toothpick and pass it through each and every shower head hole. You might also need a paper towel to remove dirt from the toothpick. Once done, turn on the water and check if the pressure has significantly improved.
If you are looking for a long-term fix, remove the shower head and put it in a small bucket or bowl. Add vinegar until the shower head is full immersed in the vinegar. Boiled vinegar works even better. Leave it there for 30 minutes.

To remove the shower head just grab the shower arm and twist the shower head counterclockwise. For some showerheads you will need to use a wrench to loosen them.
After the 30 minutes, come back with a toothpick and poke through each hole of the shower head. Take the shower head to the bathroom sink and blast water through it at full pressure to flush out any lingering debris.
Connect the shower head back and turn on the water. Check out for a significant pressure increase.
2. Remove the Shower Head Flow Restrictor
If you have low water pressure in your shower and you have a new shower head, most likely the shower head has a flow/pressure restrictor which drastically reduces the water pressure. Removing the flow restrictor will have you shower head blasting out water at great pressure.
A shower head flow/pressure restrictor is small plastic fitting installed inside the shower head that reduces its internal diameter. Water is then forced to pass through the reduced diameter, reducing its pressure significantly.
Shower heads manufacturers are mandated by the Federal Energy Policy Act of 1992 to have flow restrictors in the shower heads. This is in a bid to save the water used by each individual every time they shower.
This does not however work as intended since instead of people taking quick showers they end taking forever in the bathroom. Removing the flow restrictor is however totally legal.
How to Remove a Flow Restrictor
- Remove/disconnect the shower head.
- Remove the black O-ring. You have to remove the O-ring in order to access the flow restrictor. In some shower heads (especially the hand-held ones), the flow restrictor is not inside the shower head itself, but on the water supply line’s connection. Pull out the O-Ring using a needle-nose pliers. A flathead screwdriver will also suffice
- You will now see the plastic fitting sitting pretty inside the shower head. Grab one of its prong with the needle-nose pliers and pull it out.
- Now put the O-ring back inside. Don’t forget this step lest you have leaks in your shower.
- Connect the shower head back to the shower arm.
Removing a flow restrictor from your shower head will without a doubt increase you shower water pressure to what it should be.
3. Clean/Replace the Shower Cartridge
The Shower Cartridge is located inside of where you have the shower faucet handle. It basically regulates the shower’s flow rate, which is very different from pressure.
This is also where the cold and hot water lines meet and terminate into one. In some plumbing systems, there is an adjustable screw on both the cold and hot water lines to adjust the pressure of water coming out of the shower head.
If your shower has a decent cold water pressure and a low hot water pressure or vice versa here is where you want to have a look. Proceed as follows:
- Turn off the main water house shut off valve.
- Turn on the shower faucet to drain the water already in the lines.
- Plug off the shower/tub drain to prevent anything from falling down the drain.
- Remove the faucet handle. The faucet handle is usually connected to the faucet using an Allen nut. Turn the faucet upwards and remove the nut with an Allen wrench. Slide the handle out. Your handle design could however look a little different.
- Remove the handle adapter screw using a screw driver. Some faucets however do not have this screw and all you have to do it to unscrew the pressure control sleeve.
- Next use the screwdriver to remove the 2 screwdrivers connecting the faucet cap to the wall. If the cap is caulked to the wall cut round the caulk with a knife and pull it out.
- You can now see the cartridge and 3-pipe junction. Check out for 2 adjustable screws on each of the 2 horizontal pipes. Use a flathead screwdriver to see if they are fully open.

- If one of the screws was partially opened you might not even need to remove the cartridge. Turn on the main water valve and attach the faucet, handle. Check if there is an increase in water pressure.
- If there are no adjustable screws, you will need to pull out the cartridge and clean it.
- Look for restraining clip at the back of the cartridge and pull it upwards gently using a screwdriver. Be careful as you might drop it inside the wall.
- Now grip the tip of the cartridge with a pliers and twist it gently then pull it out. You can as well buy a special tool designed to pull.
- Check for dirt/mineral deposits on the cartridge and clean it thoroughly before putting it back. Replacing it with a new one is however a better option since most of them come with a lifetime warranty.
- Once you have put the cartridge back insert the restraining clip.
- Attach the faucet cap and screw it back in position. Caulk around it if needed.
- Put back the sleeve and faucet handle in the correct orientation. Screw in the nut and tighten with the Allen wrench.
And basically that is how to increase the water pressure in your shower by unclogging or replacing the cartridge. It is quite a long process but it will save you the money since plumbers charge a lot for such repairs.
4. Install a Shower Booster Water Pump
If the water flowing to your house has low water pressure, the problem is therefore not restricted to your shower and all the above repairs will not fix it. Installing a shower pump is a great but expensive fix.
Before the water flows to your shower faucet, it passes through this pump where fast-rotating blades force as much of it as possible to be pumped out. Local authorities do not allow the direct installation of pumps on the main water lines as it can damage the pipes. You have to install a break tank, which is another added cost.
There are however other solutions that you can try in the meantime. The first one is to turn off water to other fixtures while using the showers. Having more than one fixture running concurrently will significantly affect the water pressure in the house.
Another solution can be taking showers during off-peak hours. If you live in a busy/crowded town, most folks will be having showers in the evenings or mornings. Try taking shows during off-peak hours like midday and see if there is a significant increase in pressure in your shower.
I hope you enjoyed this post and that one of these solutions actually worked for you.


