Low water pressure in a well system is caused by a defective/old pump, low air pressure in the pressure tank, leaking/blocked pipes, clogged well screens, dirty filters or a faulty pressure switch. A clogged water softener filter can also reduce the water pressure in your house.

If your well water pressure starts high then drops, it is a sign of a blockage somewhere in the pipes. When faucets are turned off the pressure is equalized but when you turn on the faucet the blockage will not allow water to flow out fast enough to maintain the pressure.
Fluctuating water pressure on a well system is usually caused by a waterlogged pressure tank. This is due to a leak or rupture in the bladder, meaning that the bladder is unable to compress air and hold water under pressure. You will also notice your pump is cycling frequently.
No water pressure or sudden low water pressure in a house with a well is caused by a defective pump or a tripped circuit breaker. A leak in the water pipes or a sudden clog are also possibilities.
To fix low water pressure in a well system, adjust the air pressure in the pressure tank to just under 2 psi of the cut-in pressure. Clean or replace the water softener’s filter or replace a faulty pressure switch. An aging well pump or leaking water pipes will need to be replaced as well.
I have written a detailed article on the signs that indicate you need a new well pump. Read it here.
How to Increase Water Pressure on a Well System
Whenever you have a problem with your well water pressure, the first thing to do is to determine if the problem is within the house or in the well. Most of the time the problem is usually with the pressure tank, pressure switch, water softener, well pump, clogged or leaking pipes.
In this guide, I will give you a quick guide and lengthy guide. Let us start with the brief explanation:
- Check for System-Wide Issues: Ensure that low water pressure is not a widespread problem in your area or due to a temporary issue, such as a municipal water supply problem or a leak in your plumbing.
- Inspect the Pressure Switch: Examine the pressure switch on your well pump. Make sure it is set to the appropriate cut-in and cut-out pressure settings. Adjust if necessary according to your system’s requirements.
- Check for Leaks: Inspect your plumbing system, including pipes, joints, and fixtures, for any leaks. Even minor leaks can significantly reduce water pressure. Repair or replace any damaged components.
- Evaluate the Well Pump: Have a professional well pump technician assess the condition of your well pump. A worn-out or malfunctioning pump can lead to low water pressure and may need repair or replacement.
- Test the Pressure Tank: Check the pressure tank for proper air pressure. Ensure it is set to 2-3 psi below the pump’s cut-in pressure setting. Over time, tanks can lose pressure and become less effective.
- Clean or Replace Filters: If your well system has filters, clean or replace them regularly. Clogged filters can restrict water flow and reduce pressure.
- Consider a Booster Pump: In some cases, installing a booster pump may be necessary to increase water pressure throughout your plumbing system.
- Consult a Professional: If you’ve tried these steps and low water pressure persists, it’s advisable to contact a licensed well pump technician or plumber. They can conduct a thorough inspection and recommend appropriate solutions.
Now let us fix the problem in detail:
1. Inspect the Pressure Tank

The pressure tank is the link between your well and your house. Water from the well is stored temporarily in the pressure tank under pressure before flowing to all the fixtures in your house.
Inside the pressure tank is a bladder which looks like a balloon. The bladder is usually pressurized to a pressure of your choosing (usually not more than 40 psi).
Water from the well is pumped in the pressure tank, which compresses the air in the bladder and as result water is stored in the tank under pressure. This is why this holding tank is called a pressure tank.
The main reason water is stored under pressure in the tank is so that it can flow to any fixture in your house under sufficient pressure as well. Now if the pressure in the tank is low (often caused by a rupture in the bladder causing the tank to be waterlogged) the water pressure in your house will be low as well.
But why do we need a pressure tank? Why not just pump water directly from the well to the house?
Without a pressure tank, your well pump would be running non-stop. Every time someone washes their hands in the sink the pump would start to replace the used water. That is not very energy efficient.
The pressure of water in the tank is controlled by a pressure switch. The pressure switch is an electronic device usually installed very close to the pressure tank and adjacent to the pressure tank pressure gauge.
Pressure tanks have 2 pressure settings. The cut-in pressure and the cut-out pressure. The cut-in pressure is the lower pressure settings which when reached, the pressure switch triggers the well pump to start pumping water.
A pressure tank’s cut-out pressure is the high pressure rating which when reached the pressure switch turns the pump off. The water pressure in the house should not be less than 40 psi or more than 70 psi. Most pressure tanks have a cut-in pressure of 40 psi and cut-out pressure of 60 psi.
If the pressure switch is defective, it will:
- Fail to trigger the pump once water pressure in the tank falls below the cut-in pressure. This will lead to low pressure in the house.
- Not turn off the pump once water pressure in the tank reaches the cut-off pressure. Fortunately pressure tanks have pressure relief valve to avoid bursting. The bladder will rupture though.
A faulty pressure switch will need to be replaced.
Ideally, the air pressure of the pressure tank’s bladder should be less than the cut-in pressure by about 2-5 psi. If it is more than that then you will low water pressure in the house.
By inspecting the pressure tank, you want to find out 2 things. The first one is whether the pressure tank is waterlogged and the second is the air pressure in the bladder tank, assuming it is not waterlogged.
To do that, you will first need to empty/drain the pressure tank. Draining the pressure tank also gives you the opportunity to remove any sediments at the bottom of the tank and you should actually do it often.
How to Troubleshoot a Pressure Tank
Here are the steps to follow:
- Turn off the circuit breaker dedicated to the well pump. This will prevent the pump from pumping water when you drain the pressure tank below the cut-in pressure.
- Connect a garden to the spigot at the bottom of the pressure tank.
- If you have a shut off valve from the pressure tank to your house, shut it off. That will prevent having to bleed off air from the lines later. If you have no valve turn on one faucet, usually the nearest to the pressure tank.
- Open the drain valve and let the pressure tank drain completely.
- Once drained, close the drain valve and remove the garden hose.
- Try to tip the pressure tank and see if it is likely to fall off easily. This will help you determine if there is water logged in the tank or if there is just air. A water logged pressure tank will not bulge.
- Another thing you can try to do is bang the tank with your knuckles from top to bottom. If it sounds hollow, then that is good sign. On the other hand, if it sounds as though there is more than just air inside, you are looking at replacing the pressure tank.
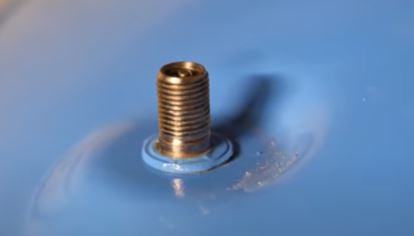
- If there are no signs of waterlogging in the pressure tank, determine the pressure of the air in the bladder. Connect a pressure gauge to the air fill valve at the top of the pressure tank. The air fill valve is usually covered with cap so you will need to unscrew it.

- If the pressure gauge indicates that the air pressure in the tank is 2 to 5 psi lower than your system’s cut-in pressure, the problem is not with your pressure tank. On the other hand, if it is way more than that, you need to pump in air to under 2 psi of the cut-in pressure.
3. Adjust the Pressure Switch
As previously mentioned, your pressure switch triggers the pump action when the water pressure in the tank falls to the cut-in value and shuts it off when the water pressure hits the cut-out value. Assuming the pressure switch is not faulty, you can adjust its settings to suit your preference.
As a word of caution, you should not set your pressure switch cut-off pressure too high. It can rapture the pressure tank’s bladder and also most household appliances will be damaged by pressure of more than 70 psi.
Your pressure switch is usually covered with a plastic cover. Underneath that cover you will see the required settings for the cut-in and cut-off pressure. You can exceed the cut-off pressure but not by a big margin.
This is how to adjust your pressure switch:
Determine the Current Cut-in and Cut-out Pressure
Open a faucet or the drain valve and let the pressure tank drain but not completely. Keep your eyes on the pressure gauge and watch the exact pressure when the pump kicks in. That is the current cut-in pressure.
Turn off the faucet or drain valve and let the pressure tank fill. Again with your eyes on the pressure gauge, note the pressure when the well pump goes silent. That is the cut-out pressure.
Are you happy with both the current cut-in and cut-off pressures? If not, you can adjust them.
Adjust the Cut-in and Cut-off Pressure
- Start by turning off power to the pump. Some people don’t do this but I recommend it to prevent electric shock
- Remove the pressure switch cover. It is usually attached to the pressure switch using a screw/bolt.
- You will now see 2 springs compressed on a bolts using nuts. The 2 springs control the cut-in and cut-off pressure depending on how much they are compressed.

As you will notice, one spring is bigger than the other. Tightening or loosening this bolt will adjust both the cut-in and cut-off pressure. Loosening or tightening the small bolt will only adjust the pressure differential, by increasing or decreasing the cut-off pressure depending on which direction you turn the nut.
- To increase the cut-in and cut-off pressure, turn the nut on the big spring clockwise or counterclockwise to reduce the pressure. On average, 1 complete turn produces a 2-3 change in psi.
- Turn the well pump power back on and start draining the tank. Note the new cut-in pressure. Keep adjusting the pressure until you get the correct value you want.
3. Replace the Well Pump
If the water pressure from the well to the pressure tank is low, you will notice that the pressure tank takes long to fill up, hence the pump cycles for long. in the well and most likely. But how do you know if you have a bad well pump?
If the water pressure in the house is too low, the pump is running throughout or producing a grinding/rattling sound, faucets are spiting air and even dirty water, you need to have your well pump replaced.
While pumps can be repaired, if yours is too old the best and long-term solution is to replace it. On average a well pump should last for about 15 years.
Other problems to do with a well that can result in low water pressure include a leak in the well pipes, clogs, corrosions and even low water level in the well as a result of drought. Problems emanating from inside the well will need a water well specialist to fix.
4. Install a Constant Water Pressure System
A constant water pressure system is a basically a pumping unit installed on your water line to ensure that your house is supplied with adequate water pressure even when you are running several fixtures. This is usually very helpful in the morning or evening where the demand for water in the house is at its peak.
Not all households will however need this system. Most household will do just fine with a proper functioning well pump and pressure tank. In case you feel like your pressure tank is too small for your household, you can always upgrade to a larger one, or have a secondary one installed in series with the first one.
Take your time to drain/flush your pressure tank often to prevent buildup of sediments at the bottom. In extreme situations, you might have to drill a new well.
5. Clean the Water Softener

If the well pump and pressure tank seem to be working fine, the next place to look is the water softener. When there is more demand for water in your house than the water softener can cope with or if the water softener filter are clogged by mineral deposits, the water pressure in your house will be low.
Clogs do not only affect the water softener filter but also the supply pipe connecting it to the pressure tank. Some mineral deposits will also pass the screens and proceed to clog shower heads and faucet aerators causing even less water pressure there.
This is usually an easy fix. All you need to do is to remove and clean the filter using running water in a sink. Once clean put it back and check if the water pressure in the house has been restored.
6. Inspect Your Pipes for Leaks and/or Clogs
If you live in an area with hard water then the likely cause of low water pressure in your house is clogged pipes, especially if you also have the old galvanized pipes. Iron, Manganese, and calcium are the minerals most likely to clog pipes.
Most pipe clogs happen more on the hot water lines than on the cold water lines. If you have low hot water pressure in your house check out this article.
The thing with clogged pipes is that they cause a restriction in the pipes effectively reducing the internal diameter of the pipes and hence low water pressure. Unfortunately, this is not a problem you can fix on your own.
If you suspect that you have clogged pipes in your house you need to call in a professional plumber to fix them. Clogged water pipes are also usually corroded, increasing their chances of breaking, causing leaks.
Conclusion
Low water pressure in a house with a well system can be caused by lots of things, some as simple as a partially open shut off valve and some quite complex and expensive to repair. The best thing to do is to try and fix the problem on your own before calling in a plumber as it can be quite pricey.


