If your toilet is making a whistling sound, it can be an annoying issue. Here’s a brief summary of why your toilet might be whistling and what you can do about it:
Causes of Toilet Whistling
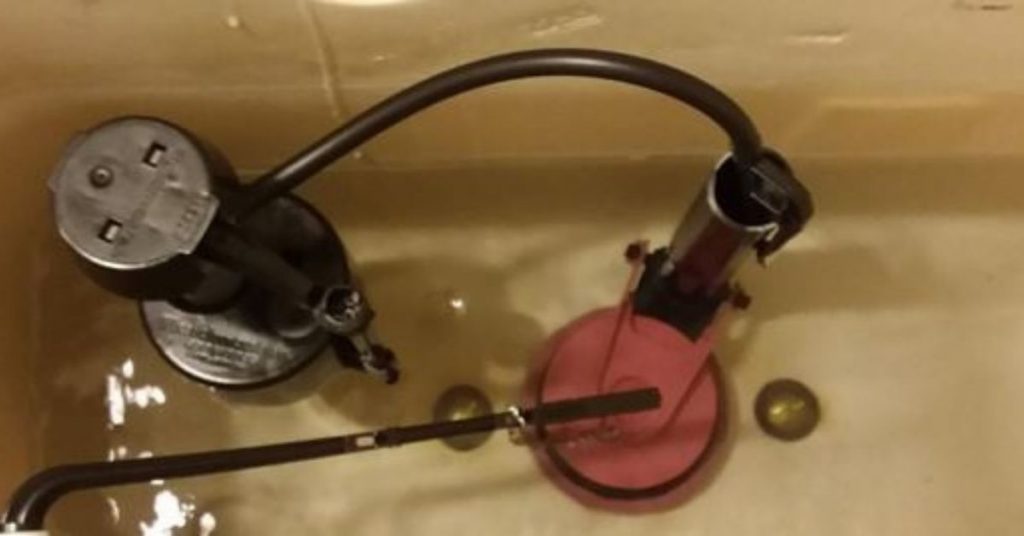
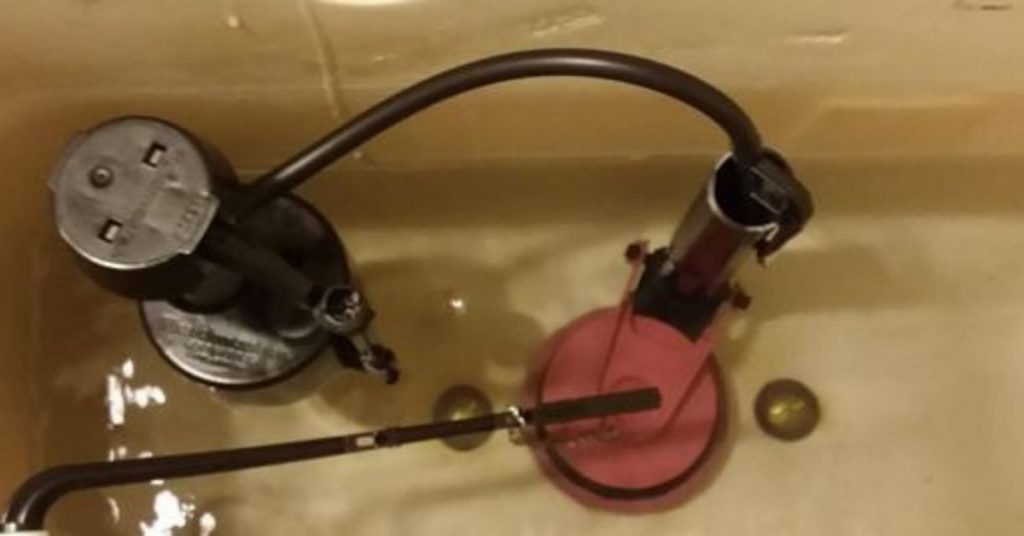
- Faulty Fill Valve: A whistling noise often indicates a problem with the fill valve (also known as the ballcock). This component controls the water entering the toilet tank. A worn or damaged fill valve can create vibrations and whistling sounds.
- Water Pressure Issues: High water pressure in your home’s plumbing system can lead to whistling sounds when the toilet is filling. It may indicate that your home’s water pressure needs adjustment or a pressure-reducing valve.
- Partially Closed Valve: If the water supply valve behind the toilet is only partially open, it can create turbulence in the water flow, causing whistling noises.
What to Do About Toilet Whistling
- Inspect the Fill Valve: Lift the toilet tank lid and inspect the fill valve for signs of wear, damage, or loose parts. If you see any issues, consider replacing the fill valve with a new one.
- Adjust the Water Pressure: If high water pressure is the culprit, consult a professional plumber to install a pressure-reducing valve or adjust the pressure in your home’s plumbing system to a safe level.
- Check the Water Supply Valve: Ensure that the water supply valve behind the toilet is fully open. Sometimes, it may only be partially turned, restricting water flow and causing noise.
- Consult a Professional: If you’re unsure about the cause of the whistling or if the issue persists after checking and adjusting the fill valve and water pressure, it’s advisable to consult a professional plumber for a thorough inspection and resolution.
How a Toilet Fill Valve Works

A toilet fill valve is the toilet tank part responsible for filling the tank with water after every flush. It is connected to the water supply hose from underneath the tank and is also connected to the toilet float inside the tank.
A toilet float basically controls the opening and closing of the fill valve opening. Old toilets have a ballcock connected to the fill valve using a lever while modern toilets have a small float connected along the vertical body of the fill valve.
The toilet tank is always full of water and at that time the float is usually at the top. At that time also, the fill valve opening is also closed.
When the toilet is flushed, the float assembly moves to the bottom of the tank, a move that opens the fill valve opening. As the water level in the tank increases, the float moves up until the water level is at its set mark and the float shuts off the fill valve opening.
Why Your Toilet is Whistling
Even us humans, we can’t whistle with our mouths wide open. To whistle, you need to bring your lips together and leave a small opening to force out air.
It is the same thing with a whistling toilet. It means that something is blocking the fill valve and therefore restricting water from entering the tank. As a result, water has to force its way through a small opening and hence the whistling sound.
If you live in an area with hard water, it is not unusual for mineral deposits to clog the fill valve leaving only a small opening which the water (since it is under pressure) will squeeze through and in the process create the whistling sound.
A worn out fill valve gasket/seal will also result in the whistling sound. The worn out gasket will vibrate as water passes through and hence the whistling sound.
How to Fix a Whistling Toilet
The best solution to a whistling toilet is to replace the fill valve. The good thing is that a fill valve is cheap and also easy to replace. You will not need to hire a plumber to do it.
If you are not ready for a replacement, you can try to fix it and see if that works. Here are therefore the 2 methods to stop a toilet from whistling:
1. Clean the Gasket
Here is how to clean and flush out debris and mineral deposits from a toilet fill valve:
- Turn off the toilet shut off valve. That is the knob on the wall behind the toilet. Turn it clockwise all the way.
- Flush the toilet and hold the lever down to remove as much water as possible from the tank.
- Remove the toilet tank lid and place it away in a safe place where it cannot fall off and crack.
- Locate the fill valve. It is usually on the left side of the tank.
- Grab the top cap (usually of a different color from the fill valve body) and the float and turn it 1/8 turn counterclockwise to remove it. If you have a ballcock you may need to disconnect it using a screwdriver.
- You will see seal/gasket under the cap. Remove it and clean it to remove any debris.
- Check if the seal is in good condition or if it is worn out. If it is worn out you will have to replace the fill valve.

- Next hold a cup (when inverted) over the fill valve and turn on the toilet shut off valve. The idea here is to force the water pressure to flush out debris from the fill valve while using the cup to prevent water from splashing on you. Do that for a few seconds
- Put back the top cover by turning it 1/8 turn in the opposite direction.
- Flush the toilet a few times and check if the whistling stops.
3. Replace the Toilet Fill Valve
The best toilet fill valves apart from those made by your toilet manufacturer are those made by Fluidmaster or Korky. You will not go wrong with a toilet fill valve from one of these universal fill valves manufacturers.
This is how to replace a toilet fill valve:
- Turn off the toilet shut off valve.
- Flush the toilet and hold the flushing lever down to remove most of the water.
- Remove the toilet tank lid.
- Use a sponge to soak any remaining water at the bottom of the tank.
- Place a bucket or container under the connection between the water supply hose and the tank. This is for draining the water still in the hose.
- Disconnect the water supply hose by turning the coupling counterclockwise. Use your bare hand only as using a wrench can deform it. Only use a wrench if the connection is too tight.
- Disconnect the fill valve mounting nut as well. This nut holds the fill valve firmly against the toilet tank.
- Disconnect the fill valve clip from the overflow tube and lift it out of the tank.
- Adjust the height of the new fill have. Fill valves can be adjusted to fit tanks of different heights. Ideally, the top of the fill valve (the cap) should be about 3 inches higher than the top of the overflow tube.
- To adjust a fill valve you only need to hold the top part with your left hand and turn the shank counterclockwise with your other hand to increase its length.
- Once you have properly adjusted the fill valve, insert it in the opening at the bottom of the tank and tighten it using the mounting nut from underneath the tank.
- Connect the water supply hose to the fill valve and also hook up the fill valves refill tube to the overflow tube.
- Turn on the toilet shut off valve.
- Flush the toilet to conform that the whistling noise has stopped.
- Put back the toilet tank lid.
And basically that is how to fix a whistling toilet. I hope this guide was helpful.
Related: How to increase a toilet’s flush power.


