Your dishwasher, often the unsung hero of the kitchen, works tirelessly behind the scenes to clean your dishes day in and day out. But what happens when this trusty appliance starts to falter, leaving dishes less than sparkling or emitting unpleasant odors? The culprit might just be a dirty dishwasher.
Over time, food particles, grease, and soap scum can build up inside your dishwasher, leading to reduced performance and even potential damage to the appliance. However, fear not, as deep cleaning your dishwasher is a simple yet crucial task that can restore its efficiency and extend its lifespan.
In this comprehensive guide, we’ll take you through each step of the deep cleaning process, providing detailed instructions and helpful tips along the way. From gathering supplies to performing maintenance checks, you’ll learn everything you need to know to keep your dishwasher in top condition.
Step 1: Gather Supplies
Before diving into the deep cleaning process, it’s essential to gather all the necessary supplies. Here’s what you’ll need:
- White vinegar
- Baking soda
- Dish soap
- Soft brush or toothbrush
- Clean cloth
- Optional: commercial dishwasher cleaner
Having these supplies on hand will ensure that you’re well-equipped to tackle any dirt and grime lurking inside your dishwasher.
Step 2: Empty the Dishwasher

Begin by emptying your dishwasher of all dishes, racks, and utensil holders. Take out any removable parts, such as the silverware basket, and set them aside for cleaning later. By starting with a clean slate, you’ll have better access to all areas of the dishwasher for thorough cleaning.
Step 3: Clean the Exterior
With the interior of the dishwasher empty, turn your attention to the exterior. Dampen a clean cloth with warm water and a mild detergent, then gently wipe down the outside of the dishwasher. Pay special attention to areas prone to fingerprints and grease buildup, such as the door handle and control panel. Rinse the cloth with clean water and wipe away any soap residue.
Step 4: Clean the Filter

Next, locate the dishwasher filter, typically found at the bottom of the appliance. Depending on your dishwasher model, the filter may twist or lift out easily. Remove the filter and inspect it for any visible debris or clogs.
- If the filter is removable, soak it in warm, soapy water for about 10-15 minutes to loosen stubborn residue.
- Use a soft brush or toothbrush to gently scrub the filter, paying attention to the mesh screen and crevices where food particles may be trapped.
- Rinse the filter thoroughly with warm water to remove any soap residue, then allow it to air dry completely before reinserting it into the dishwasher.
Cleaning the filter is essential for maintaining proper drainage and preventing food particles from recirculating during the wash cycle.
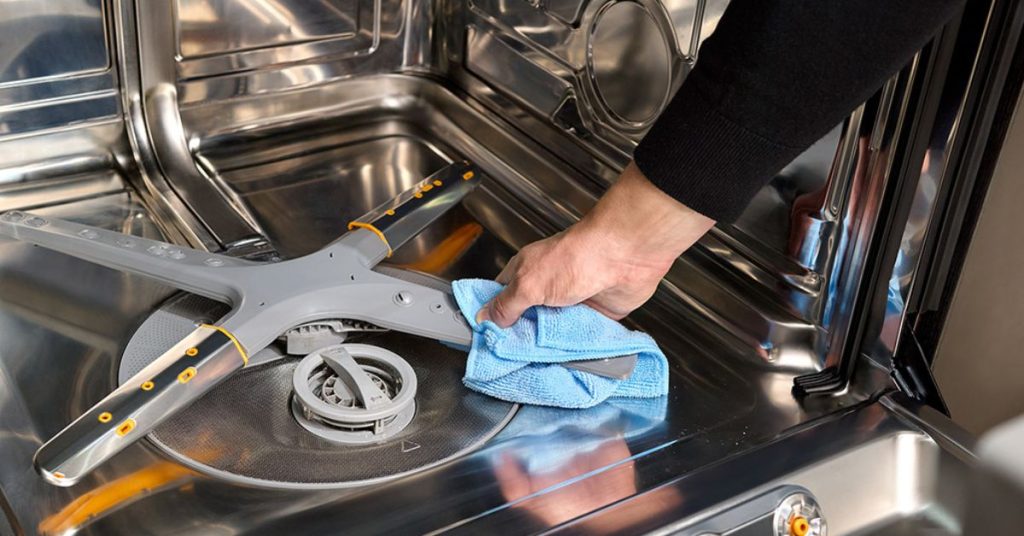
Step 5: Scrub the Interior
Now it’s time to tackle the interior of the dishwasher. Start by preparing a cleaning solution using equal parts white vinegar and baking soda.
- Pour one cup of vinegar into a dishwasher-safe container and place it on the top rack of the dishwasher.
- Sprinkle one cup of baking soda along the bottom of the dishwasher.
Close the dishwasher door and run a hot water cycle on the highest temperature setting. The vinegar and baking soda will work together to break down grease and eliminate odors, leaving your dishwasher fresh and clean.
Once the cycle is complete, inspect the interior of the dishwasher for any remaining grime or buildup. Use a soft brush or toothbrush to scrub away stubborn residue, paying close attention to the spray arms, door seals, and around the edges of the door.
For hard-to-reach areas, such as the corners and crevices, dip the brush in the cleaning solution and scrub vigorously to dislodge any dirt or debris.
Step 6: Clean the Door Seal
The door seal, also known as the gasket, is a common hiding spot for mold and mildew. To clean the door seal:
- Mix a solution of warm water and dish soap in a small bowl.
- Dip a toothbrush or soft brush into the soapy water and scrub the door seal thoroughly, paying extra attention to any visible mold or mildew.
- Rinse the door seal with clean water and wipe it dry with a clean cloth.
Regularly cleaning the door seal can prevent mold growth and ensure a tight seal when the dishwasher is in use.
Step 7: Run a Cleaning Cycle
To give your dishwasher an extra deep clean, consider running a cleaning cycle with a commercial dishwasher cleaner. These specialized products are designed to dissolve tough stains and eliminate odor-causing bacteria.
- Follow the manufacturer’s instructions for your chosen dishwasher cleaner, as the application method may vary.
- Place the cleaner in the detergent dispenser or follow the recommended dosage for manual application.
- Close the dishwasher door and run a hot water cycle on the longest and hottest setting available.
Once the cleaning cycle is complete, open the dishwasher door and allow the appliance to air out for a few minutes before unloading. Your dishwasher will emerge from this deep cleaning session smelling fresh and looking like new.
Step 8: Clean the Accessories
While the dishwasher is running its cleaning cycle, take the opportunity to clean any removable accessories, such as racks and utensil holders.
- Fill a sink or large basin with warm, soapy water.
- Submerge the accessories in the soapy water and use a sponge or cloth to scrub away any food residue or grease.
- Rinse the accessories thoroughly with clean water and allow them to air dry completely before reinstalling them in the dishwasher.
Regularly cleaning the accessories helps to prevent the buildup of dirt and grime, ensuring optimal performance with each use.
Step 9: Replace and Test
Once the dishwasher and accessories are clean and dry, it’s time to reassemble the appliance and perform a final test to ensure everything is in working order.
- Carefully reinsert the filter, racks, and utensil holders into their respective positions within the dishwasher.
- Double-check that all parts are securely in place and that the dishwasher door closes properly.
- Run a test cycle with a small load of dishes to confirm that the dishwasher is functioning as expected. Listen for any unusual noises or signs of malfunction, such as leaks or error codes.
If everything appears to be in order, congratulations! You’ve successfully deep cleaned your dishwasher and restored it to peak performance.
Step 10: Maintenance Tips
To keep your dishwasher running smoothly between deep cleaning sessions, consider implementing the following maintenance tips:
- Scrape food debris from dishes before loading them into the dishwasher to prevent clogs and buildup.
- Run a cleaning cycle with vinegar or a commercial dishwasher cleaner every few months to keep the appliance fresh and odor-free.
- Check the dishwasher filter regularly and clean it as needed to ensure proper drainage and filtration.
- Inspect the door seal for signs of mold or mildew and clean it as necessary to maintain a tight seal.
By incorporating these simple maintenance tasks into your cleaning routine, you can help prolong the life of your dishwasher and enjoy sparkling clean dishes with every wash.
Conclusion
Your dishwasher is a valuable asset in the kitchen, but it requires regular maintenance to keep it performing at its best. By following this step-by-step guide to deep cleaning your dishwasher, you can rid the appliance of dirt, grime, and odor-causing bacteria, ensuring optimal performance and longevity.