Flushing a water heater is an essential maintenance task that helps remove sediment and mineral buildup, ensuring your heater operates efficiently. Here’s a brief summary of the steps to follow to flush a water heater:
- Turn Off the Power: For electric water heaters, switch off the power at the breaker box. For gas water heaters, turn the gas control valve to the “Pilot” position.
- Turn Off the Cold Water Supply: Locate the cold water inlet valve near the top of the water heater and turn it off. This stops the flow of new water into the tank.
- Allow the Water Heater to Cool: Wait for the water inside the tank to cool down. This can take a few hours, so exercise caution to avoid burns.
- Connect a Hose: Attach a garden hose to the drain valve at the bottom of the water heater. Ensure the hose is securely connected and that the other end is positioned to safely drain the water.
- Open a Hot Water Faucet: To allow air into the system and facilitate draining, open a hot water faucet in your home, preferably on the upper floor or farthest from the water heater.
- Open the Drain Valve: Carefully open the drain valve on the water heater by turning it counterclockwise. Be prepared for hot water to start flowing through the hose.
- Flush the Tank: Allow the water to drain completely from the tank. This may take some time depending on the size of your tank and the amount of sediment. Monitor the water as it exits the hose; it may be discolored at first but should clear up as sediment is flushed out.
- Close the Drain Valve: Once the tank is empty, close the drain valve by turning it clockwise.
- Refill the Tank: Turn on the cold water supply valve to refill the tank. Keep the hot water faucet open until water flows steadily from it, indicating that the air in the system has been expelled.
- Turn On the Power or Gas: If you have an electric water heater, switch the power back on at the breaker box. For gas heaters, turn the gas control valve back to the desired setting.
- Check for Leaks: Inspect the drain valve and hose connection for any leaks. Tighten connections if necessary.
- Monitor Water Temperature: Allow the water heater to heat the newly added water to the desired temperature. This may take some time.
How to Flush a Water Heater
Flushing a water heater is one of those tasks every homeowner should learn to do without calling in a plumber. The only materials needed are:
- Garden hose
- Flathead screwdriver
- Adjustable wrench (optional)
- Vinegar (optional)
The following is a detailed guide on how to flush out sediments from a water heater:
1. Turn Off Cold Water Supply to the Water Heater
The water heater is constantly supplied with cold water by a pipe installed at the top. In most houses, there is a shut off valve (gate valve or ball valve) and all you need to do is turn it clockwise if it is gate valve or align it with the pipe if it is a ball valve.
If you live in an old house where the water heater cold-water supply pipe has no shut off valve you will need to turn off water at the main house shut off valve. This valve might be in the basement very close to the water heater or outside adjacent to the water meter.
2. Turn Off Thermostat or Circuit Breaker
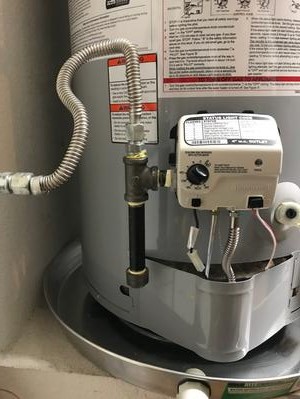
If you have a gas water heater, turn off the natural gas supply to the water heater or turn of the pilot thermostat. You can also turn off both the thermostat and the gas supply shut off valve.
For an electric water heater flip the switch to the OFF position at the circuit breaker. Draining/flushing the water heater without turning off the power will most likely burn the heating element.
3. Test T&P Relief Valve

The water heater temperature and pressure relief valve is the valve near the top or at the top of the water heater which has a little lever. It should at all times be connected to a vertical pipe called a discharge tube.
Its function is to discharge water/steam when the pressure and temperature of the water inside the water heater are too high. Without it or when it is faulty, the excess water pressure and temperature will have nowhere to go and the water heater is likely to burst.
It is a good practice to check/test the T&P valve every time you are draining/flushing the water heater. That way you will be able to know if it is faulty and replace it immediately.
Place a bucket under the discharge tube and lift the lever gently. If water is discharged into the bucket then the valve is working perfectly. Replace the valve as soon as possible if no water is discharge even after fully lifting the lever.
For more information about the T&P valve including how to replace it check out this post.
4. Connect Garden Hose to the Drain Valve.

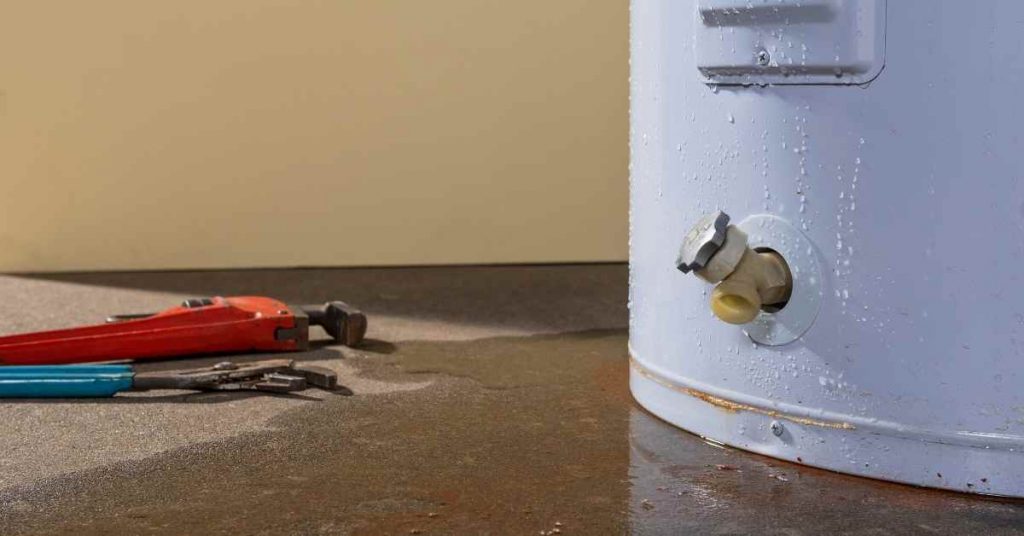
The water heater drain valve is the threaded spigot/bib at the bottom of the water heater. Some have a lever while others don’t. Connect a garden hose to this valve and place its other end in a floor drain or out in the driveway and inform everyone around of what you are doing.
The water in the water heater is scalding hot and is a danger to people and pets. If you do not have a garden hose a bucket will suffice, only that it will take you longer.
5. Turn on a Hot Water Faucet
Dash to the nearest hot water faucet and turn it on fully. Turning on the faucet will help the water heater drain faster by allowing in air into the system, which pushes water out quicker.
Leave the faucet open and running. Do not turn off this faucet otherwise you will have airlock in your plumbing system.
6. Start Draining the Water Heater.
Use a flathead screwdriver to turn the screw on the water heater drain valve all the way counterclockwise. Hot water will start draining from the tank through the garden hose. If you are using a bucket you need to turn the valve on and off, or you can wait until most of the water has drained out of the faucet.
If your drain valve has a lever, just turn it in such a way that the lever is aligned with the valve. If you want to let in more air inside the tank for even faster draining, open the T&P valve by lifting the lever all the way up.
Wait until all of the water has completely drained out. This means you need to keep checking the end of the garden hose, to see if there is a change in water color, of if there are impurities in the water.
7. Flush the water heater Tank
If you are very keen, you will notice that the last bit of the water to drain out of the water heater will be dirty (brownish or even cloudy in color) due to the sediments. That means that there is more sediment inside the tank and just draining it is not enough.
This is where water heater flushing comes in. You want to remove as much sediment from the bottom of the water heater as possible.
Turn on the cold water shut off valve. Since the tank is empty, the cold water will strike the bottom of the water heater hard, breaking down, agitating and forcing the sediment out.
Keep monitoring the color or purity of the water draining out of the garden hose until you are convinced that the water heater is clean.
8. Turn off the Drain Valve
When only clean water is flowing out of the garden hose, you have flushed out the sediments from your water heater successfully. Turn off the drain valve to allow the water heater tank fill with water.
If you had also opened the T&P valve close it as well.
9. Monitor the Hot Water Faucet
As the water heater is filling up with water, monitor the hot water faucet that you left open. Instead of the air in the water heater tank being being trapped there creating an airlock, it will exit through the faucet. This is why it is important to leave the faucet open.
At first, water will be sputtering out of the faucet as the air exits but when all of the air has been successfully flushed out it will start flowing out of in a smooth stream. Only then should your turn the faucet off.
10. Turn on the Thermostat or Circuit Breaker
If you have a gas water heater turn on the thermostat to the pilot and if you had turned off the gas you will also need to turn it on as well. For people with electric water heaters turn on the power at the circuit breaker.
To finish up, disconnect the garden hose from the drain valve and put it away. If you messed up the floor with water clean it up.
Wait for about 20 minutes for the water in the tank to heat and then turn on a hot water faucet to check if indeed the water heater is working fine. If there were rumbling/popping sounds from the water prior to flushing listen carefully if they have disappeared.
And that is how to flush a water heater and get rid of sediments. Repeat this process at least once every year.
Using Vinegar
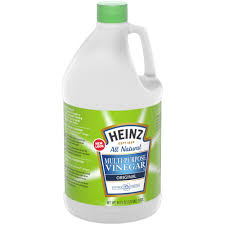
If you water heater has not been flushed for a long time, you probably have a lot of sediment at the bottom of the tank. To successfully flush the water heater, you would first need to dissolve the sediment so that it flows out of the tank easily.
Vinegar is very effective in dissolving sediment inside the water heater and is totally safe. Other chemicals like acids are definitely not safe.
Here is how to flush a water heater using vinegar:
- Drain the water heater. Use the method outlined above to completely drain the water heater.
- Ensure that the drain valve is turned off.
- Disconnect the cold-water pipe connection to the water heater or the T&P valve.
- Use a funnel to pour 1 gallon of vinegar inside the water heater.
- Connect the cold-water pipe or T&P valve back to the water heater.
- Let the vinegar sit for about 6 hours.
- After the 6 hours connect a garden hose to the drain valve and open it to drain out the vinegar.
- Turn on the cold water to the water to agitate the now broken-down sediment.
- Flush the water heater until only clear water is flowing out of the hose.
- Turn off the drain valve and start filling the tank.
- Turn on a hot water faucet to flush out air from the system.
- Once air has been completely flushed out, turn off the faucet.
- Turn on the pilot thermostat or power to the water heater.
Another alternative to vinegar is CLR. Use the same procedure as above. The best way of preventing sediment build up in a water heater is flushing it frequently. A water softener also helps.
Is It Necessary Though?
I know this sounds stupid especially after outlining such a detailed process of flushing sediments out of a water heater, but it is actually a question most homeowners often ask.
While doing my research and comparing what other plumbers think of this exercise, I stumbled on The Grumpy Plumber on YouTube. This is pro plumber who has decades of plumbing experience so I was intrigued by what he said concerning flushing water heaters.
The Grumpy Plumber doesn’t mince his words and he stated boldly that flushing water heaters is a waste of time and money, although he has flushed many in his time, since most homeowners insisted on it.
In his argument, the plumber says that the sediments in the water heater cannot be flushed out through the drain valve. You would need to enter the tank and scrape off the muck yourself.
His suggestion is to replace the water heater as soon as you start having problems with it instead of flushing it, especially if you are paying someone to do it. Do you agree with him?
Click here to watch the complete interview on You Tube.


