Your bathroom is the sanctuary of serenity, the oasis of orderliness. But wait, what’s lurking beneath the sink? Ah, the infamous clutter conundrum! If you’ve ever opened that cabinet door only to be greeted by a cascade of half-empty bottles, tangled cords, and expired products, fear not, for we’re about to embark on a journey to reclaim this valuable real estate.
Organizing under the bathroom sink may seem like a daunting task, but fear not, dear reader, for I am here to guide you through the maze of mess and emerge victorious on the other side. Say goodbye to chaotic mornings and hello to a streamlined space where every item has its place.
In this comprehensive guide, we’ll explore strategies to declutter, maximize storage, categorize effectively, and maintain your newfound orderliness. From sleek storage solutions to creative DIY hacks, get ready to transform your under-sink area from chaos to calm. Let’s dive in!
Assessing Your Space
Before we roll up our sleeves and dive into the organizing process, let’s take a moment to assess the battleground – I mean, the space under your bathroom sink. Grab a flashlight (or your phone’s flashlight app) and peer into the depths of the cabinet. What do you see?
- Evaluate the Current State: Take stock of what’s currently lurking beneath the sink. Are there expired products that need to be tossed? Are there items you haven’t used in ages? Make mental notes of what needs to stay and what needs to go.
- Consider Size and Layout: Is your under-sink area spacious or cramped? Are there any pipes or obstacles that limit storage space? Understanding the dimensions and layout of your space will help you choose the right storage solutions.
- Identify Challenges and Goals: What are your biggest pain points when it comes to organizing this space? Do you struggle with keeping small items organized, or is there simply not enough room for everything? Set clear goals for what you want to achieve with your newly organized under-sink area.
Now that you have a clear picture of your space and goals, it’s time to roll up your sleeves and get to work decluttering!
Decluttering
Ah, decluttering – the cornerstone of any organizing endeavor. It’s time to bid farewell to those half-empty shampoo bottles and ancient tubes of toothpaste. Here’s how to declutter like a pro:
- Sort and Purge: Start by emptying out the entire contents of the cabinet and sorting them into categories: keep, donate, discard. Be ruthless – if you haven’t used it in the past six months, it’s time to let it go.
- Tackle Expired Products: Check expiration dates on skincare, haircare, and cleaning products. Dispose of anything that’s past its prime – trust me, your skin will thank you.
- Streamline Your Essentials: Now that you’ve purged the excess, take a critical look at what’s left. Do you really need five different types of moisturizer? Keep only the essentials and donate or discard the rest.
By decluttering your under-sink area, you’ll not only create more space but also make it easier to find what you need when you need it. Now, let’s move on to the fun part – storage solutions!
Storage Solutions
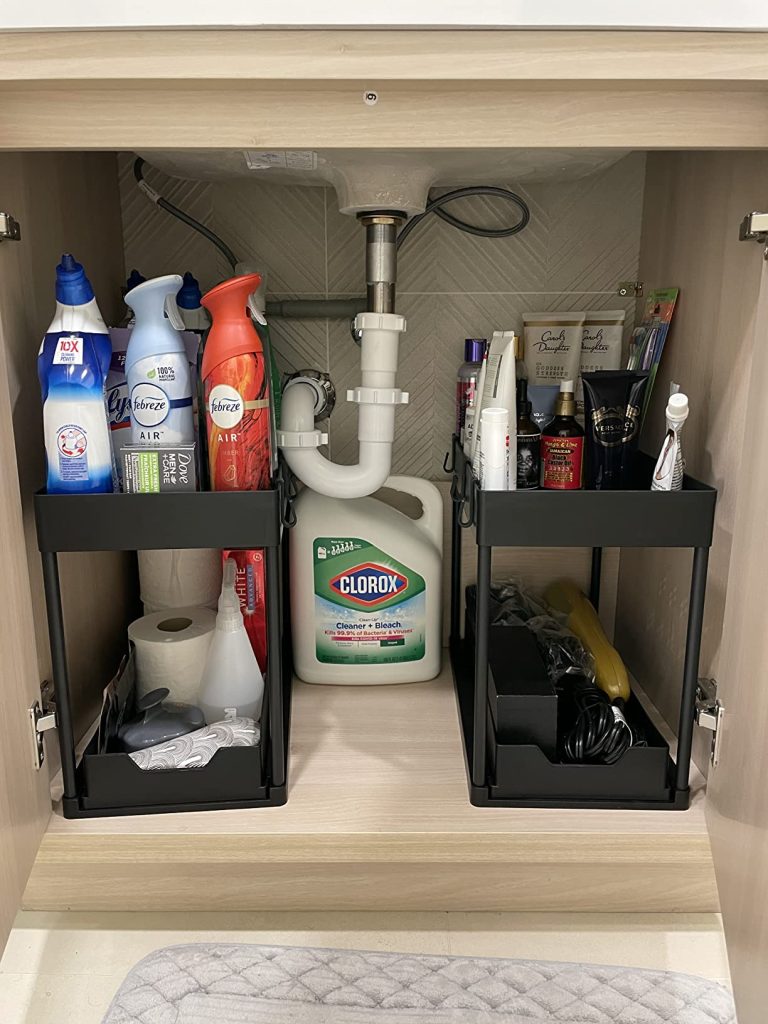
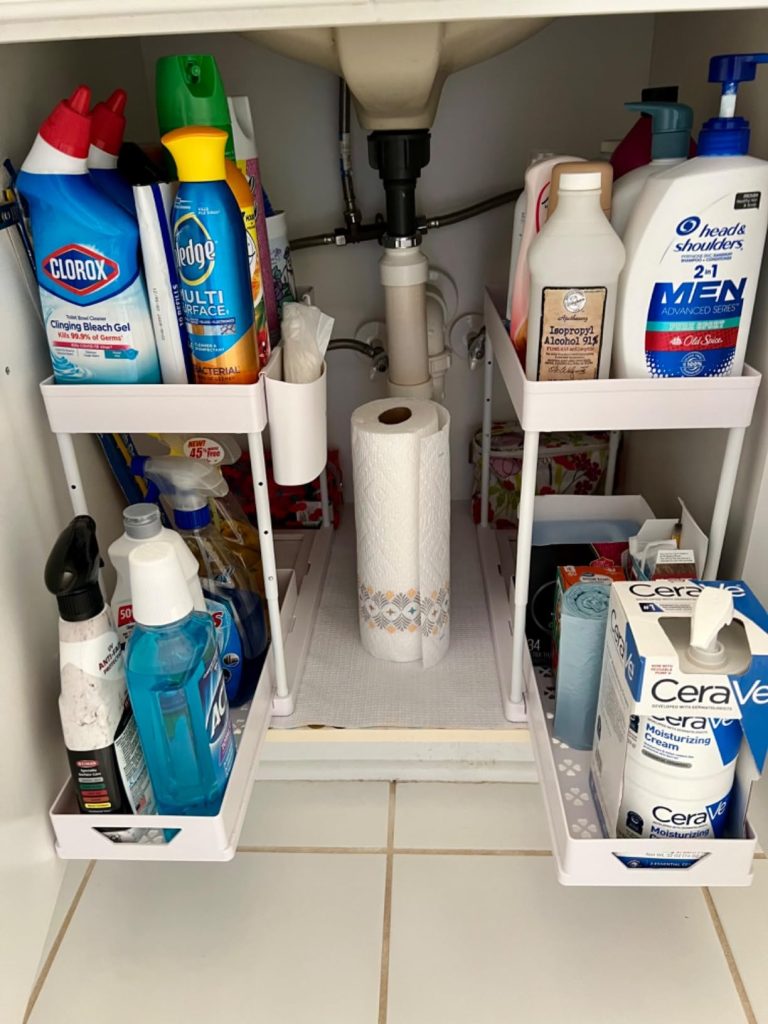
Ah, storage solutions – the secret sauce to a beautifully organized bathroom. Whether you have a spacious cabinet or a tiny nook under the sink, there are plenty of options to maximize your storage space:
- Utilize Containers and Bins: Invest in clear plastic bins or baskets to corral small items like cotton balls, Q-tips, and hair accessories. Not only will this keep everything neat and tidy, but it will also make it easier to access items when you need them.
- Install Shelves or Organizers: If you have ample vertical space, consider installing shelves or organizers to take advantage of every inch. Adjustable shelving allows you to customize the layout to fit your needs, while stackable drawers provide additional storage for larger items.
- Get Creative with Over-the-Door Organizers: Don’t overlook the back of the cabinet door – it’s prime real estate for hanging organizers. Opt for an over-the-door rack with pockets or hooks to store items like cleaning supplies, hair tools, or even spare toiletries.
- Think Outside the Box: Get creative with your storage solutions by repurposing items you already have on hand. An old silverware tray makes the perfect drawer organizer for makeup brushes and beauty tools, while a shoe organizer can be hung on the back of the door to store toiletries and cleaning supplies.
By implementing these storage solutions, you’ll not only make the most of your under-sink space but also create a visually pleasing and functional area that makes your daily routine a breeze.
Categorizing and Labeling
Now that you’ve decluttered and maximized your storage space, it’s time to put everything back in its rightful place – but not before categorizing and labeling like a pro:
- Group Similar Items Together: Arrange your items into logical categories based on their function. For example, keep all skincare products together in one bin, haircare products in another, and cleaning supplies in a separate container.
- Label Everything: Once you’ve sorted your items into categories, it’s time to label your containers or shelves. This not only makes it easier to find what you need but also ensures that everything gets put back in its proper place.
- Consider Accessibility: Keep frequently used items within easy reach, while less frequently used items can be stored towards the back or higher up. This will streamline your daily routine and prevent clutter from accumulating over time.
By categorizing and labeling your under-sink storage, you’ll create a cohesive and organized system that makes it a breeze to find what you need when you need it.
Maintenance Tips
Congratulations, you’ve successfully organized your under-sink space – but the work doesn’t stop there! To maintain your newfound orderliness, follow these maintenance tips:
- Establish a Cleaning Routine: Incorporate regular cleaning sessions into your weekly or monthly routine to prevent dirt and grime from building up. Wipe down shelves, containers, and bottles with a damp cloth to keep everything looking fresh and clean.
- Reassess Regularly: Periodically reassess your under-sink storage to make sure it’s still meeting your needs. As your collection of products evolves, you may need to adjust your storage solutions accordingly.
- Stay Consistent: Make a habit of putting things back in their designated spots after each use. It only takes a few seconds but will save you time and frustration in the long run.
By staying on top of maintenance tasks, you’ll ensure that your under-sink area remains organized and clutter-free for the long haul.
Creative Ideas and Inspirations
Looking to take your under-sink organization to the next level? Get inspired with these creative ideas and DIY hacks:
- Repurpose Household Items: Turn mason jars into stylish storage containers for cotton balls or makeup brushes. Use a tension rod to hang spray bottles or cleaning supplies from the cabinet door.
- DIY Drawer Dividers: Create custom drawer dividers using cardboard or foam board to keep smaller items like hair ties and bobby pins organized.
- Add a Pop of Color: Inject some personality into your under-sink storage with colorful bins or patterned shelf liners. Not only will this add visual interest, but it will also make your storage solutions feel more cohesive.
- Incorporate Greenery: Bring a touch of nature into your bathroom with small potted plants or succulents. Not only do they add a decorative element, but they also help purify the air and create a calming atmosphere.
By thinking outside the box and getting creative with your under-sink organization, you’ll create a space that’s not only functional but also reflects your personal style and personality.
Conclusion
Congratulations, you’ve conquered the clutter and transformed your under-sink area into a haven of organization and tranquility. By following the strategies outlined in this guide – from decluttering and maximizing storage to categorizing and labeling – you’ve unlocked the secret to a beautifully organized bathroom.
But remember, organization is an ongoing process, not a one-time event. Make a habit of decluttering regularly, reassessing your storage solutions, and staying consistent with maintenance tasks to keep your under-sink area looking its best.
So go ahead, open that cabinet door with confidence, knowing that everything has its place and your morning routine just got a whole lot smoother. Here’s to a clutter-free bathroom and a happier, more organized you!