A water heater pilot light that won’t stay lit is almost always caused by a bad thermocouple. It fails to send a signal to the gas valve to open up, meaning gas does no flow to the pilot and burner.
It could also be caused by a faulty gas control valve or tripped thermal switch.
If your water heater pilot won’t stay lit even after replacing the thermocouple, you most likely have a faulty gas control valve. It is a sign that the valve is failing to open and allow gas to flow to the pilot. You could also be dealing with a tripped or faulty thermal switch.
A gas water heater depends on natural gas to heat the water but needs a little bit of electricity to function. It is very easy to know to know where the problem is, whether it is with the gas supply or it’s an electrical fault.
If while lighting the water heater you can see a flame (the pilot light) which goes out after releasing the knob, the issue is electrical and in most cases a bad thermocouple. On the other hand if you don’t see a flame, you probably have a clogged pilot tube or the gas valve is off.
To fix a water heater whose pilot light won’t stay lit, test the thermocouple voltage with a multimeter. If you get less than 20 millivolts replace it. A good thermocouple means that the problem is with the gas control valve or thermal switch.
Now let us look at detailed way of how to troubleshoot and fix a water heater whose pilot light that won’t stay lit.
How to Fix a Water Heater Pilot that Won’t Stay Lit

From the above introduction, you now know that when a water heater pilot light won’t stay lit, the thermocouple is the most likely culprit. But what is a thermocouple? And how does it work?
A water heater thermocouple is made of 2 dissimilar metals connected on one end, while there is a small gap between the 2 metals on the other end. The end with the junction is connected to the gas valve while the other end is installed very close to the pilot.
When a pilot is lit, the 2 metals get very hot due to their proximity to the pilot and a current is generated. The current travels along the thermocouple and triggers a spring in the gas valve to open the valve.
If the pilot light goes out, the thermocouple cools off and the current drops gradually to zero. When that happens, the gas valve closes to prevent build up of unburnt gases in the house which can cause an explosion.
A thermocouple therefore acts as a safety switch as well.
Remember that it is the pilot light that ignites the main water heater burner. With the pilot light off, the burner will be therefore be off as well and you will have no hot water in your house.
In order for the thermocouple to keep the gas valve open and the pilot light on, there needs to be 20 to 30 millivolts of power flowing through it. Anything less than that the gas valve will not open and the pilot light will go out as soon as you release the gas control knob/button.
The following are the steps to fix water heater pilot light that won’t stay lit:
1. Bend the Thermocouple Slightly

I saw this trick on this You Tube video and it was just incredible. If you are trying to light your water heater pilot light with no success, try it.
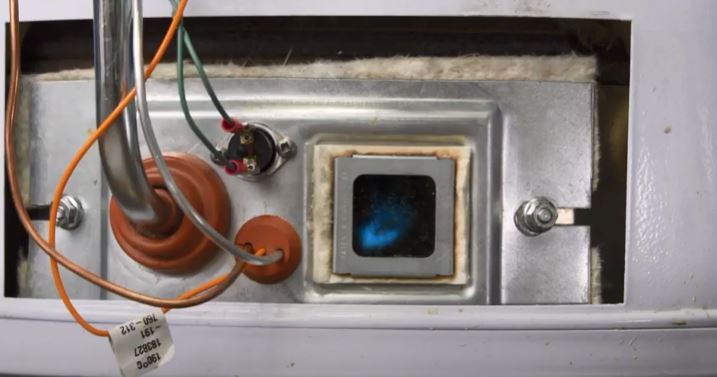
- Remove the metal cover at the bottom to reveal the pilot light sight glass.
- Try to relight the pilot as you usually would or as the instructions on the water heater illustrates.
- When you see the pilot flame, continue pressing the gas valve/button down for at least a minute.
- While still holding the valve/button down, grab the thermocouple (the copper wire) and bend it slightly.
- Slowly release the button.
This trick will surprisingly work for most people. Of course it is a sign of a bad thermocouple but at least it gives you enough time to buy a replacement thermocouple with hot water still flowing in your house.
2. Test the Thermocouple
This is how to test the voltage across a water heater thermocouple using multimeter:
- Adjust your multimeter to the low voltage settings.
- Disconnect the thermocouple from the gas control valve using a wrench.
- Place one multimeter probe on the copper wire and the other at the tip of the thermocouple. If you are working alone, you will need alligator clips to help you make contact with the thermocouple, as your hands will be engaged elsewhere. Otherwise look for a helper.
- Attempt to relight the pilot light. Once you light the pilot light, keep pressing the valve/button down for at least 3 minutes with the multimer probes still on the thermocouple.
- Check the reading on the multimeter.
When you try to relight the pilot light, the heat from the pilot will generate a current in the thermocouple, and the voltage will be recorded on the multimeter. The voltage will start from zero and increase gradually.
If the thermocouple is in good condition, the voltage recorded should be between 20 and 30 millivolts. If it is less than that then thermocouple is worn out and will need to be replaced.
Check the video below for more step by step details
3. How to Clean the Thermocouple on Water Heater
Before replacing the thermocouple, you may as well clean it and see if that helps. As I have mentioned, the thermocouple sends an electric signal to the gas control valve to open or close.
If the head of the thermocouple is dirty, it may affect the heat and signal transmission from the pilot to the gas control valve. Cleaning the head of the thermocouple (the one next to the pilot tube) can be enough to fix a pilot light to stay lit.
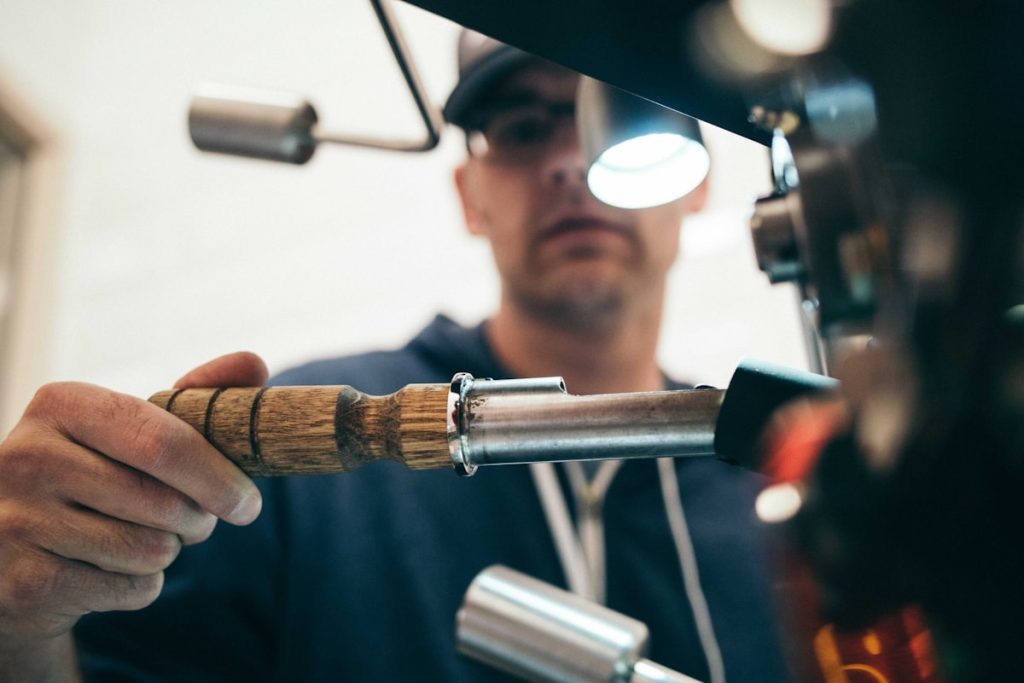
To clean a thermocouple you will need an emery cloth. Remove the thermocouple and polish the head with emery cloth until all dirty is removed.
Removing and installing a water heater thermocouple is actually quite easy as shown in the video I have attached below. Just make sure that you turn off the gas supply to the water heater.
Please note that this is not a long-term solution. The best way to deal with a bad water heater thermocouple is to replace it.
4. Replace the Thermocouple
Replacing a thermocouple will in most cases fix a water heater pilot light that will not stay lit. The good thing is that replacing a water heater thermocouple is a fairly easy DIY and the average homeowner will do it.
A new water heater thermocouple costs between $10 and $20 dollars. a professional plumber will however charge you $100 or more to replace it for you.
I will leave this video here for you to follow as it is easy than me having to write 300 words explaining it.
5. Reset/Replace the Thermal Switch
A water heater thermal switch is a safety device at the bottom of the water heater that trips and cuts off power to the gas control valve in case of excessive heat in the chamber. This usually happens when the vent or air inlet screen at the bottom of the heater are blocked.
With a tripped thermal switch, you will have an open circuit, and the gas valve will just not open, allowing air to flow to the burner. You will therefore find that the pilot light will not stay lit when you release the valve/button.
Apart from tripping, the thermal switch could be faulty as well. You should therefore start by trying to reset the switch and if that does not work test for continuity.
This is how to repair a water heater thermal switch:
- Remove the cover at the bottom of the water heater.
- Look for a small button between the 2 switch terminals.

- Press the button in. You should hear it click, but sometimes it will not.
- Try to relight the pilot.
- If the pilot light stays lit after releasing the button/valve, then your problem is fixed.
- Test for continuity across the 2 terminals if the button wasn’t tripped in the first place.
- Disconnect the 2 wires from the 2 terminals.
- Set your multimeter to the lowest ohms of resistance or to beep if it has that option.
- Place the 2 multimeter probes on the 2 thermal switch terminals.
If there is continuity then the thermal switch is good. A negative continuity test means the thermal switch is defective and will need to be replaced.
Replacing a water heater thermal switch is really easy. Use a screwdriver to loosen the 2 screws connecting it to the tank. Pull it out and replace it with the new one.
Connect the wires back and attempt to relight the pilot light one more time.
6. Replace the Gas Control Valve
If all of the above methods have failed to fix your problem, you most likely have a bad gas control valve. This is the worst problem to have since the valve is quite pricey, and it will most likely require a professional to replace.
And basically that is how to fix a water heater pilot that will not stay lit. I hope you enjoyed and are able to fix your water heater.