Fixing a leaking Moen bathroom sink faucet can be done relatively quickly if you follow these steps:
- Turn Off the Water Supply: Locate the shutoff valves beneath the sink and turn them clockwise to shut off the hot and cold water supply.
- Remove the Faucet Handle: Use a screwdriver or an Allen wrench to remove the screw securing the handle. This screw is usually located under a decorative cap on top of the handle. Once the screw is removed, carefully lift off the handle.
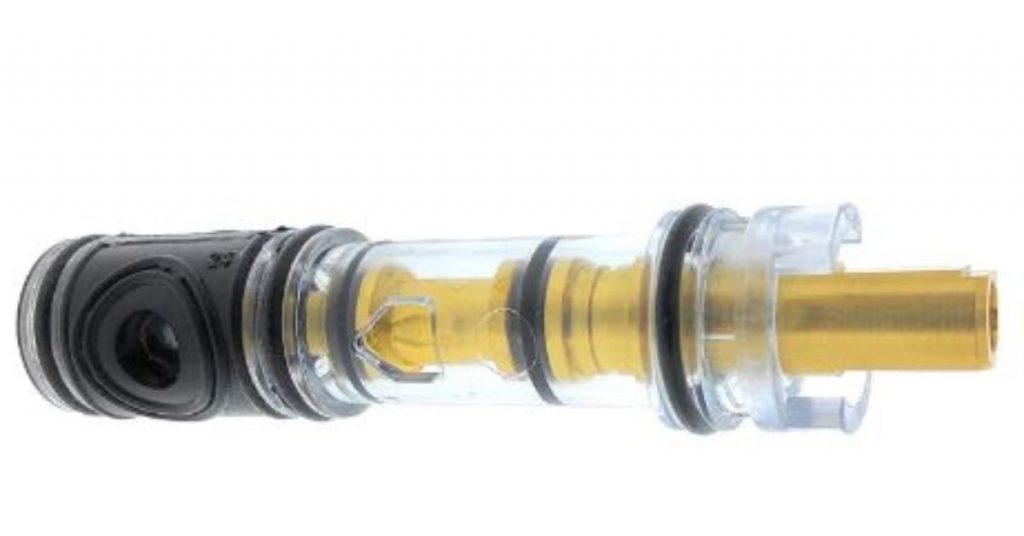
- Examine the Cartridge: Moen faucets typically use a cartridge as the internal control mechanism. Check the cartridge for damage or wear. If it’s damaged or causing the leak, you’ll need to replace it with a new one. Make note of the cartridge type, as Moen offers various models.
- Replace the Cartridge: If the cartridge needs replacement, follow the manufacturer’s instructions to remove the old cartridge and install the new one. Ensure it’s properly aligned and seated.
- Check O-Rings and Seals: Inspect the O-rings and seals for signs of wear or damage. If you notice any issues, replace them with suitable replacements.
- Reassemble the Faucet: Place the handle back onto the faucet stem, aligning it with the cartridge. Secure it with the screw you removed earlier. Ensure it’s snug but not overly tight.
- Turn On the Water Supply: Reopen the shutoff valves beneath the sink to restore water flow to the faucet.
- Test for Leaks: Turn on the faucet and check for any leaks around the handle or base. If there are any leaks, double-check the cartridge and O-rings for proper installation. Make any necessary adjustments.
- Cleanup: Clean up any tools and debris from your work area.
To know which Moen faucet cartridge you need, remove the old one and take it with you to a home improvement store and purchase a similar one. Alternatively, you can use Moen’s Identify my Product guide on their website to know which faucet you have and the replacement parts you need.
As I mentioned earlier, Moen parts have a lifetime warranty. If your faucet is under warranty, give Moen a call and they will send you a replacement kit free of charge.
Since Moen makes both single-handle and double-handle bathroom sink faucets, I will first show you how to replace the cartridge in a leaking single-handle faucet. We will then look at how to replace a cartridge in a leaking double-handle faucet.
Related: How to fix a Moen shower faucet cartridge.
How to Fix a Leaking Single Handle Moen Bathroom Faucet

For this repair you will need the following
- Allen wrench
- Philips screwdriver
- Flathead screwdriver
- New cartridge
- Adjustable wrench/pliers
- Cartridge puller
- Towel/rag
Once you have all the materials you need, these are the steps to follow to replace the cartridge:
1. Turn off Water to the Faucet
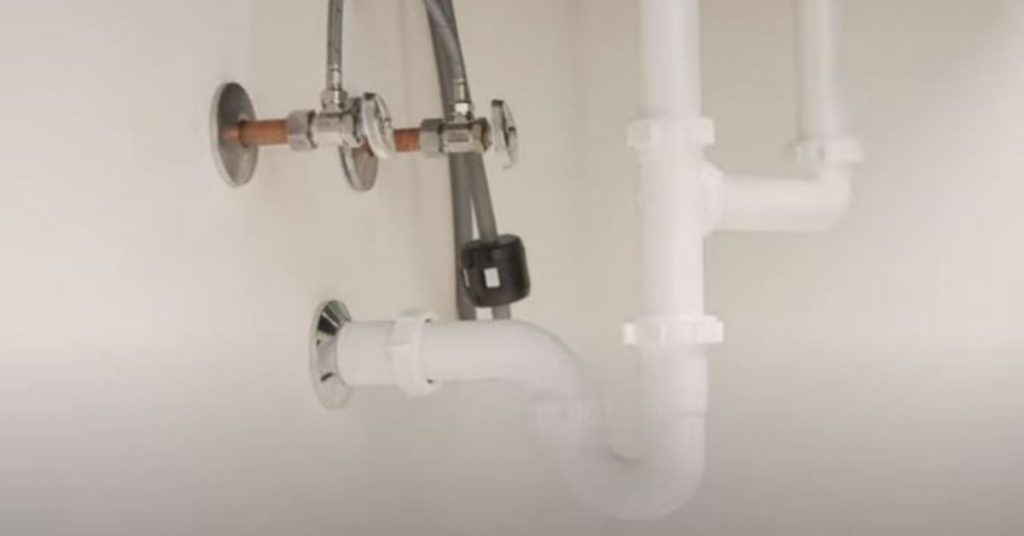
- Duck under the bathroom sink and look for 2 oval-shaped knobs connected to water supply houses. Those are the cold and hot water shut off valves.
- To turn off water to the faucet, turn the two valves all the clockwise.
- Open the faucet to drain the water already in the hoses.
- Plug off the sink drain opening. This is very important to make sure that you do not drop anything down the drain.
2. Remove the Faucet Handle
Based on the type of faucet you have, you may have a lever-type handle or a knob-type. I will show you how to remove both.
- With a knob-type handle, pry off the small index cover at front of the handle (with the Moen logo) using a flathead screwdriver or knife. Now loosen the screw connecting the handle to the cartridge using a Philips screwdriver and pull out the handle.
- If you have a lever-handle, start by prying off the small cap underneath the handle. Use the correct size of Allen wrench to remove the screw connecting to the handle and pull it out.
Note: sometimes the handle maybe corroded and will not simply slide out. In that case you will need to spray it with a penetrating oil then try after a few minutes.
- Remove the handle adapter. This is the piece connected to the cartridge using a Philips screw. After removing the screw, lift the front side of the adapter then push it back a little before lifting it off. It is held in place using a tab on its rear.
- Lift off the flange. It is decorative piece that you only need to lift off.
- Unscrew the plastic ring. It could be hand-tight but sometimes you may need to use a wrench to loosen it.
Note: It is important to arrange the parts in order of how you removed them so that you don’t forget the order in which to put them back.
- Remove the second decorative piece by just lifting it off. That piece as well as the first one is not threaded.
3. Remove the Cartridge
- The cartridge is held in place using a retaining clip to prevent it from shifting due to water pressure. Use needle-nose pliers to pull out the clip. You could also use a small screwdriver.
- Slide out the temperature limit stop. This is the plastic piece at the tip of the cartridge.
- Remove the washer as well.
To successfully remove a Moen cartridge, you will need a cartridge puller. Attempting to pull the cartridge straight without the puller might break it in to 2 parts with 1 left inside the valve.
Luckily for you, the new Moen cartilage will come with a cartilage puller. This is the small plastic piece which is usually white in color.
- Push the cartilage puller inside the faucet valve to engage the cartilage.
- Grab the puller with a wrench or pliers and twist it back and forth until the cartilage starts to rotate freely.
- Remove the puller, grab the cartilage stem with pliers and pull it straight out.
- Use the towel/rag to soak up any water inside the valve body.
4. Install the New Cartilage
- Start by applying grease all over the cartilage’s seals.
- Push the cartilage inside the valve. It is important to make sure that the 2 tabs on the cartridge are at the top and bottom. This is what allows it to be restrained by the retaining clip.
- Slide in the washer and temperature limit stop.
- Once the cartilage is in place, insert the retaining clip.
- Push in the metal ring then screw in the plastic ring. Tighten it gently using the wrench.
- Put the flange back and align it.
- Install the handle adapter, starting by hooking up the tab on its rear then screw it in using the Philips screwdriver.
- Screw the handle back on.
- Turn on the shut off valves. Check if there are any leaks with the faucet turned off. Turn on the faucet for about 30 seconds then turn it off. Check for leaks again.
How to Fix a Leaking Double-Handle Moen Bathroom Faucet

As I mentioned earlier, a double-handle faucet will have 2 cartridges. Since both cartridges cannot be faulty at the same time, only one cartilage will be responsible for the leak.
To find out which cartilage is faulty, start by turn off the cold water shut off valve under the sink. If the leak stops, you will need to replace the cold water faucet handle cartilage.
On the other hand if the leaking/dripping continues, replace the hot water faucet handle cartilage. That being said, I like to replace both cartilages at the same time.
That gives me the peace of mind that I will not need to replace the other one after only a few months or years.
The following are the steps to follow when replacing a cartilage in a double-handle Moen bathroom faucet.
- Turn off the shut off valves and open the faucet to drain the water.
- Plug off the sink drain opening.
- Remove the handle. Depending on the type of faucet you have, you will need to look for a hex screw on the side of the handle and remove it or if the handle is threaded turn it counterclockwise to loosen it.
- Remove the retaining ring. The cartridge is held in place using a retaining ring. Loosen it with a wrench and put it aside.
- Grab the cartilage with a wrench or pliers and pull it straight out. If the cartilage won’t come out freely, you may need to use a tool to remove it. Alternatively, insert a small flathead screw driver on the notch on the side of the valve and attempt to free it by lifting it up and down.
- Soak up the water inside the valve using a cloth.
- Apply some grease on the new cartilage’s O-rings
- Install the new cartilage. It is important to make sure that that the tab on the cartridge coincides with the notch on the side of the valve body.
- Screw in the retaining clip and tighten it gently using the wrench.
- Install the handle.
- Turn on the water and check if the leaking has stopped.
And that is how to replace the cartilage to fix a leaking double-handle Moen bathroom faucet.
I like to also take the time to clean or replace the faucet aerator as well. For more information on faucet aerators as well as how to clean and replace them check out this post.