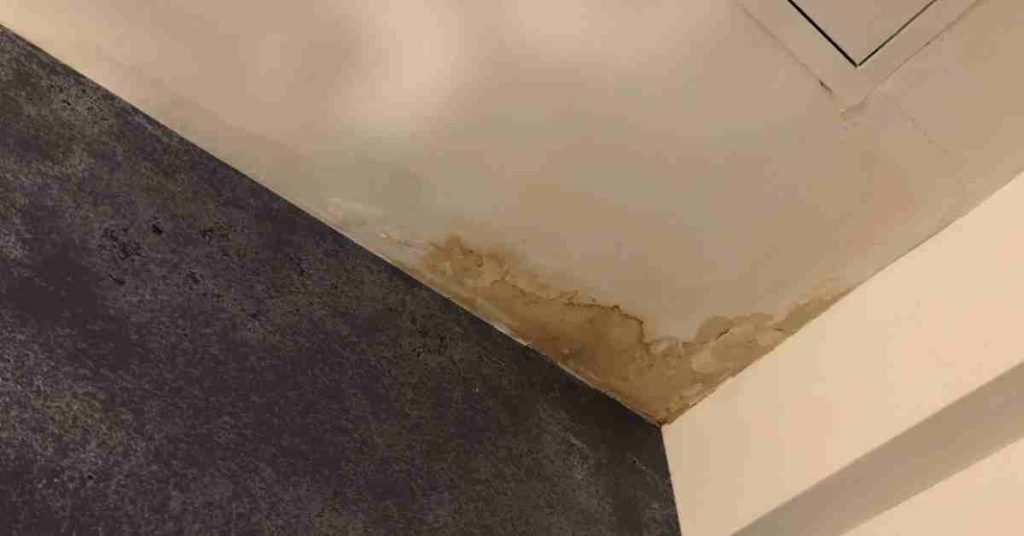
To fix a leaking Delta bathroom sink faucet quickly, follow these steps:
- Turn Off the Water: Locate the shutoff valves beneath the sink and turn them clockwise to shut off both the hot and cold water supply.
- Remove the Faucet Handle: Use a screwdriver or an Allen wrench to remove the screw securing the handle. This screw is typically located beneath a decorative cap on top of the handle. Carefully lift off the handle once the screw is removed.
- Access the Cartridge: Delta faucets commonly use a cartridge as their internal control mechanism. Depending on the faucet model, you may need to remove a retaining nut or other parts to access the cartridge.
- Examine and Replace the Cartridge: Check the cartridge for damage or wear. If it’s damaged or causing the leak, you’ll need to replace it with a new one. Make note of the cartridge type and model before purchasing a replacement.
- Install the New Cartridge: Follow the manufacturer’s instructions to remove the old cartridge and install the new one. Ensure it’s properly aligned and seated within the faucet.
- Check O-Rings and Seals: Inspect the O-rings and seals for signs of wear or damage. If needed, replace them with suitable replacements.
- Reassemble the Faucet: Place the handle back onto the faucet stem, aligning it with the cartridge. Secure it with the screw you removed earlier. Ensure it’s snug but not overly tight.
- Turn On the Water Supply: Reopen the shutoff valves beneath the sink to restore water flow to the faucet.
- Test for Leaks: Turn on the faucet and check for any leaks around the handle or base. If leaks persist, double-check the cartridge, O-rings, and seals for proper installation and make any necessary adjustments.
- Cleanup: Clean up any tools and debris from your work area.
Related: How to fix a leaking Delta bathroom faucet.
How to Fix a Leaking Single-Handle Delta Bathroom Faucet
For this repair, you will need the following:
- Repair kit
- Hex wrench set
- Flathead screwdriver
- Adjustable wrench/channel locks
- Philips screwdriver
- Needle-nose pliers
Once you have all the necessary items, this is how to proceed:
1. Turn off Water to the Faucet
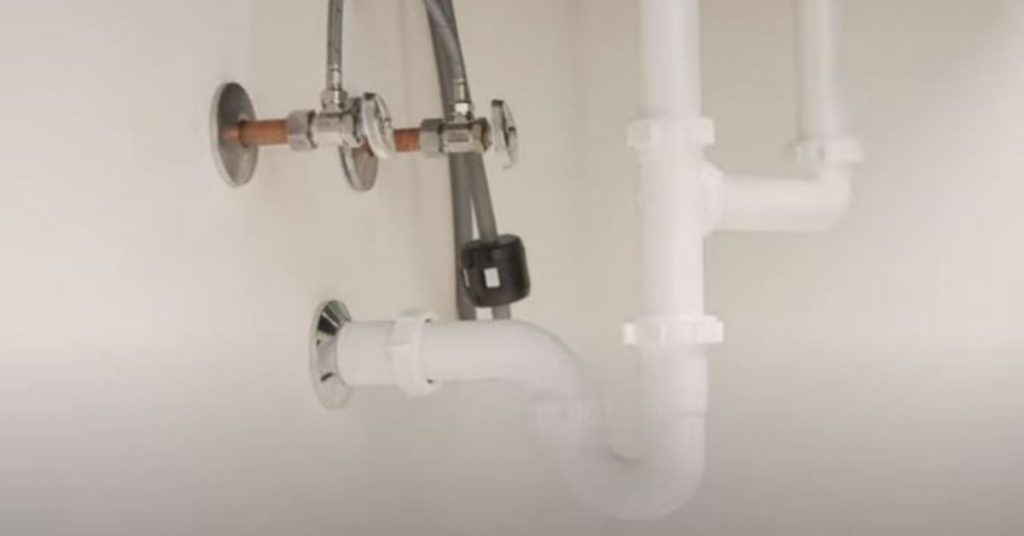
- Duck underneath your bathroom sink and you will see 2 oval-shaped knobs. Those are your sink faucet’s shut off valves for both cold and hot water. Turn them clockwise to turn off water to the faucet.
- Open the faucet to drain the water already in the hoses.
- Block off the sink drain. You do not want to drop anything down to the drain.
2. Remove the Faucet Handle
Depending on the type of faucet you have, you will either have a knob-handle or lever-handle. Both of these handles are joined to the faucet stem using a screw.
- If you have a knob-handle, pry off the index cap at the front using a sharp knife or flathead screwdriver to reveal the screw. Remove the screw using a Philips screwdriver and pull out the knob.
- If you have a lever-handle, it will be installed using a hex screw from underneath it. The screw may also be covered by a plastic piece. Remove the screw with a hex wrench and remove the handle.
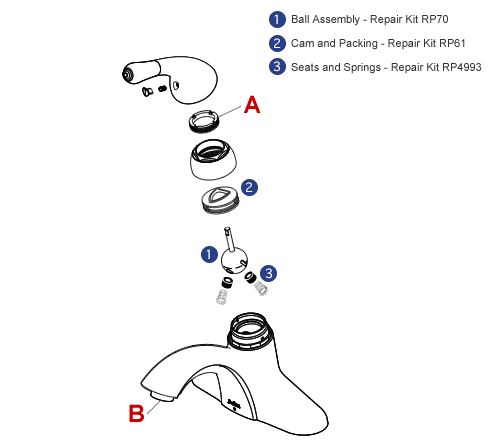
3. Remove the Cam, Ball Assembly, Seat and Springs

- Remove the adjusting ring. This is a thin ring which holds all the faucets parts in place. Unscrew it using needle-nose pliers.
- Unscrew the cap using the wrench or channel locks. This is the dome-shaped piece which holds the assembly in place.
- Lift off the Cam, packing and ball assembly.
- Use a towel to soak up the water inside the valve body. This makes it easy to remove and install the faucet parts.
- Use a hex wrench or screwdriver to remove the seat and springs. Just insert the screw driver and tilt it to the side to lift them off.
Check if there are mineral deposits inside the valve body. You need to be very careful if you decide to scrape off the minerals. You do not want to burr the valve in any way since that will scratch the ball as well and the faucet will start to leak again.
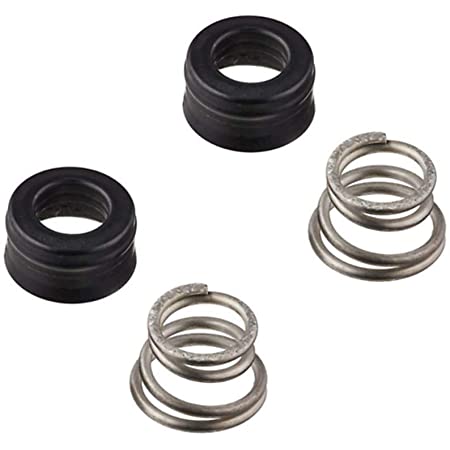
4. Replace the Seats and Springs
In most of the repairs I have performed, the springs and seats are usually the culprits in a leaking Delta bathroom faucet. You can however decide to replace the cam, packing and ball assembly as well.
Note: You must replace the cam and ball assembly if the faucet was leaking from the base of the handle.
- If you look at the 2 springs, you will notice that there is a wide and a narrow end. That is very important.
- The wide side is the one which goes inside the valve while the narrow side is connected to the seat.
- Slide in the spring in the seat and use a screwdriver or hex wrench to stick them inside the valve.
- Once inside the valve, retrieve the screwdriver/hex wrench and press on the seat with your your finger to properly install them. You should hear a click as confirmation that they are properly set.
- Insert the ball assembly. It is important to make sure that you align the slot on the ball with the tab on the inside of the valve. Again, this is very important.
- Install the cam and packing, making sure to align the notch on the cam to that on the side of the valve body.
- Screw in the cap. As you do this, push the ball lever forward and apply pressure to prevent it from shifting as you screw in the cap. Gently tighten the cap with the wrench.
- Screw in the adjusting ring using needle-nose pliers.
- Install the handle and secure it with the screw.
5. Test the Faucet
- Turn on water to the faucet by opening the shut off valves.
- Open the faucet and see if the water pressure is great. Now would be a good chance to clean the faucet aerator as well. Check out more on that in this post.
- Turn off the faucet and check if the leak has stopped.
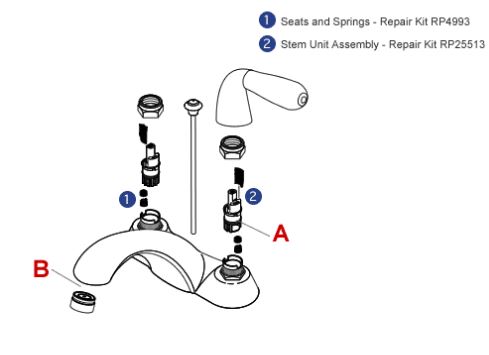
How to Fix a Leaking Delta Double-Handle Bathroom Faucet
A double-handle Delta bathroom faucet works a little different from a single handle-handle faucet. The first thing you need to determine here is whether the leak is on the hot side or the cold water side.
I like to replace both the cold and hot sides’ parts even when only one side is the problem. That gives me the peace of mind that the other side will not start to leak soon.
Anyway, if the faucet is leaking from the spout, you will need to replace the seats and springs. Replace the stem assembly if the faucet is leaking from the base of the handle. You can as well replace everything especially if you haven’t done so in a long time.
This is how to how to fix a leaking Delta double-handle bathroom sink faucet:
- Turn off Water to the faucet. Again, you will do this from underneath the sink. Turn off the cold and hot water shut off valves.
- Open the faucet to drain out all the water in the hoses and plug off the drain to prevent dropping anything down the drain.
- Remove the handles. Look for a hex screw underneath the handles. Remove it using a hex wrench. If you have knob-handles, pry off the index cap to reveal the screw. Use a Philips screwdriver to remove it.
- Remove the retaining ring. This ring holds the stem assembly in place. Grab it with a wrench or channel locks and loosen it.
- Pull out the stem assembly. Just grab it with the needle-nose pliers and pull it out.
- Pull out the seat and springs. You can use the needle nose pliers as well for this.
- Replace the seat and springs. Connect the narrow end of the springs to the seats and stick them in a screwdriver. Insert them inside the valve and once in place retrieve the screwdriver. Use a finger to press them down till you hear a click.
- Install the stem assembly. You need to be very careful here. There is a small tab on the stem assembly that you need to align with a groove on the valve body.
- Screw in the ring and tighten it further using the wrench or channel locks
- Install the handle.
- Do the same for the other side of the faucet.
- Turn on the water and check if the leak has stopped.
And that is how to fix a leaking double-handle Delta bathroom faucet.