
Checking and adjusting your well tank’s pressure is essential to maintain a well-functioning well system. Here’s a summarized guide to the process:
Checking the Well Tank Pressure
- Safety Precautions: Turn off the power to the well pump to ensure safety during the procedure.
- Locate the Tank: Identify the location of your well tank, which is typically found near the well pump or in the basement.
- Pressure Gauge: Locate the pressure gauge on the tank. This gauge displays the tank’s current pressure.
- Drain Water: Open a faucet or valve in your home to release some water pressure from the system. This ensures an accurate reading on the pressure gauge.
- Read Pressure: Check the pressure gauge reading. It should ideally be set at 2 psi below the pump’s “cut-in” pressure setting. The “cut-in” pressure is the pressure at which the pump turns on.
Adjusting the Well Tank Pressure
- Turn Off Power: Again, make sure the power to the well pump is turned off to prevent any accidents.
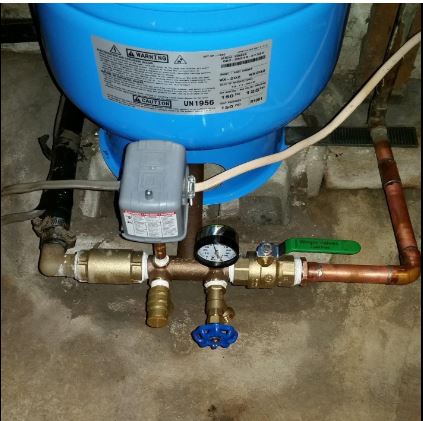
- Locate Pressure Switch: Find the pressure switch, which is usually located near the tank. This switch controls the well pump’s pressure settings.
- Adjust Cut-In Pressure: Using a flathead screwdriver, adjust the larger nut on the pressure switch to increase or decrease the “cut-in” pressure setting to the desired level. This setting determines when the pump turns on.
- Adjust Cut-Out Pressure: Adjust the smaller nut on the pressure switch to set the “cut-out” pressure, which determines when the pump turns off. The difference between the “cut-in” and “cut-out” pressures defines the pressure range within which the pump operates.
- Test the System: Turn the power back on and open a faucet to activate the well pump. Observe the pump’s cycling to ensure it operates within the desired pressure range. Adjust the settings as needed.
- Monitor Performance: Keep an eye on the well system’s performance over time. If you notice frequent cycling or pressure-related issues, further adjustments may be necessary.
- Secure Cover/Casing: If your pressure switch has a protective cover or casing, ensure it’s securely fastened to protect the switch and wiring.
How to Check a Well Tank’s Pressure
The following are the steps to follow when checking and adjusting the air pressure in your well tank:
1. Determine your Cut-in Pressure
You need to first know your pressure switch’s cut-in pressure. Remember I mentioned that your pressure tank needs to be set at 2 psi less than the cut-in pressure.
To check your pressure switch’s cut-in pressure, this is what to do:
- Open a nearby faucet and leave the water running.
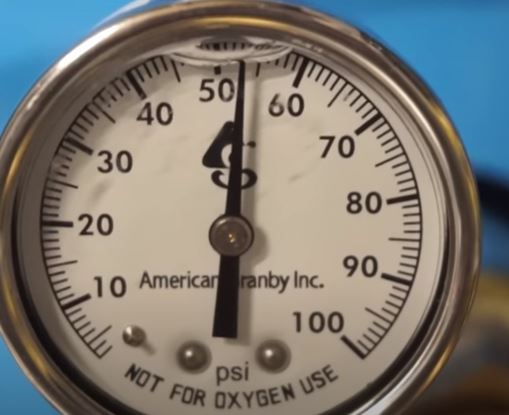
- Dash to where you have the pressure tank and keenly observe the pressure gauge connected to it.
- Notice the exact pressure when the well pump kicks in. That is your cut-in pressure.
- Turn off the faucet.
- Again, check the pressure when the well pump goes off. That is your cut-off pressure.
2. Turn off the Pump
Since you will be draining the tank (meaning pressure will be way lower than the cut-in pressure), you will want to make sure your pump is turned off. Draining water from the tank with more being supplied by the tank will have you working for eternity.
Dash to your electrical panel and check the breaker marked “Well Pump”. Flip it to the off position. You can as well plug off the pump from the electrical outlet on the wall.
If you have any water filtration equipment in your house, you will also need to turn them off or bypass them before draining the tank to avoid being clogged by sediments.
3. Drain the Tank
So, why do you need to drain the pressure tank? The reason why you want to drain the pressure tank is that the water inside the bladder (or under the diaphragm) is already compressing the air chamber at the top of the tank.
Checking the pressure with the tank full of water will therefore be erroneous since you will end up with the water pressure and not the air pressure. You need to check the pressure when the tank is empty.
Before draining the tank, you should also check if the tank is waterlogged. Tap the bottom of the tank with your arm then the top. The bottom part of the tank should be cold and sound solid when tapped.
Due to the air at the top of the tank, the top half is expected to be warmer and sound hollow when tapped. If however the tank is all cold and sounds solid from top to bottom, it is most likely waterlogged.
Remove the cap on the air inlet valve at the top of the tank and try to bleed off some pressure. If you see water coming out and not air, the tank is waterlogged and will need to be replaced.
- Turn off water to the house. On the pipe that delivers water from the tank to the house is shut off valve which you need to turn off prior to draining the tank.
- Connect a garden hose on the boiler drain on the manifold at the bottom of the tank. Direct the end of the garden hose out into the driveway or into a floor drain.
Note: All pressure tanks are not designed the same way. If yours does not have a drain valve at the bottom, you will need to drain it from one of your faucets. Avoid the kitchen or bathroom faucets which have faucet aerators. Those can be badly clogged by the sediment at the bottom of the tank.
- When the tank is completely drained, turn off the drain valve and disconnect the garden hose.
4. Check the Tank’s Pressure
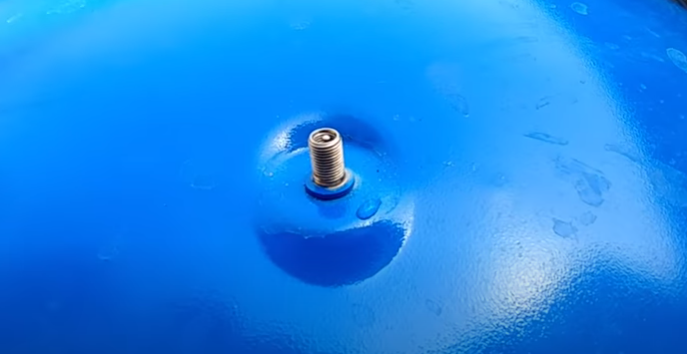
With the pressure tank completely drained, you can now go ahead and check the air pressure inside it. To do that, you will need a tire gauge.
The air inlet valve at the top of the tank is similar to the one found in bicycle or car tires. It is used for checking the air pressure and also add more pressure should that be needed.
Connect the pressure gauge on the valve and check the reading indicated on the gauge. Compare your results with the cut-in pressure you saw on the pressure gauge at the bottom of the tank.
If the air pressure is too low, you will need to adjust it. As I said, when the pressure in the tank is way lower than the cut-in pressure, the drawdown capacity of your pressure tank will reduce as well.
A pressure tank’s drawdown is the amount of water you will need to draw from the tank from the time the pump goes off to the time the pump kicks in again.
5. Adjust the Pressure
If the pressure in the tank is too low, increasing it is easy. An air compressor is an effortless way of adding more pressure in the tank but in case you don’t have one a bicycle pump will suffice.
Be careful that you do not exceed the cut-in pressure. If you do, you can always bleed off some pressure by pressing down the piston on the air inlet valve.
6. Turn the Pump Back On
When you have checked and adjusted the well tank pressure, turn the pump back on to start filling the tank. Since you will have air in the tank, turn on one faucet to help flush out the air.
Do not forget to turn on the water filtration equipment back on as well.
Adjusting the Pressure Switch
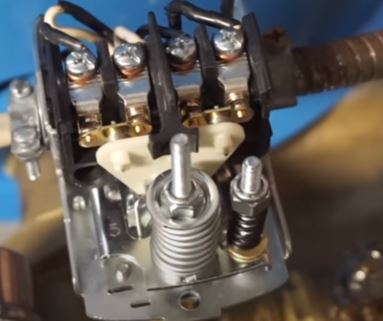
If you would like to adjust the cut-in and cut-off pressure, you will need to do it at the pressure switch. If you remove the pressure switch cover you will see the recommended cut-in and cut-off pressure on its back.
There are 2 springs on the pressure switch compressed on bolts using nuts. One spring controls the cut-in pressure while the other controls the cut off pressure.
To adjust the cut-in and cut-off pressures you will need to compress or release the springs by tightening or loosening the nuts. The only downside to this is that you need to do it with the power switched off.
This means you have to turn the power on and off until you get your desired pressure settings. Attempting to do so with the power on could cause electrical shock.