To adjust a Delta shower faucet anti-scald device and control the water temperature, follow these steps:
- Turn Off Water: Shut off the main water supply to the shower to ensure no water is flowing during the adjustment.
- Remove the Handle: Locate and remove the screw securing the faucet handle, typically beneath a decorative cap or cover. Carefully lift off the handle.
- Access the Scald Guard: Inside the faucet, you’ll find a scald guard or temperature-limiting device. Depending on your Delta faucet model, this may be a round disc or a lever.
- Adjust the Scald Guard:
- For a disc-style scald guard: Rotate the disc clockwise to reduce the maximum temperature and counterclockwise to increase it. Experiment with small adjustments to find your desired temperature.
- For a lever-style scald guard: Move the lever to the left (towards hot) to increase the temperature or to the right (towards cold) to decrease it.
- Reassemble the Faucet: Place the faucet handle back onto the stem, ensuring proper alignment. Secure it with the screw you removed earlier.
- Turn On Water: Gradually turn on the main water supply to the shower.
- Test Water Temperature: Turn on the shower to your desired temperature and check if the adjustment meets your needs. Make further adjustments if necessary by repeating steps 2-5.
- Final Checks: Ensure that the faucet operates smoothly and delivers water at your desired temperature without scalding or extreme cold.
- Cleanup: Clean up your work area and dispose of any debris.
How to Adjust Water Temperature in a Delta Shower Faucet

Adjusting your Delta shower faucet anti-scald device will take about 10 minutes or less. You will need the following tools to do the job:
- Set of Allen keys (for lever-type handles)
- Flathead screwdriver
- Philips screwdriver
Once you have all the tools, this is how to proceed.
1. Turn off Water to the Shower
If you have a lever-type shower faucet handle, you will need to first turn off water to your house. It is not possible to remove the screw connecting the handle to the cartridge with the water still on, since you need to turn it upside down.
Unfortunately, most showers don’t have dedicated shut off valves like sinks or toilets. Check however if you have an access panel on the wall behind you shower faucet.
If you do, remove the panel to reveal shut off valves for both the cold and hot water to the shower valve. You will need to turn off water to your entire house if you don’t have the access panel.
Dash to the basement or wherever you main shut off valve is located and turn off the water. Turn on the faucet to drain the water already in the pipes.
If you have a knob-type Delta shower faucet handle, you do not have to turn off the water. The screw connecting the handle to the cartridge allows you to remove the handle with the water still on
Make sure you plug off the shower/bathtub drain opening to avoid dropping the screws down the drain.
2. Remove the Faucet Handle
As I have already mentioned, you will either have a lever-type handle or a knob-type handle. Removing them is however easy.
- For a lever-type handle, flip it upside down to reveal a hex screw that connects it to the cartridge.
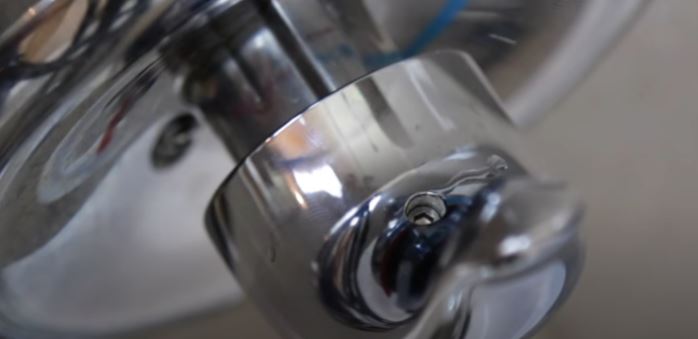
- Use the correct size of Allen wrench to remove the screw and slide out the handle.
- If you have a knob-type of shower handle, it will be connected to the cartridge using a Philips screws. The screw is hidden by an index cap at the front of the handle.
- Use a flathead screwdriver or even a knife to pry out the cap, being careful not to break it or injure your finger.
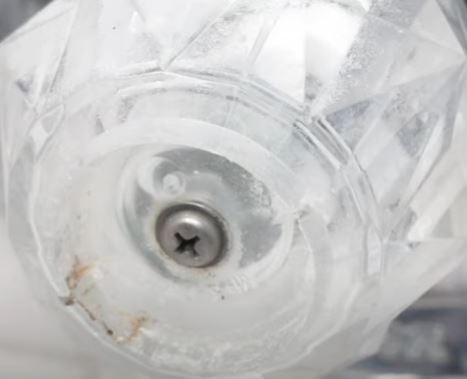
- Grab the knob with your left hand to prevent it from turning as you remove the screw with your other hand using a Philips screwdriver.
- Slide out the handle. You may need to wiggle it out as you pull it out.
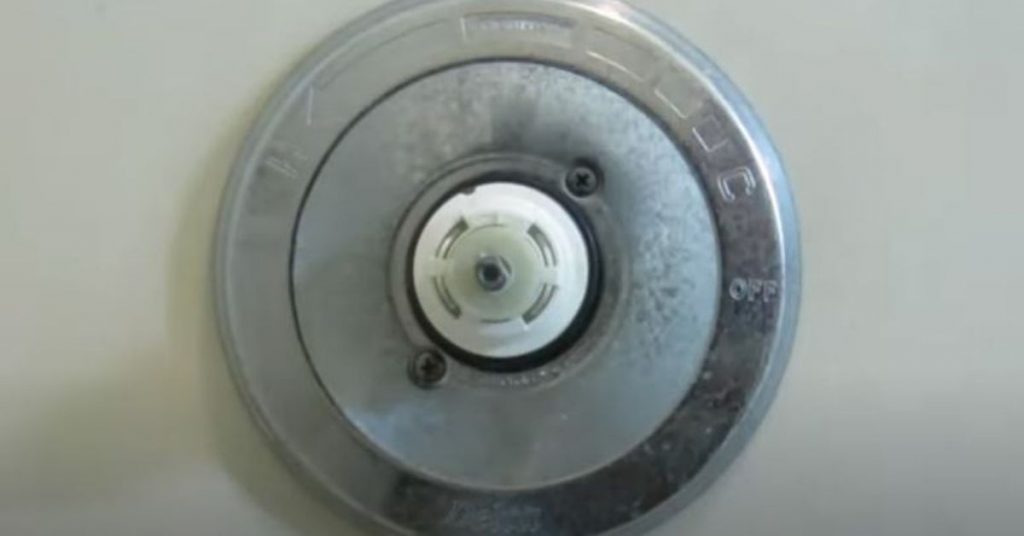
3. Adjust the anti-Scald Device
With the handle out, you can clearly see the anti-scald device at the front of the shower cartridge. It is a plastic piece (usually white in color) with arrows indicating which side to turn it to get hotter or cold water.
If there is a small round disc (usually grey) slide out as well. In some cases you may also need to pull out the metal sleeve (not threaded just pull it out) to give you enough room to work with.
- Remove the set screw (optional). These devices are not the same. Some will be secured on the cartridge suing a set screw while others do not have a screw. Use a Philips screwdriver to remove the screw.
An anti-scald device is made of 2 pieces which engage each other like a gear. To adjust the water temperature, you pull out the outer piece, turn it right or left then engage it back to the inner piece.
- Pull out the outer plastic piece (you may need to use a flathead screwdriver in some pieces) to disengage it from the outer piece. Turn the piece counterclockwise to make the shower water hotter or clockwise to make it colder.
- This is usually a trial and error thing so there is no a standard of how much you need to turn the piece. Once you have turned it anyway, push it back it to engage it to the inner piece.
- don’t forget to put back the plastic disc if there was one in your faucet.
4. Check the New Water Temperature
- Slide in the faucet handle but don’t put the screw back yet. You want to test if the water temperature is what you want to be or whether you need to do more adjustments.
- Turn on the water and let the water run out for like a minute. It is important to let the cold water in the pipes flow out first.
- If you need to make more adjustments, pull out the handle and repeat the steps above until you get to you most preferred shower water temperature setting.
And basically that is how to adjust the shower water temperature in a Delta shower Faucet.
See also: Signs, Effects and Solutions for for more details.
See also: 5 Reasons To Replace Your for more details.